Scheduling Reports
Scheduling reports sends list view data or reports (tabular and charts) on a regularly scheduled interval. Scheduled reports can be configured using the Crow Canyon NITRO Workflow Manager “Scheduled report” type workflows and “Send Mail” action type.
Before configuring the scheduled report workflow, first we have to prepare the required SharePoint list views and reports. See the components involved below.
Components Involved
List Views: Create standard SharePoint list views with required view filtering and view fields. Once the reports and views are created, they are available in workflow manager email template to configure the send mail actions.
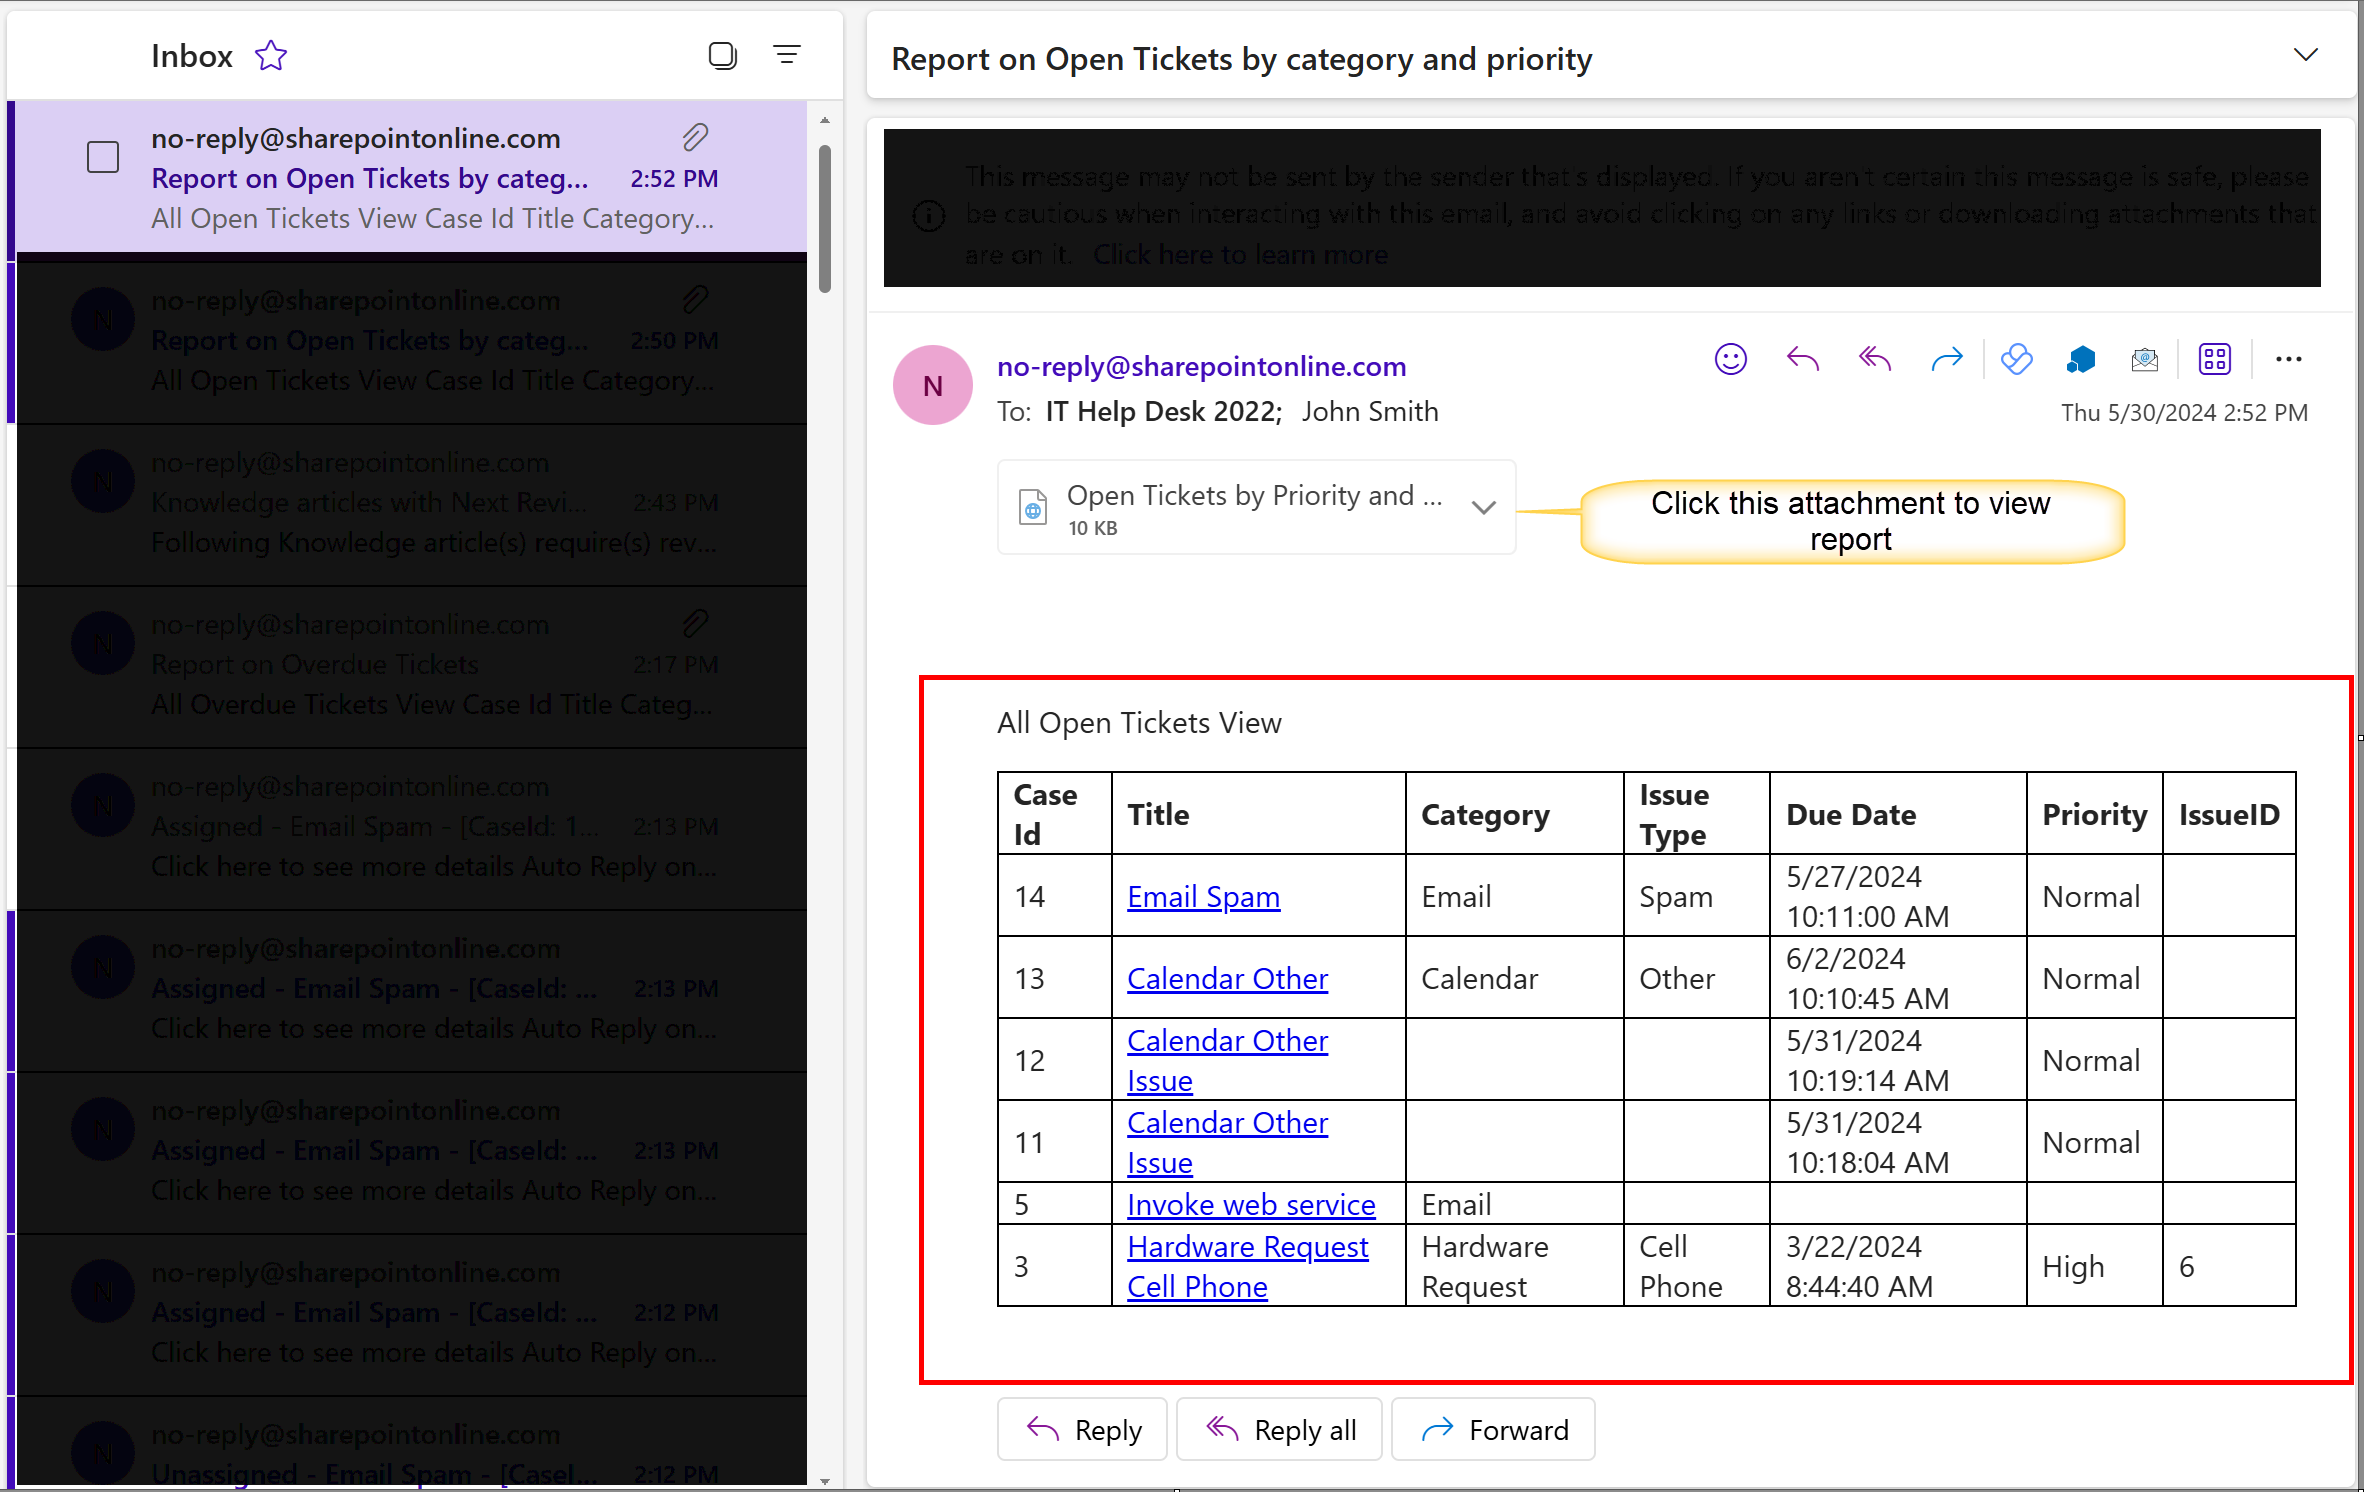
Report: Configure required reports using Crow Canyon Report Manager solution. Once the reports and views are created, they are available in workflow manager email template to configure the send mail actions. Report will be sent as an *.html attachment; the recipient has to open the attachment in a browser to see the output. The data present in this file is the data that is generated at the scheduled time and it does not change day to day.
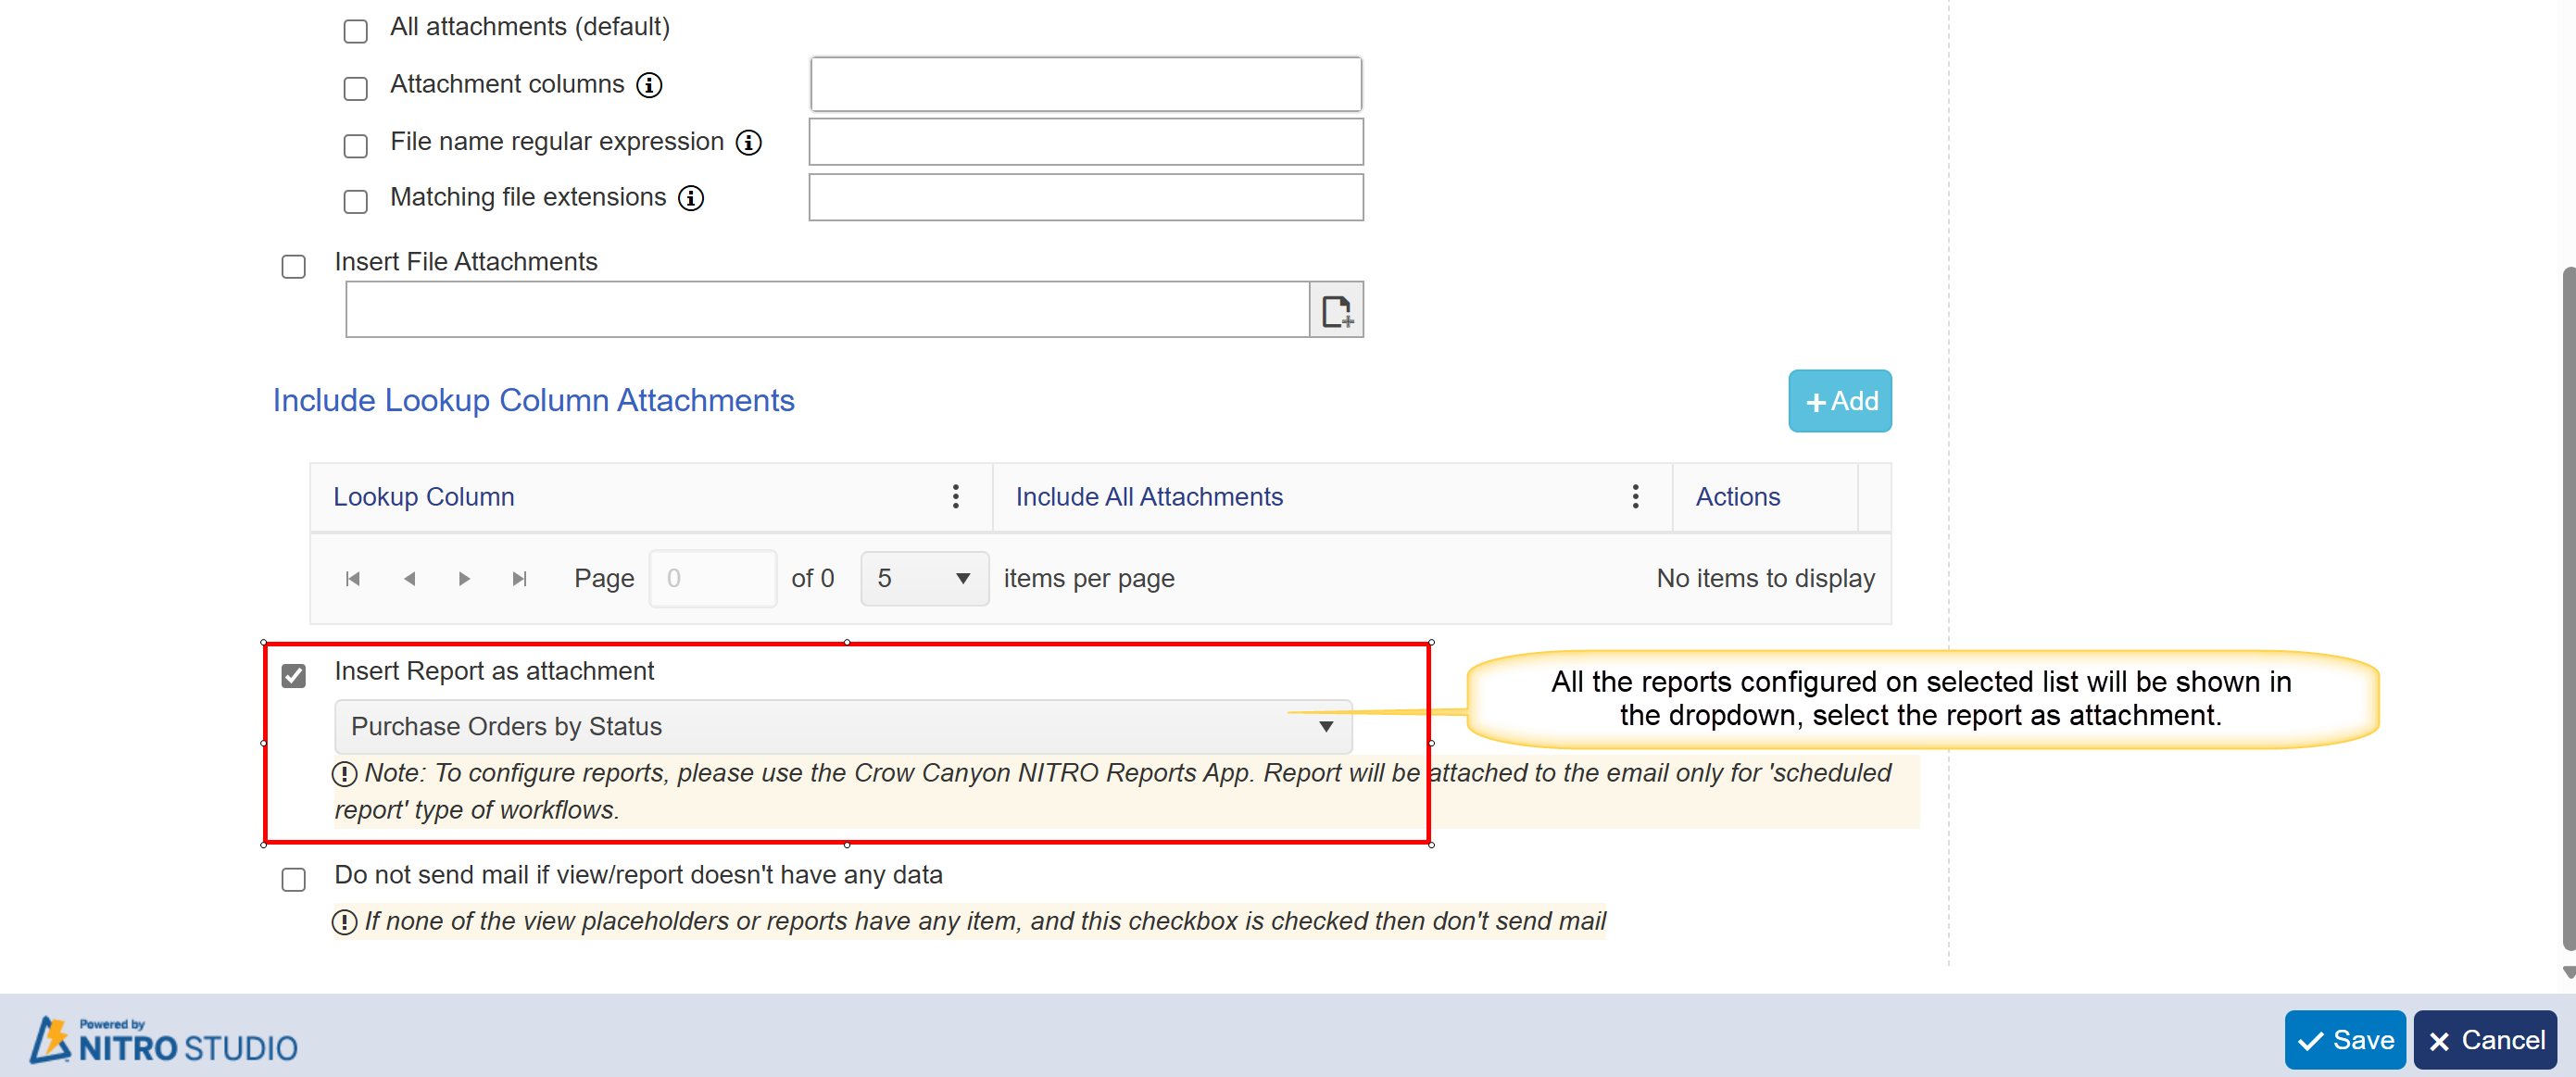
Scheduled Report workflow in Workflow manager: NITRO Workflow Manager Mail template configuration shows all the available list views and reports for the selected list. The user can add multiple views in the mail body and can attach single report.
This workflow will be triggered based on the configuration in the scheduled report settings. The only supported action in this type of workflow is “Send Mail” action.
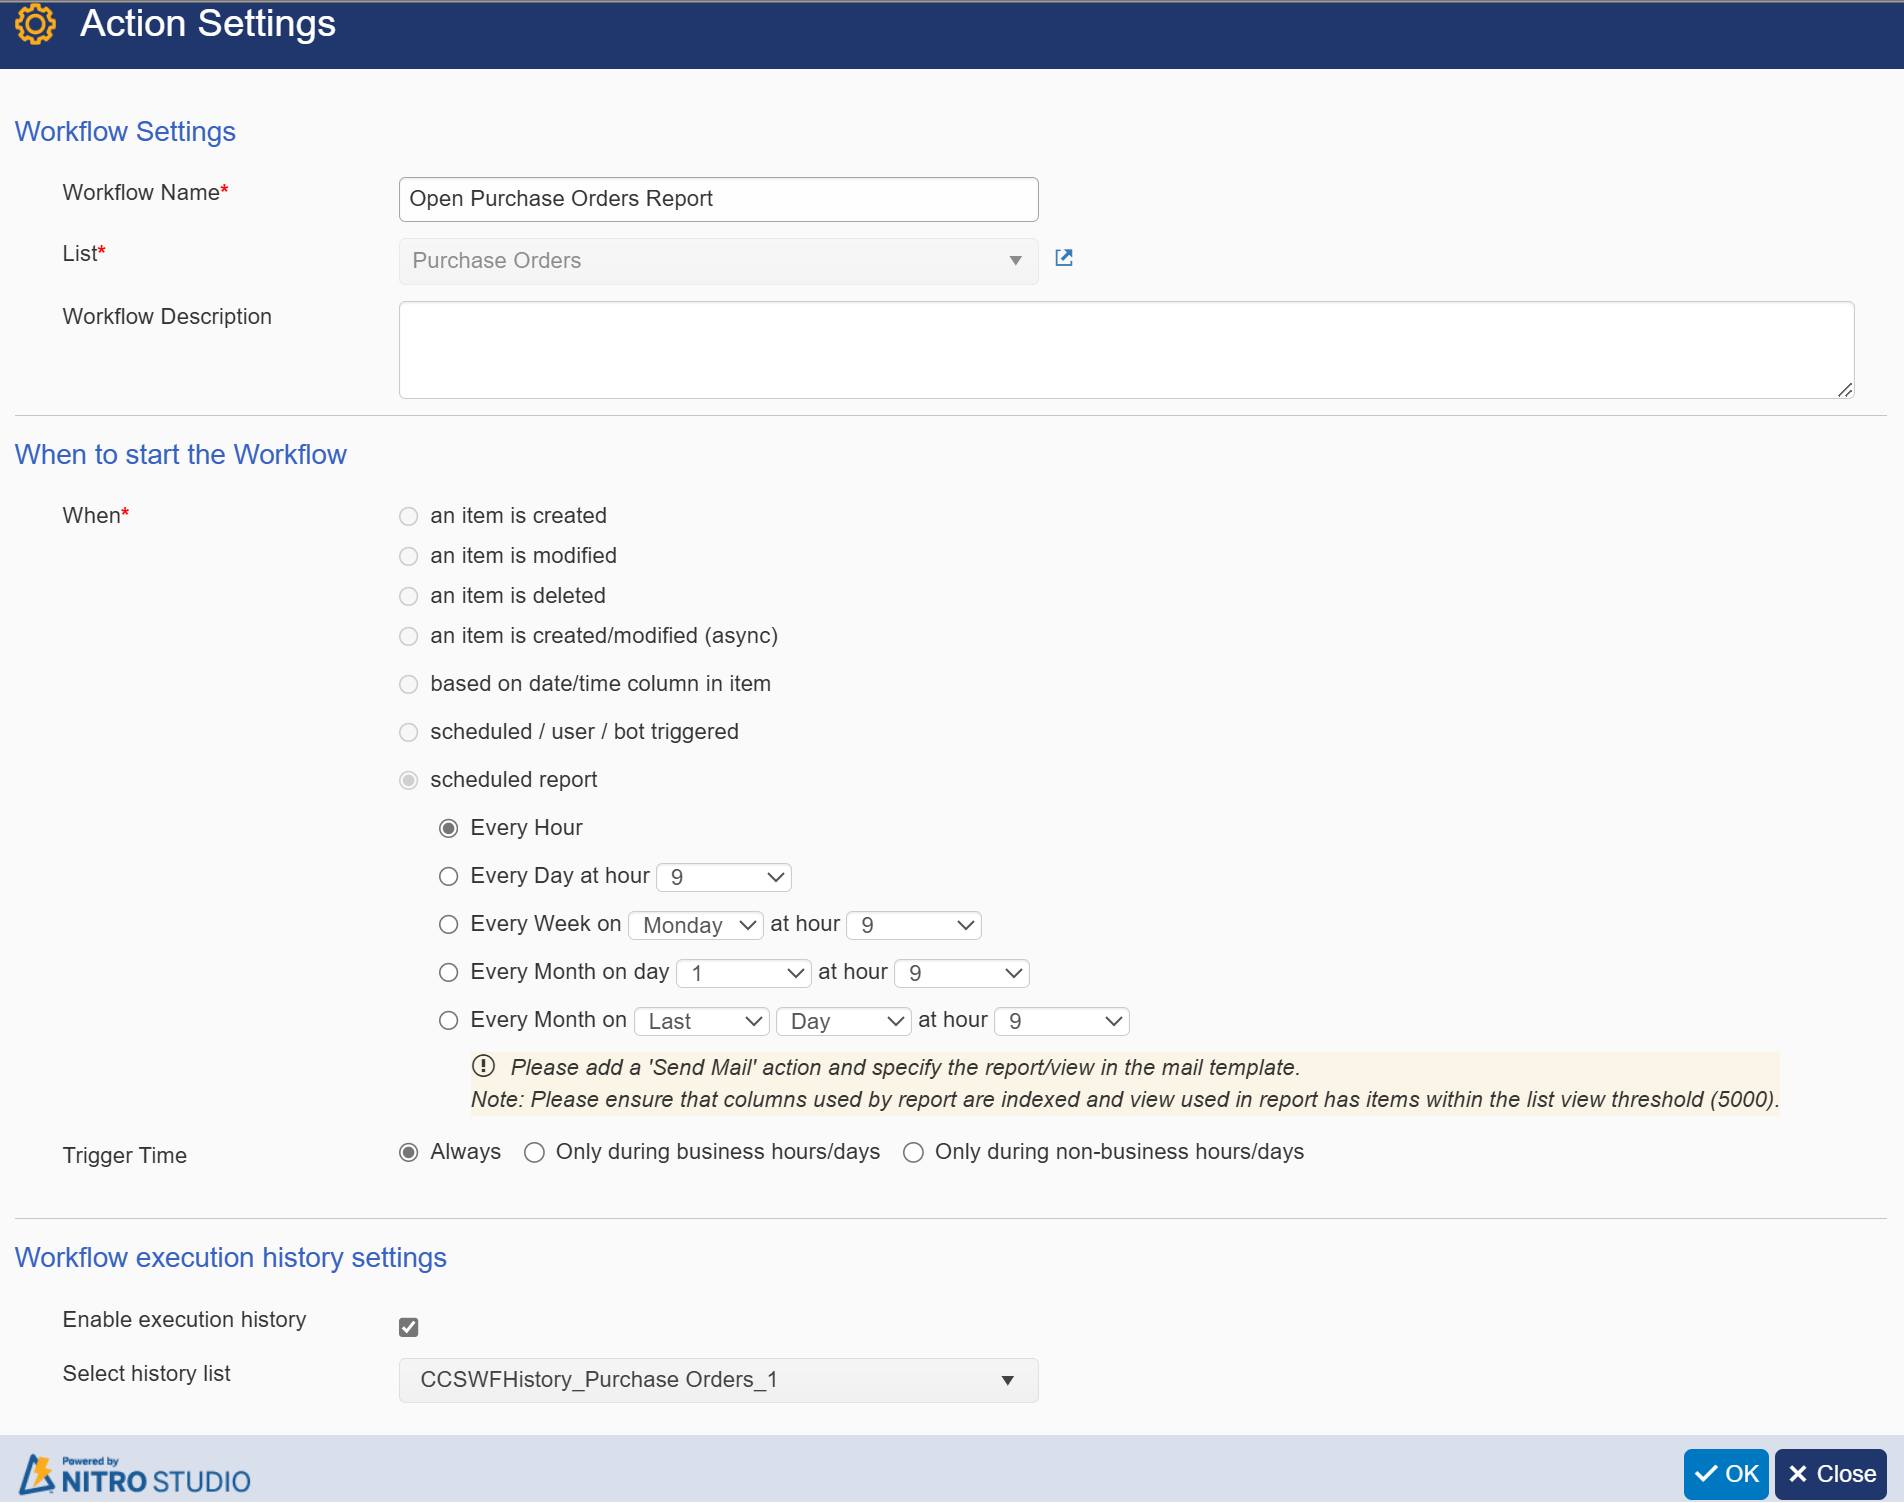
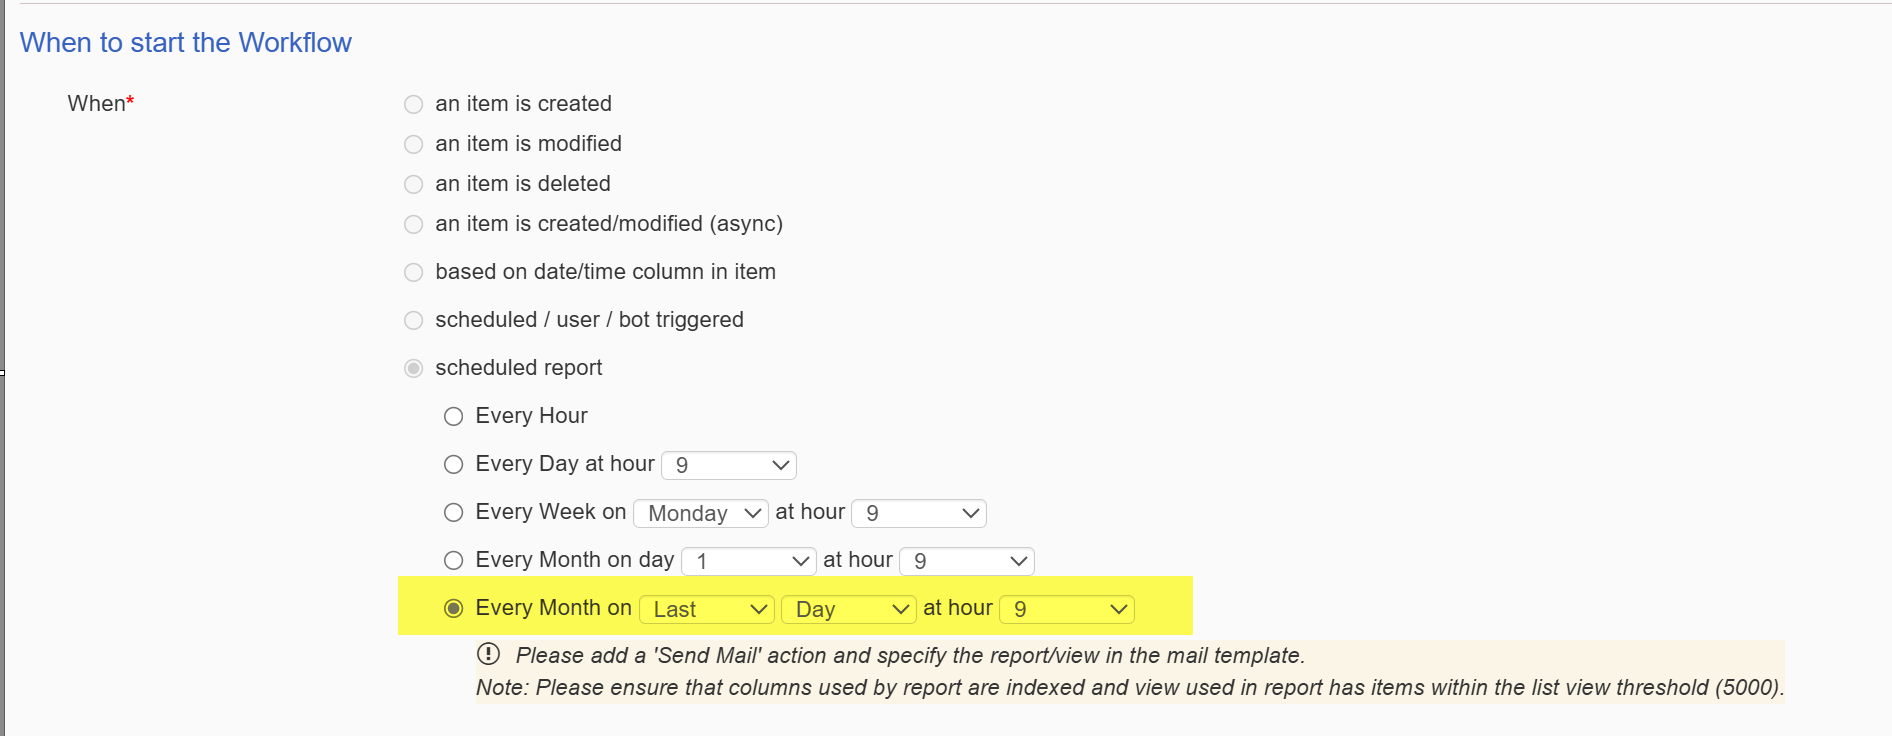
Every Hour
This scheduled report workflow will trigger always ( as 'Trigger Time selected is 'Always') for every hour.
Every Day at hour
This scheduled report workflow will trigger for every day at specific hour configured in Scheduled only during business hours/days ( as 'Trigger Time selected is 'Only during business hors/days') as per site regional settings.
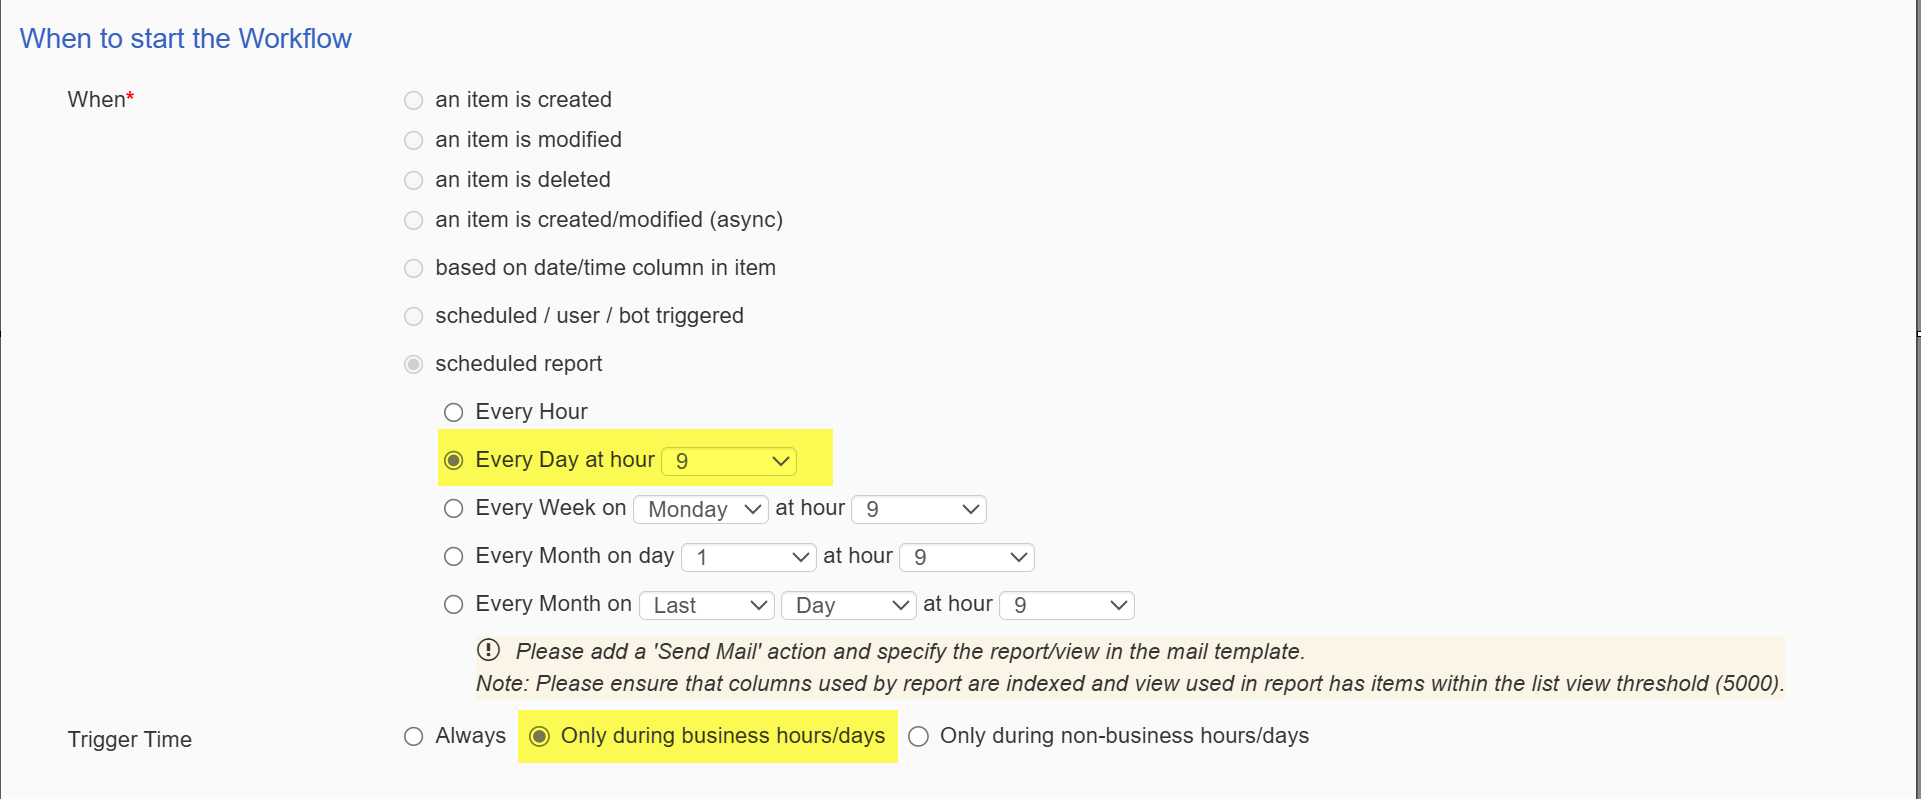
Note: If "Only during non-business hours/days" is selected, this workflow will run during non-business hours/days as per site regional settings.
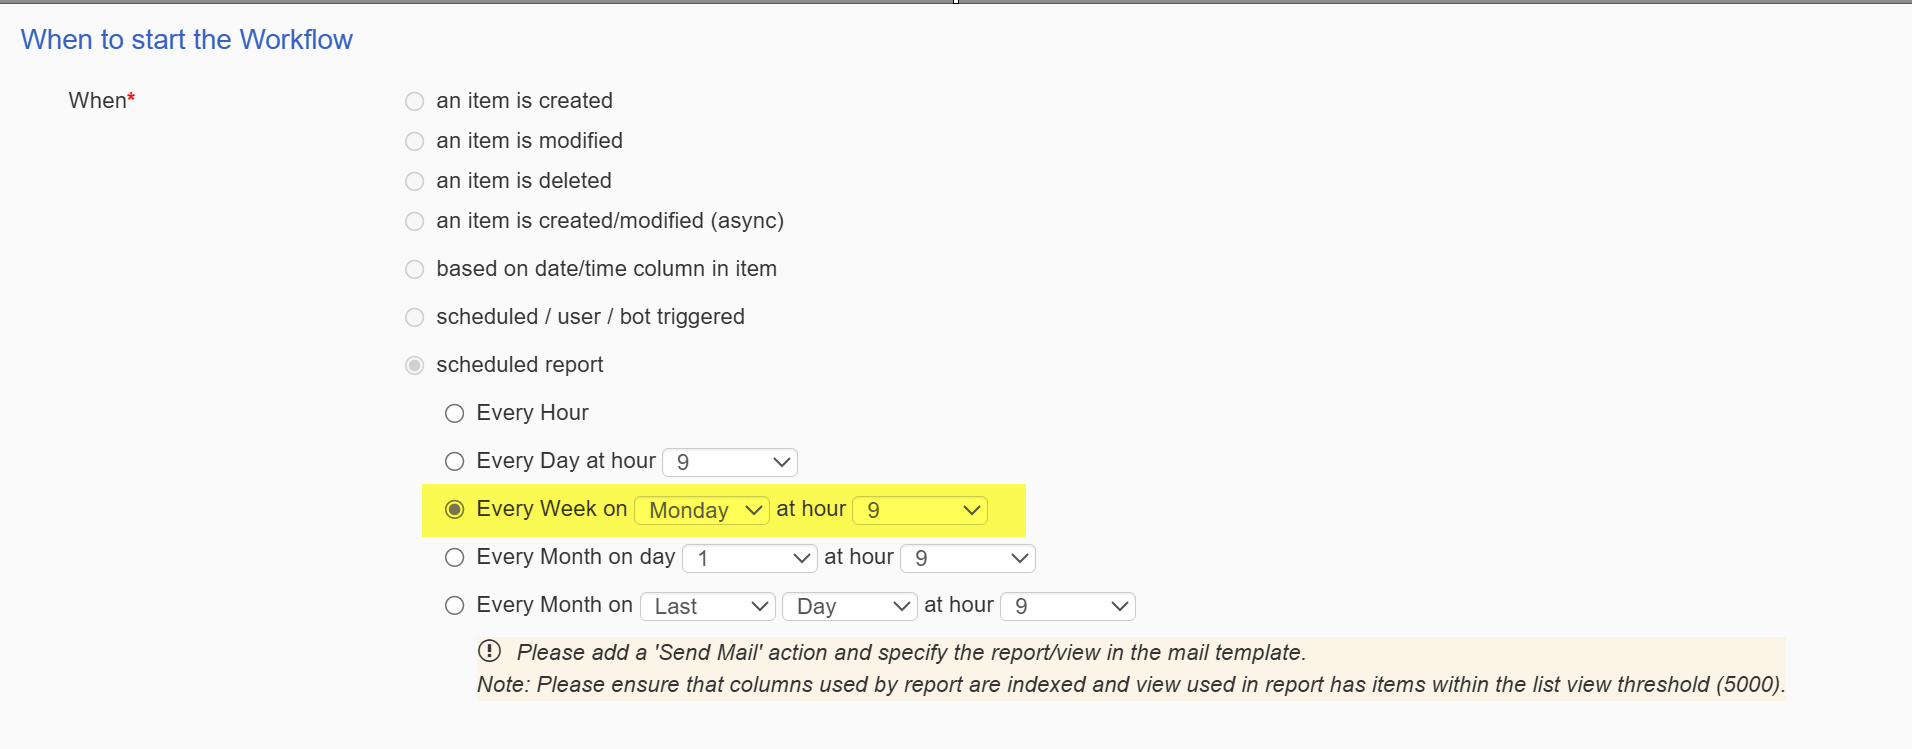
Every Week on
This scheduled report workflow will trigger for every week on at specific hour.
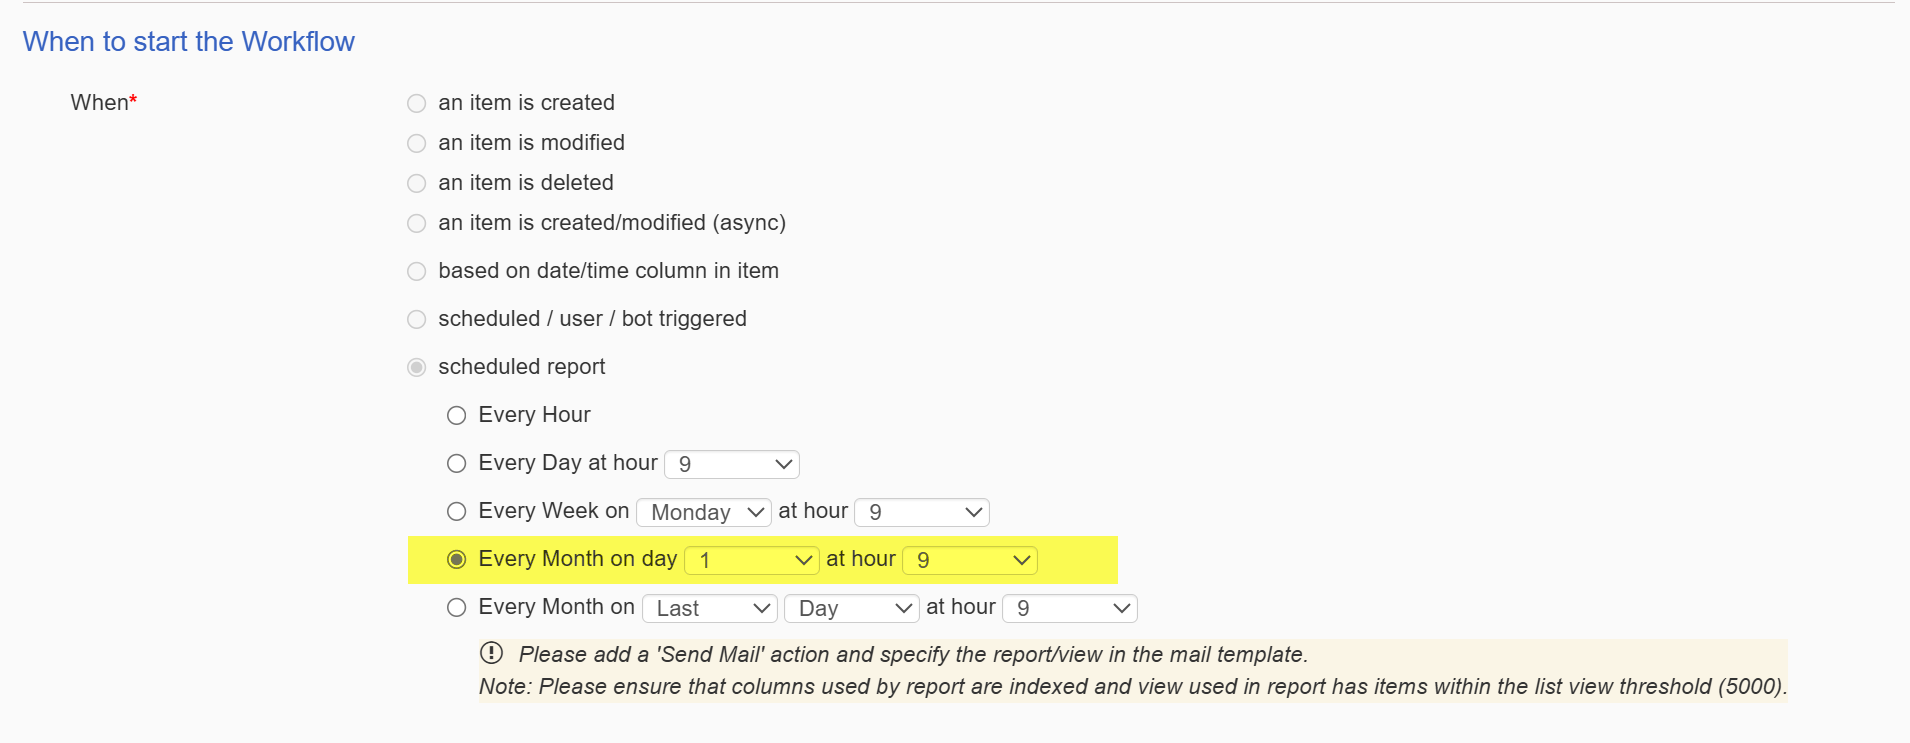
Every Month on day
This scheduled report workflow will trigger for every month on specific date at specific hour.
Every Month on
This scheduled report workflow will trigger for every month on specific day (First, Second, Third, Fourth and Last) at specific hour.
Supported Actions
Send Mail
Use Cases
Case 1: Daily Overdue Tickets Summary
SharePoint list view configuration
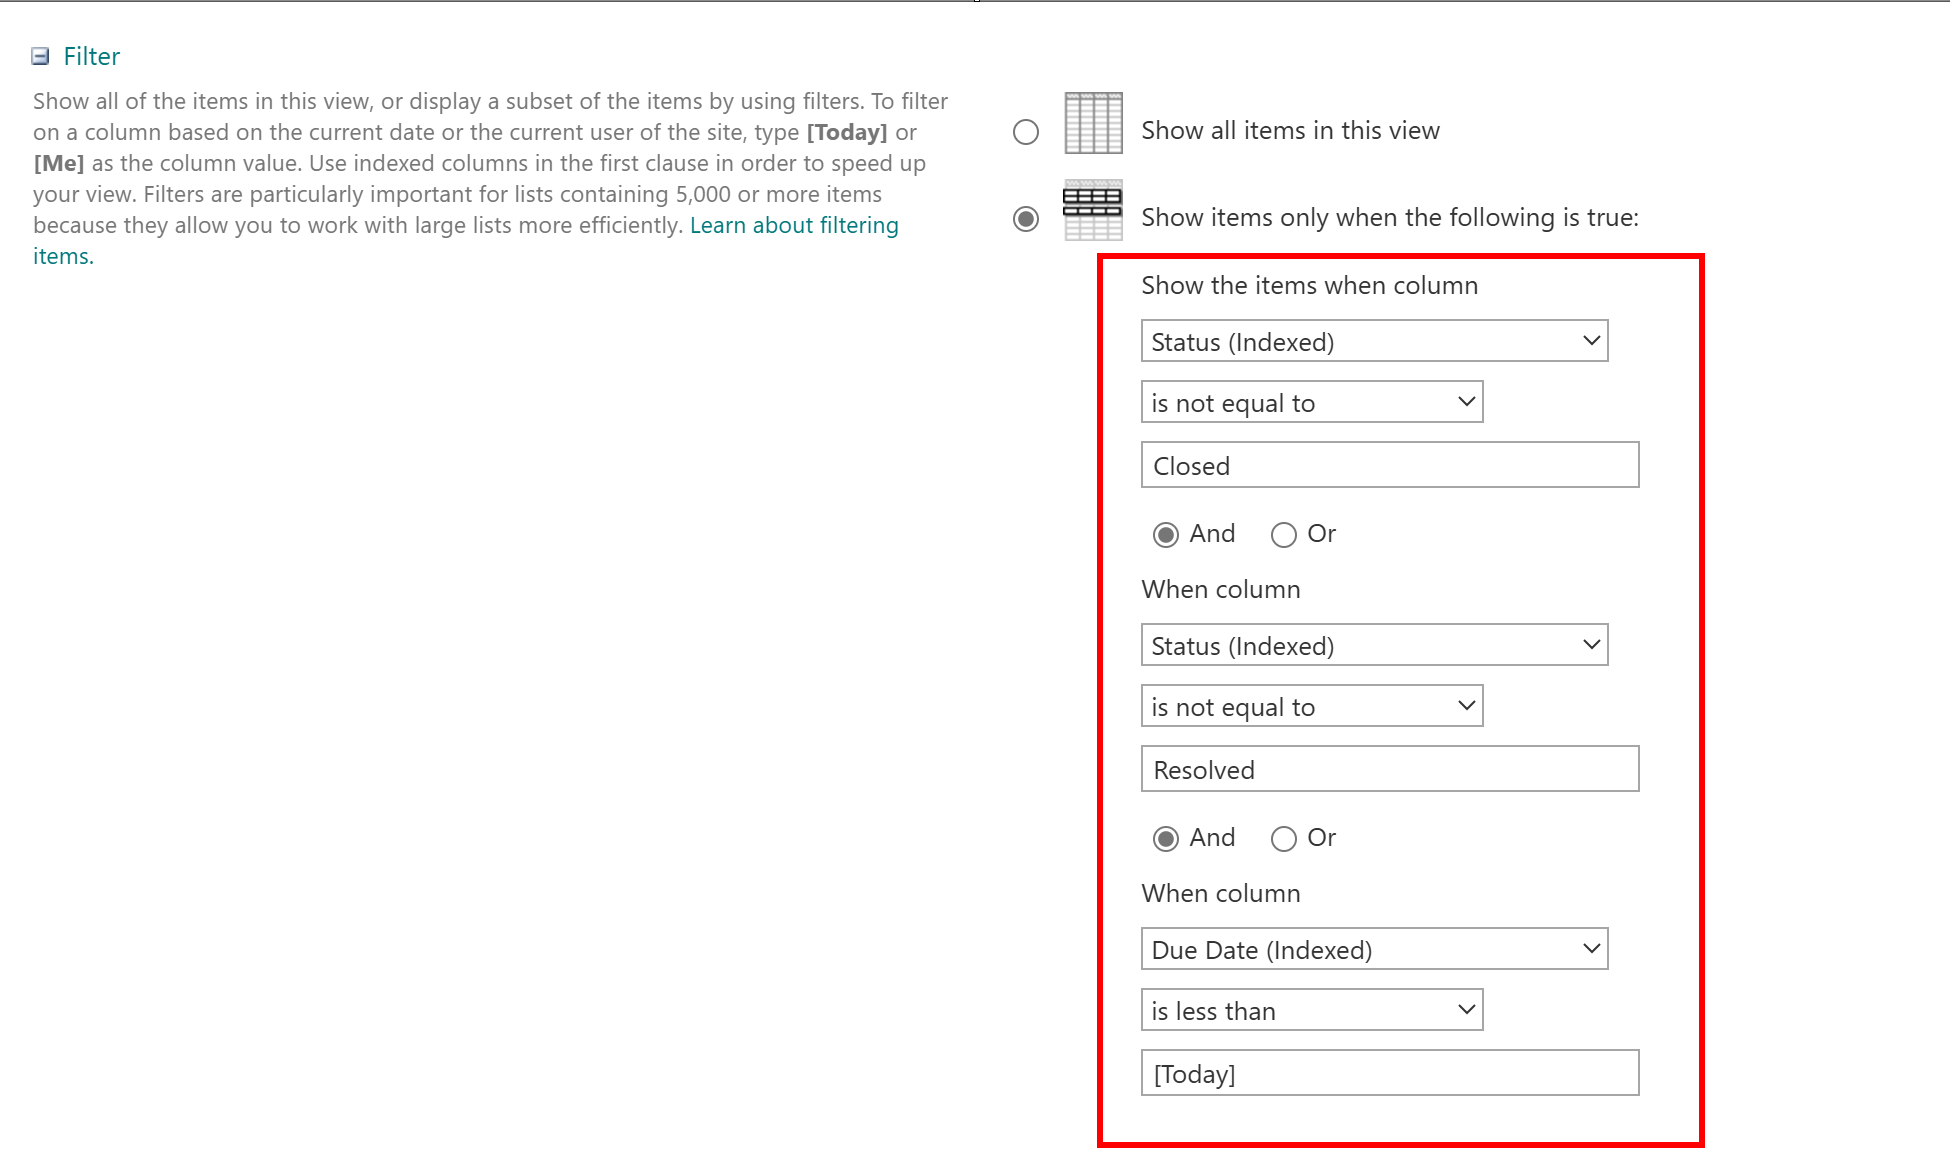
Create Overdue Tickets view like shown below
Go to Tickets list -> List Settings -> Create a new view with below filter conditions
Workflow Configurations
Open “Crow Canyon Nitro Studio” -> Crow Canyon Workflow Manager and create new workflow as shown below
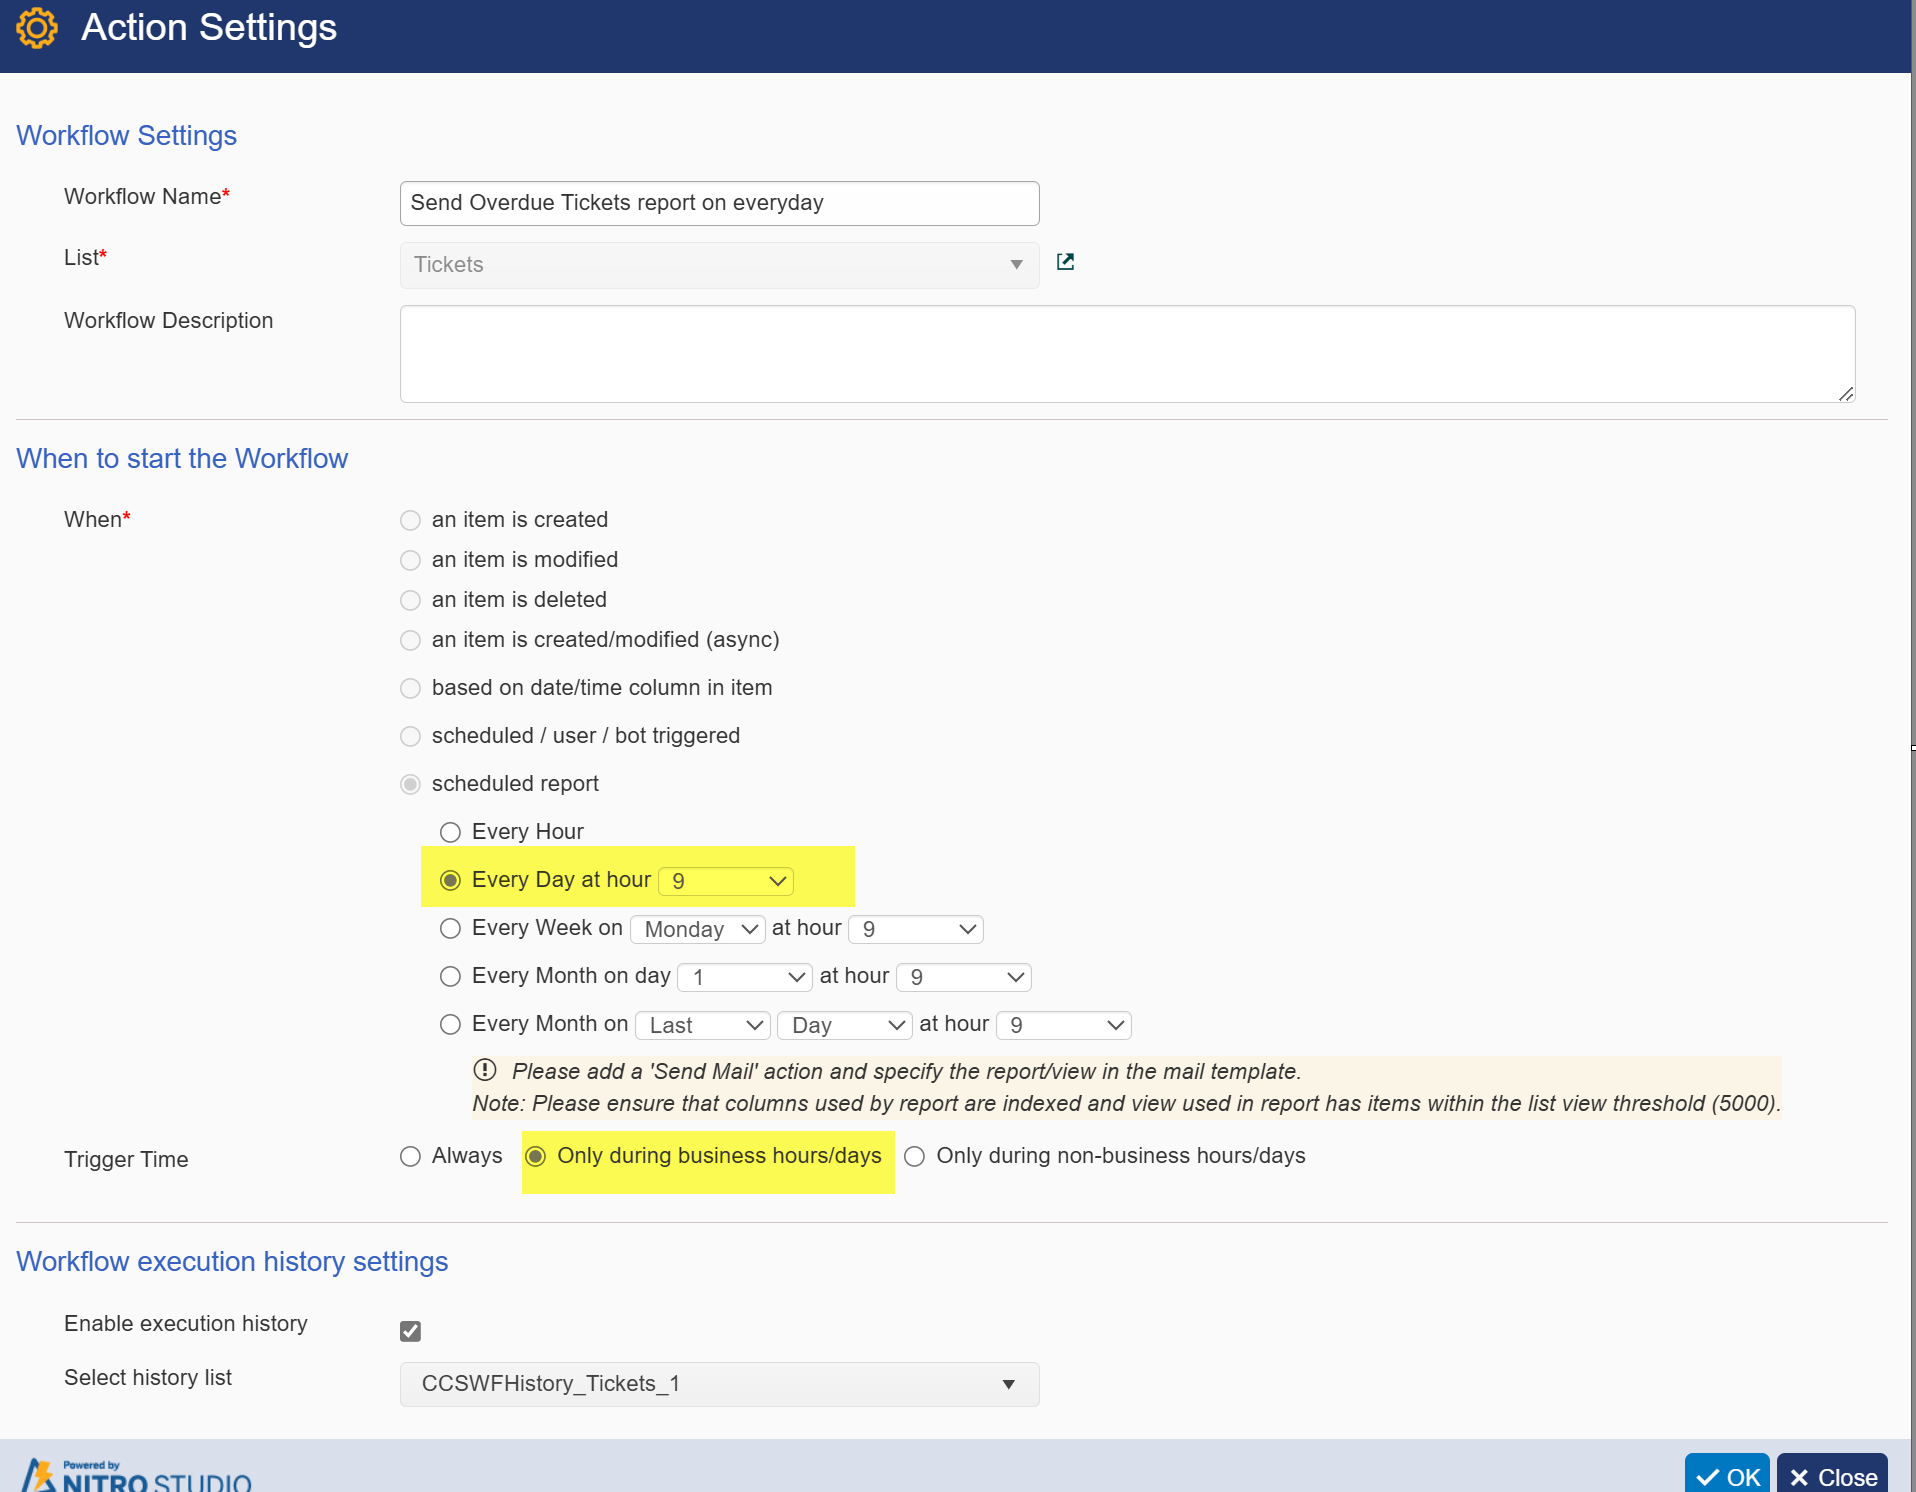
This workflow runs every day at 9 AM and sends mail to recipients with selected list view data in the mail template.
Workflow settings
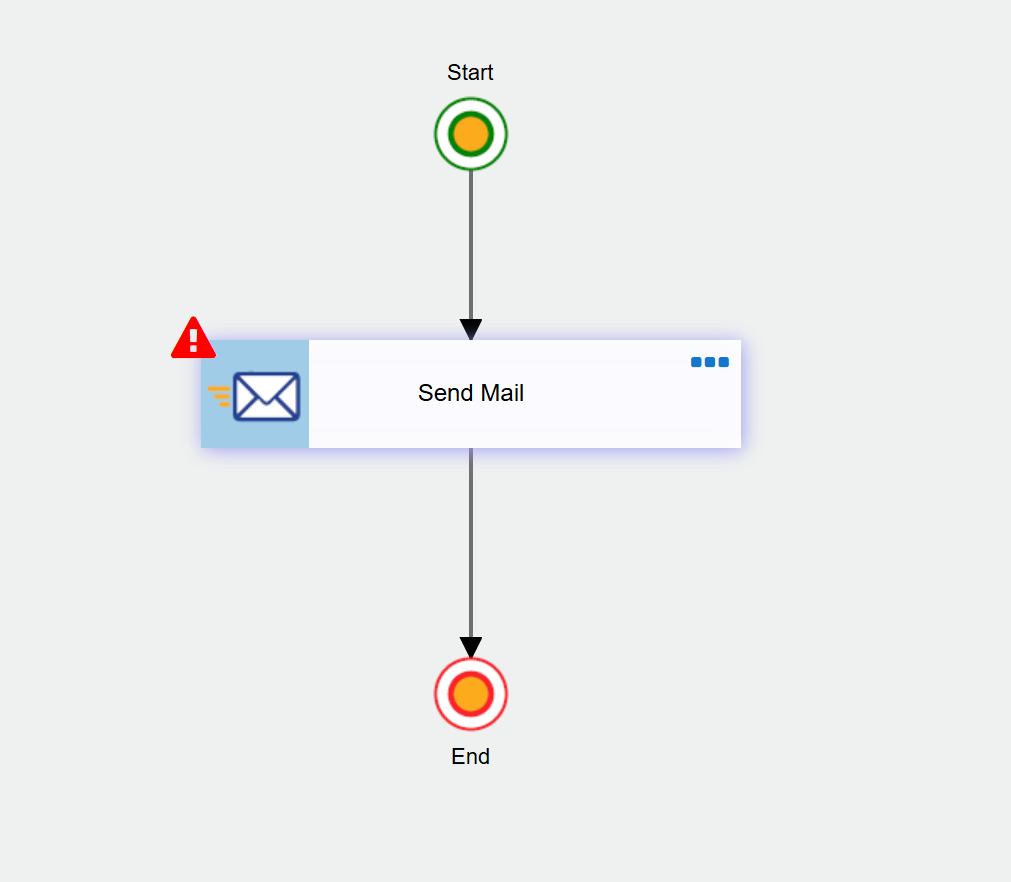
Send Mail action
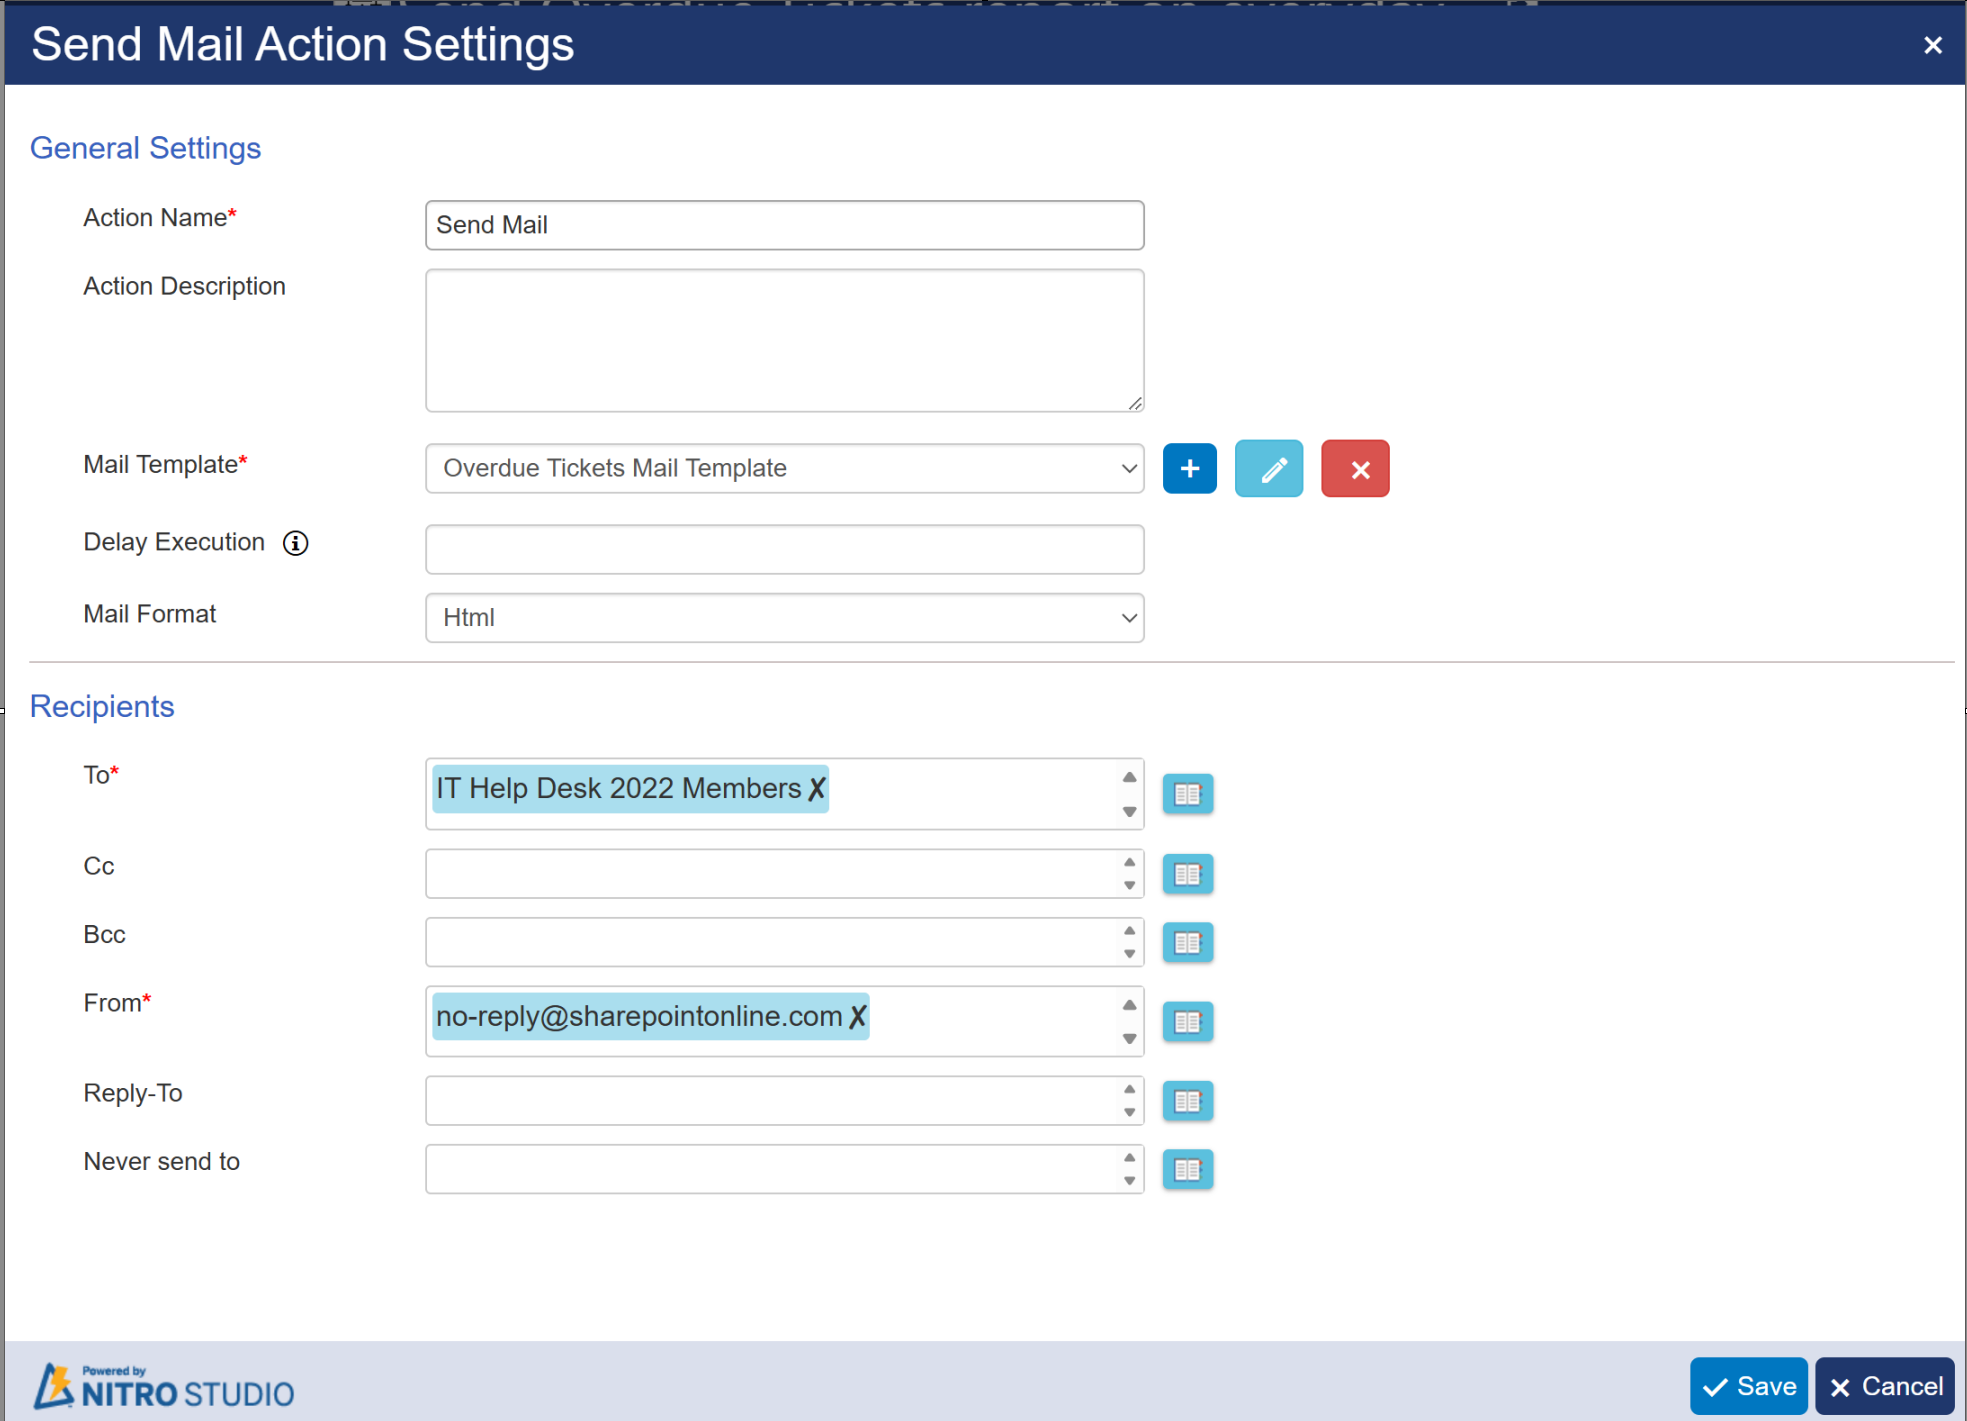
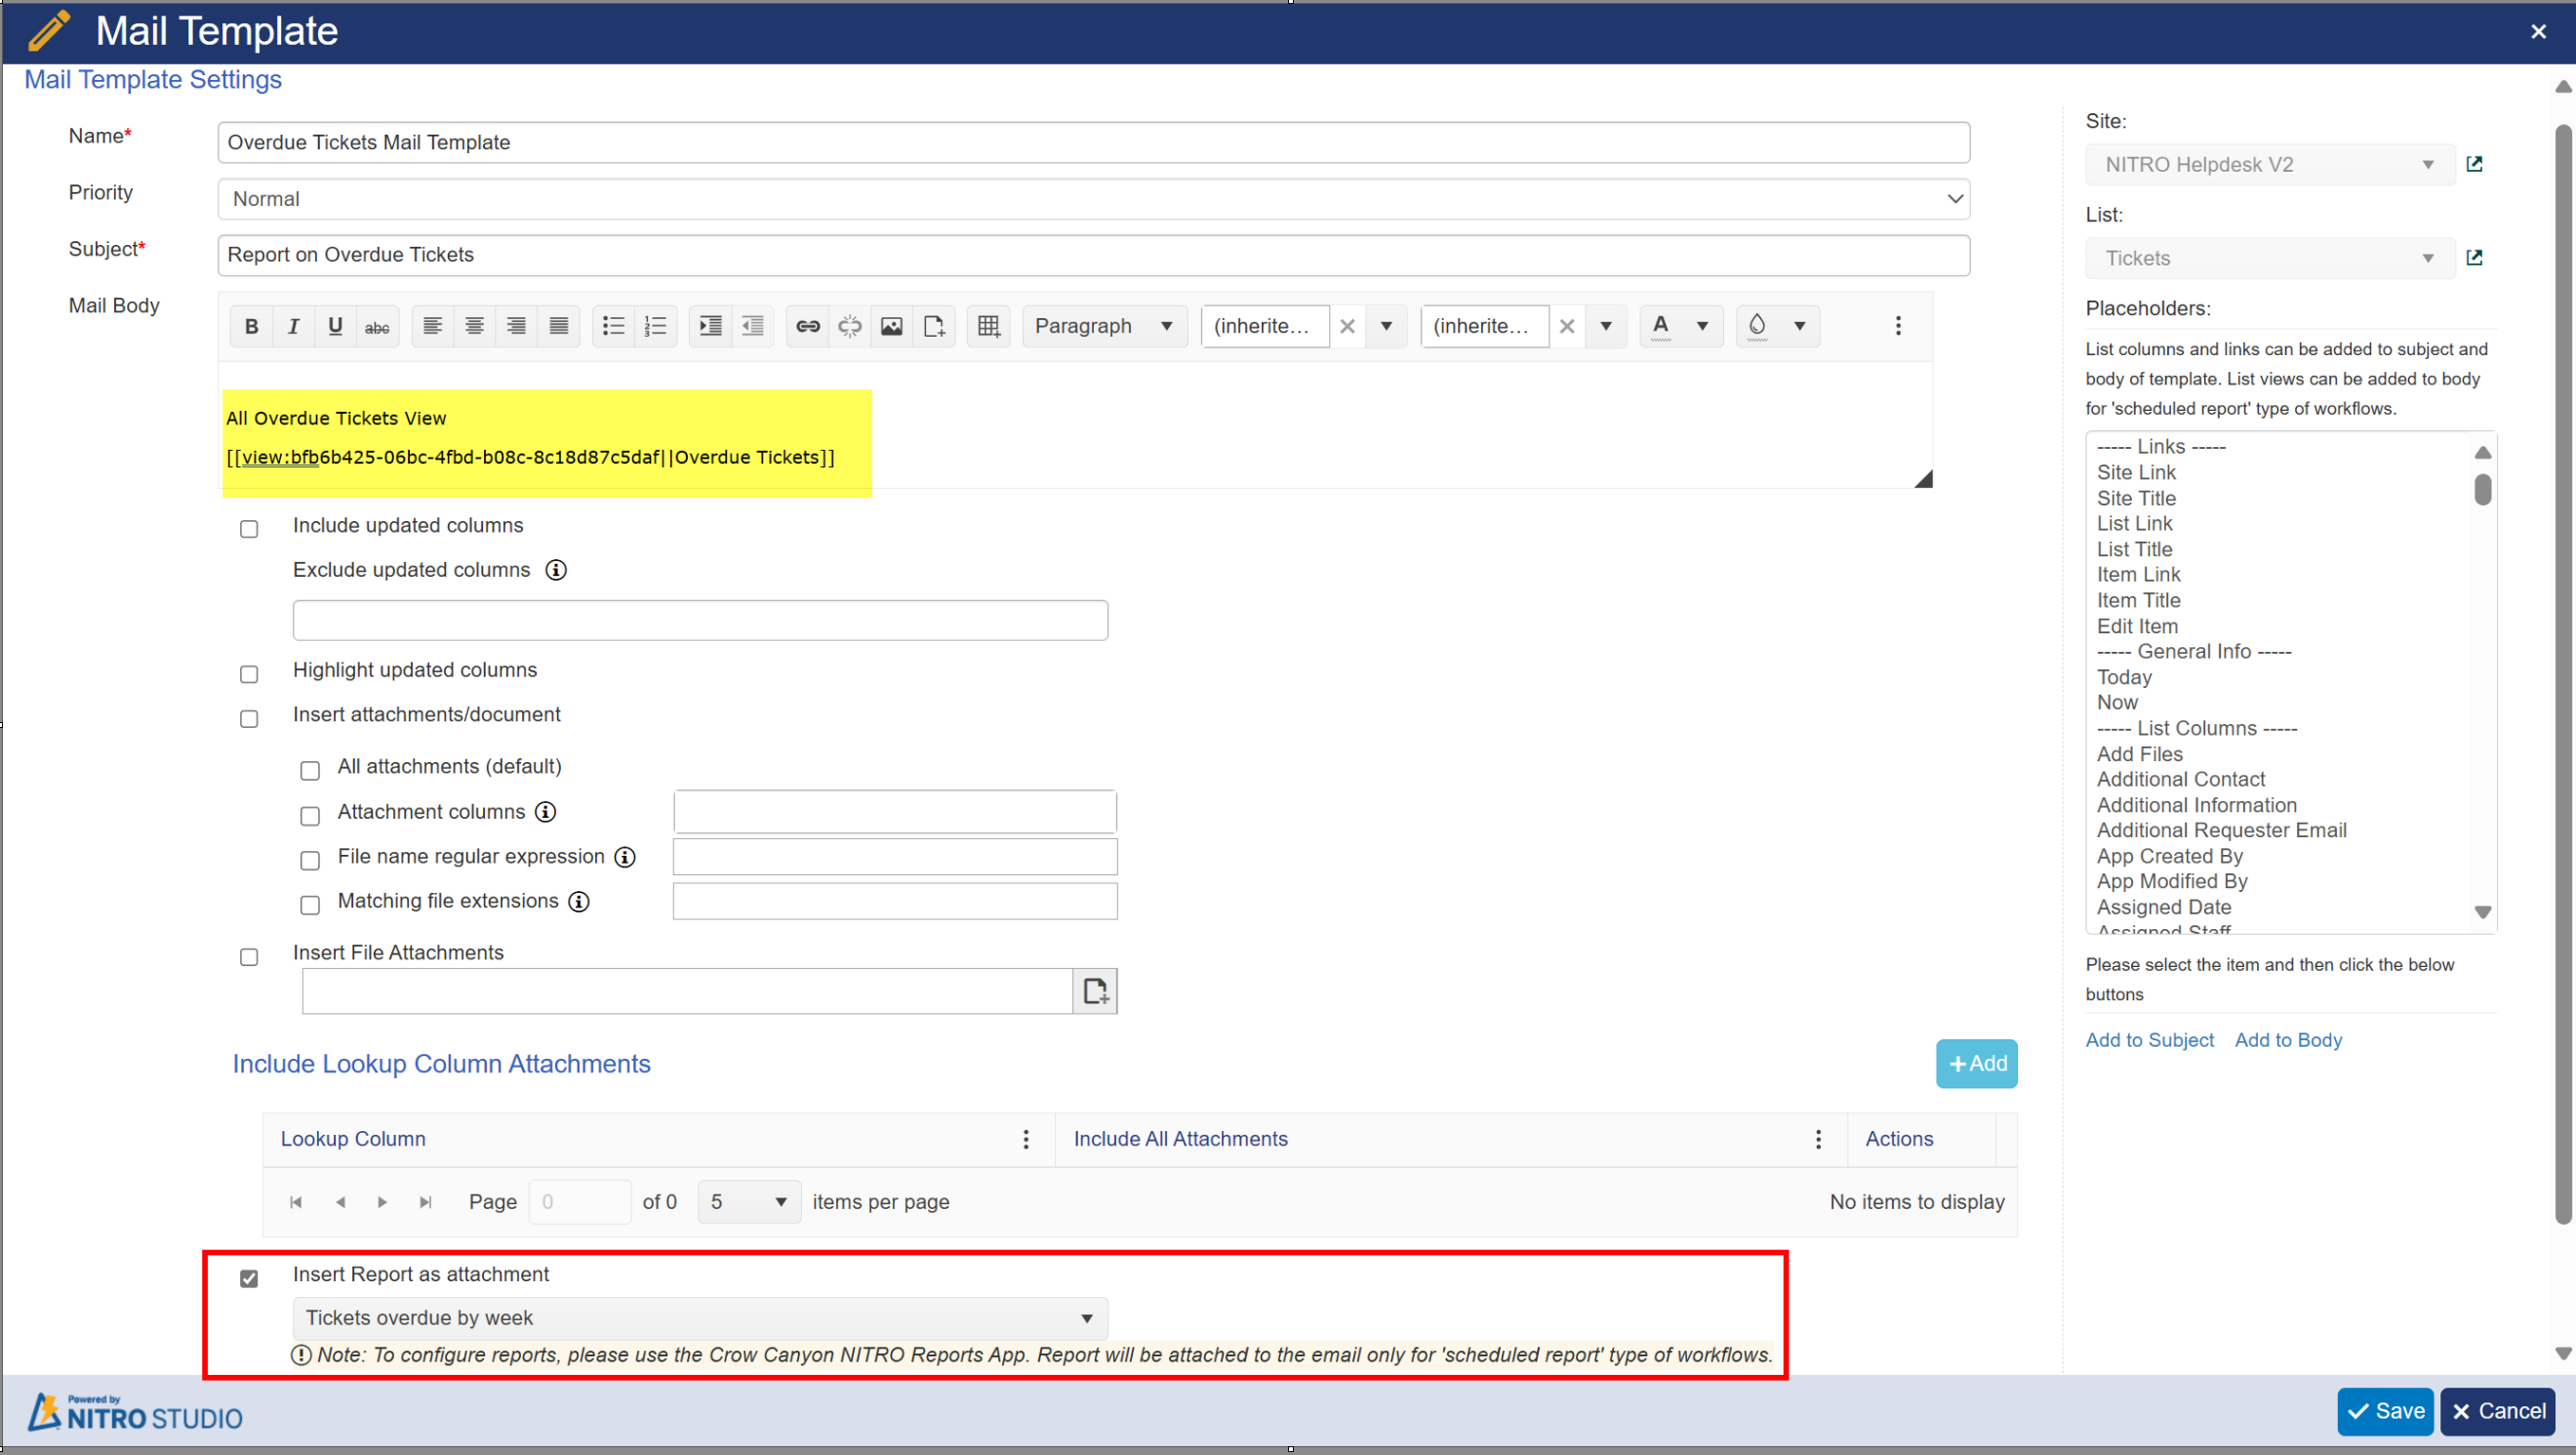
Mail Template:
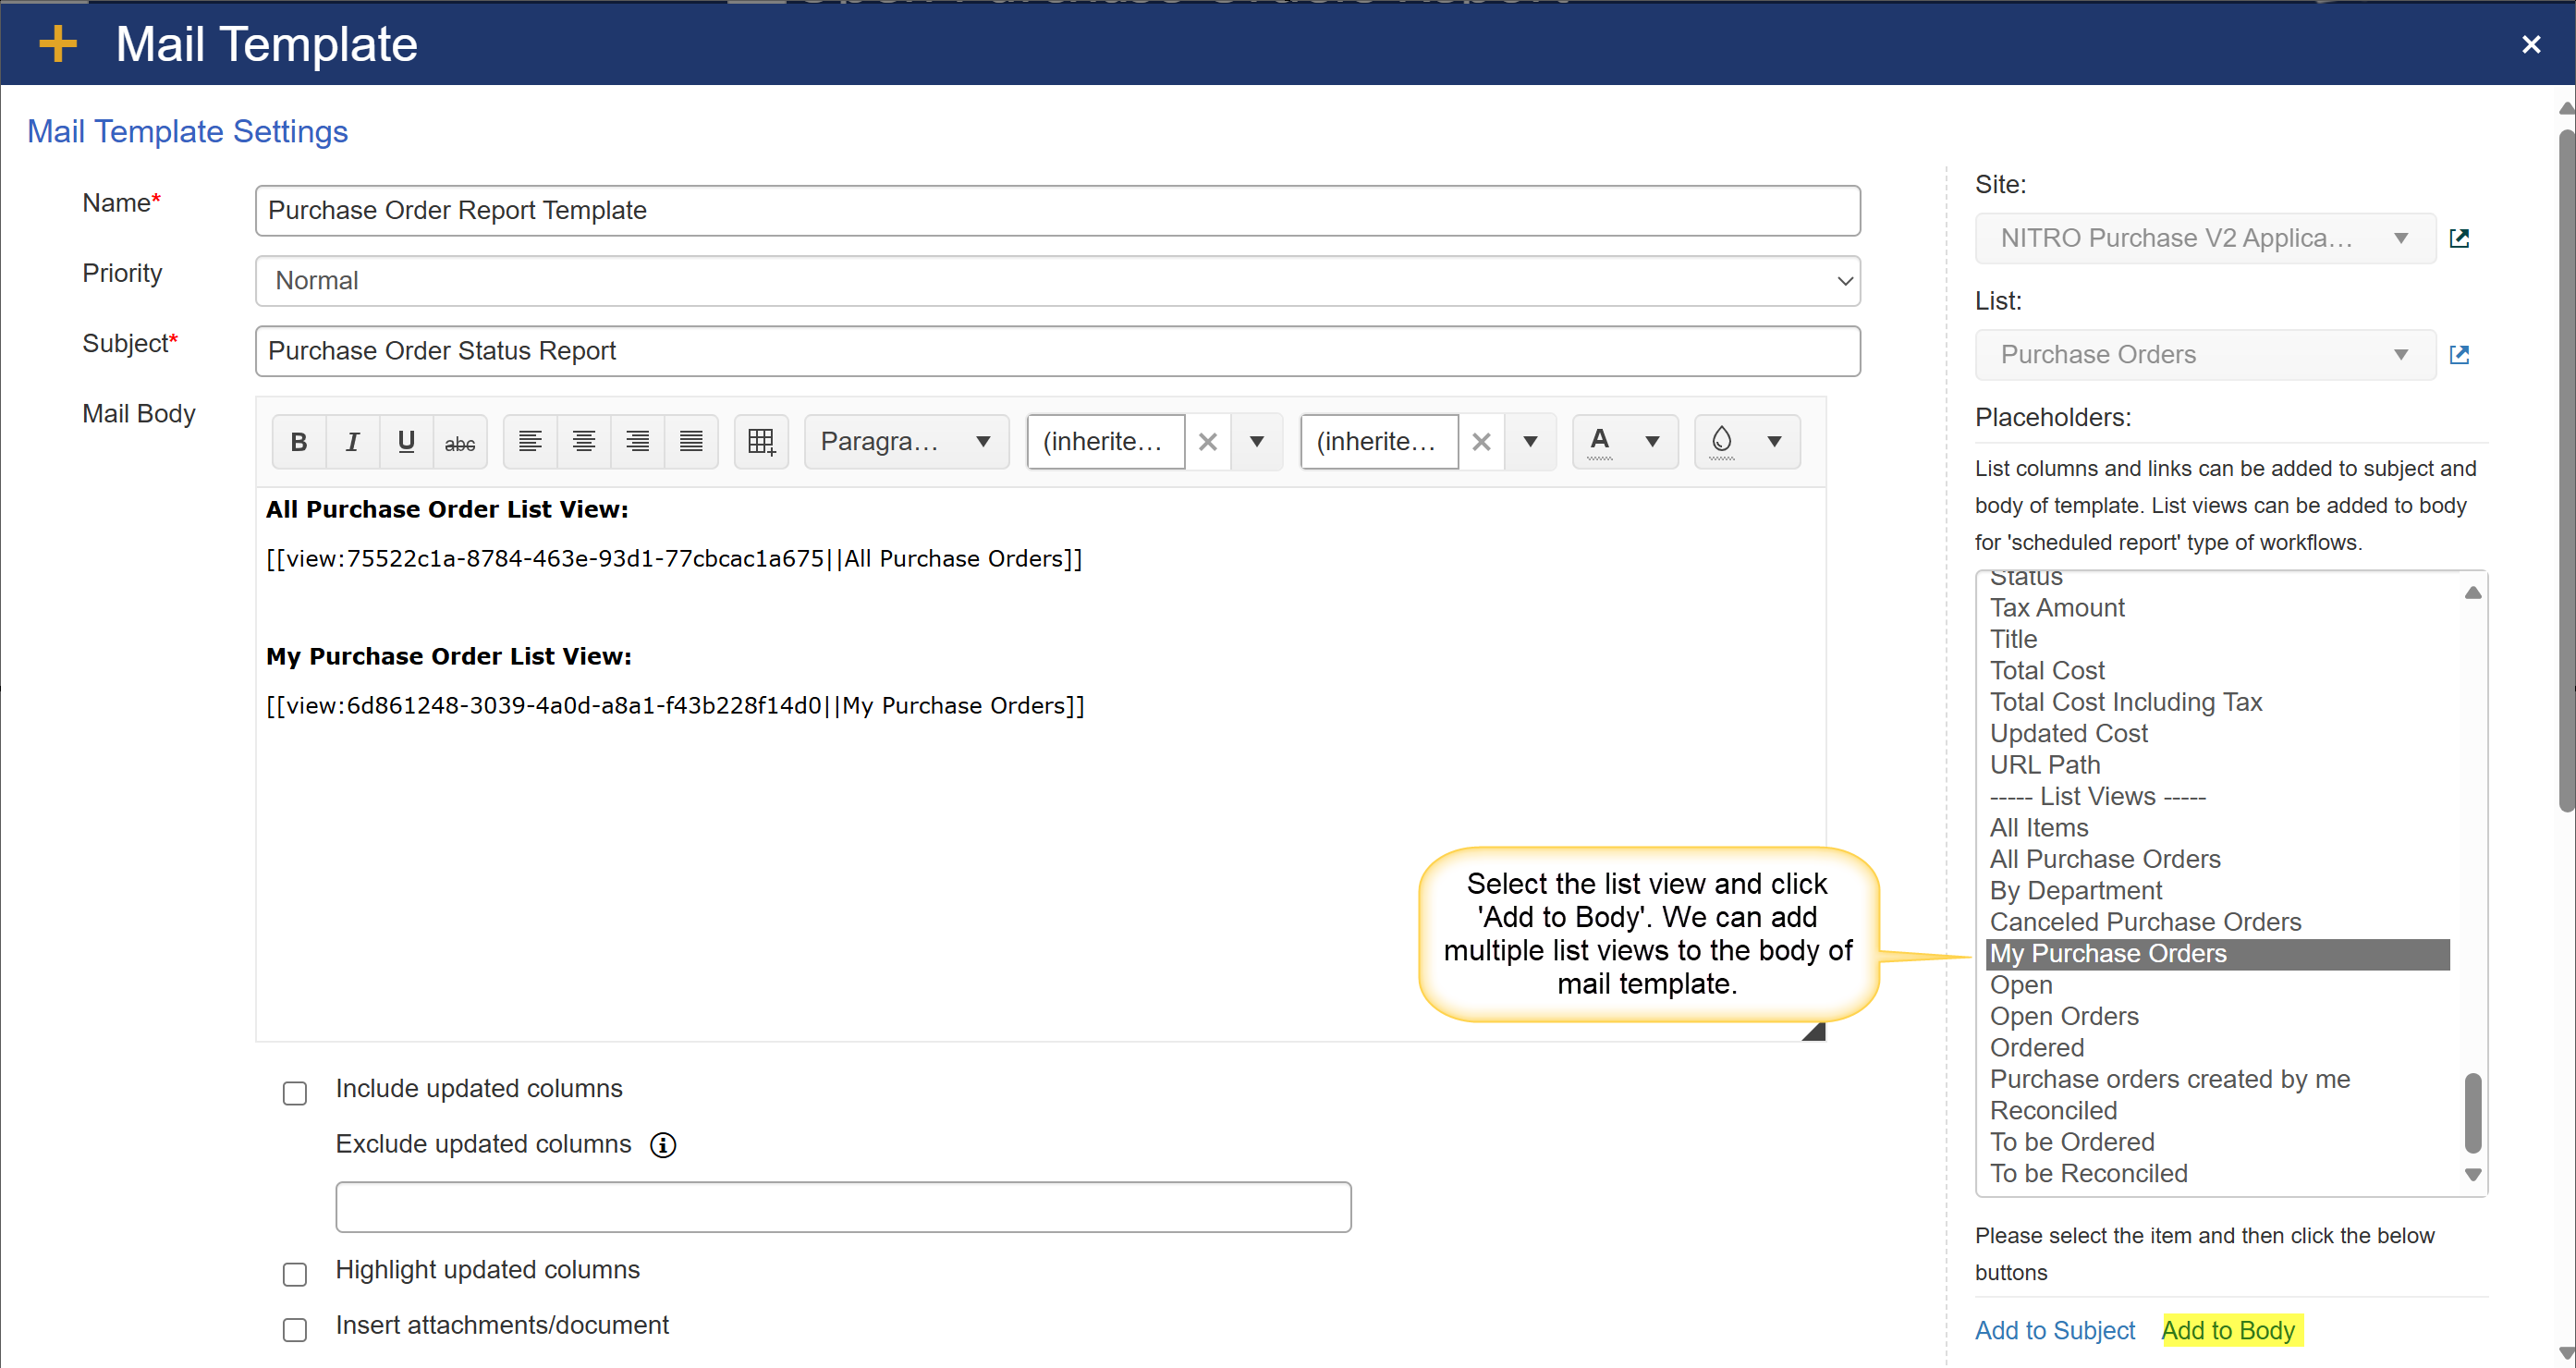
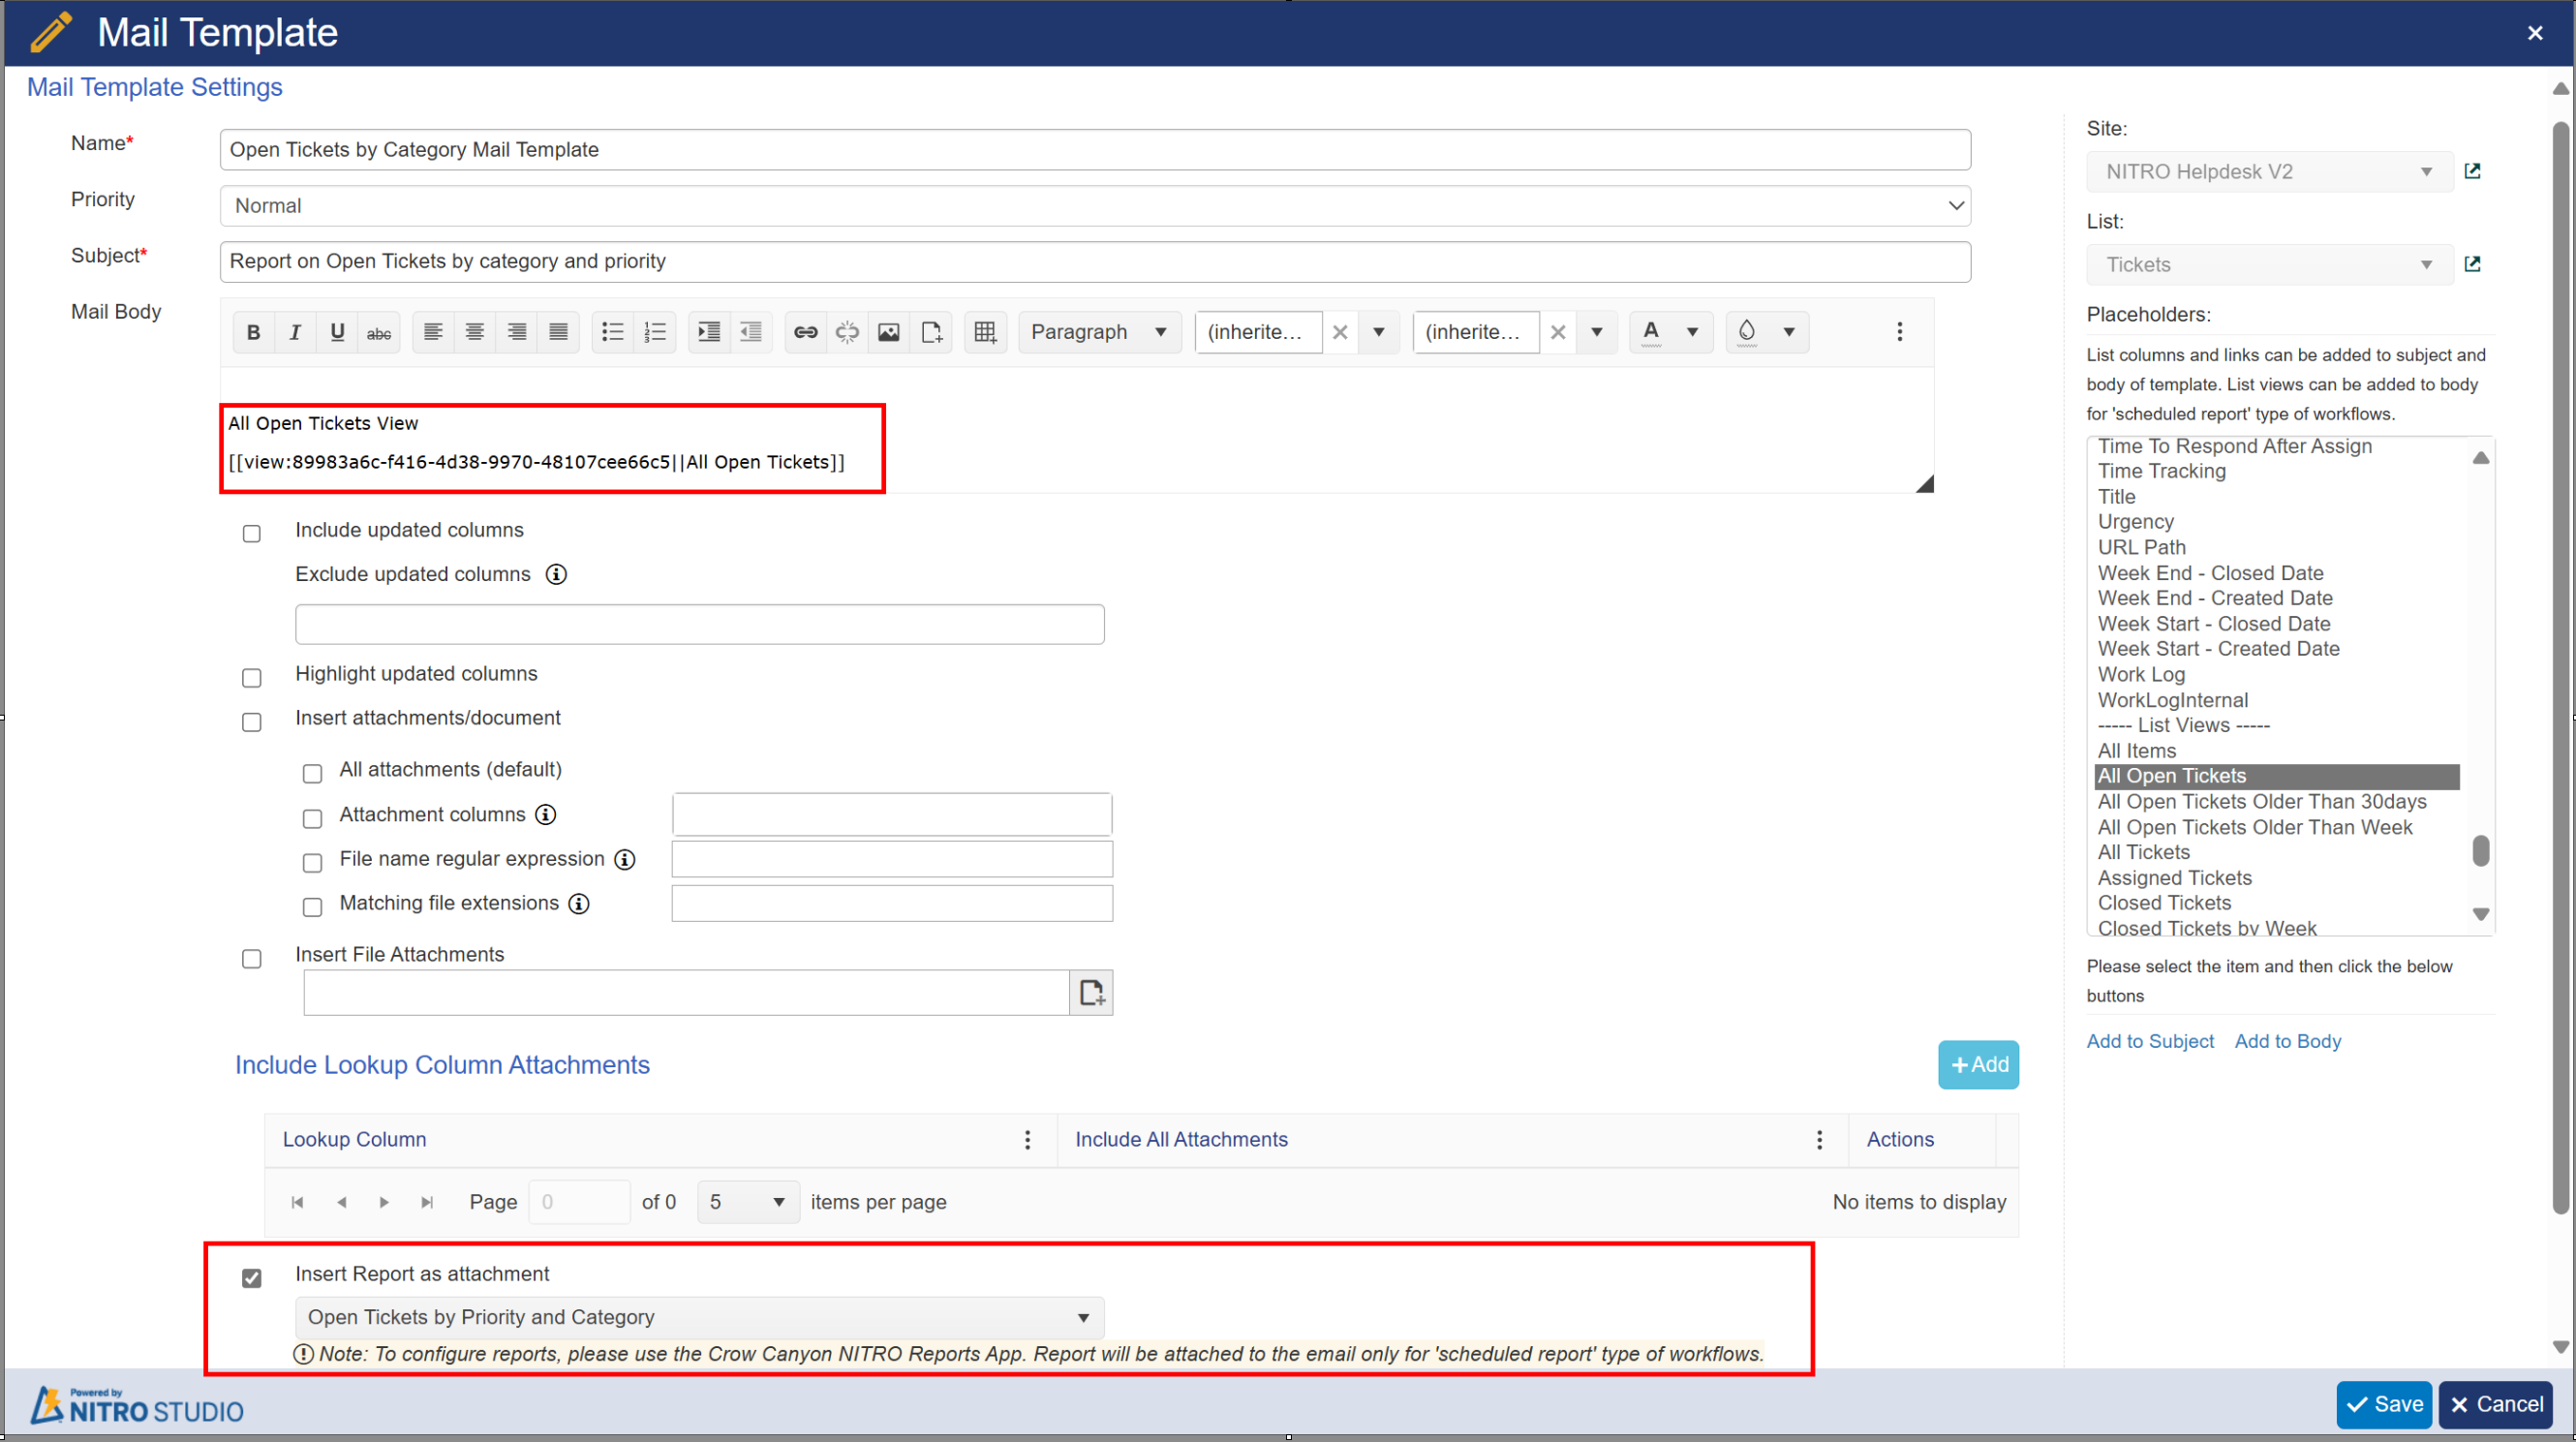
Select the List views from placeholder (right side) and add to the body. We can add multiple list views to the body.
List Overdue Ticket view:

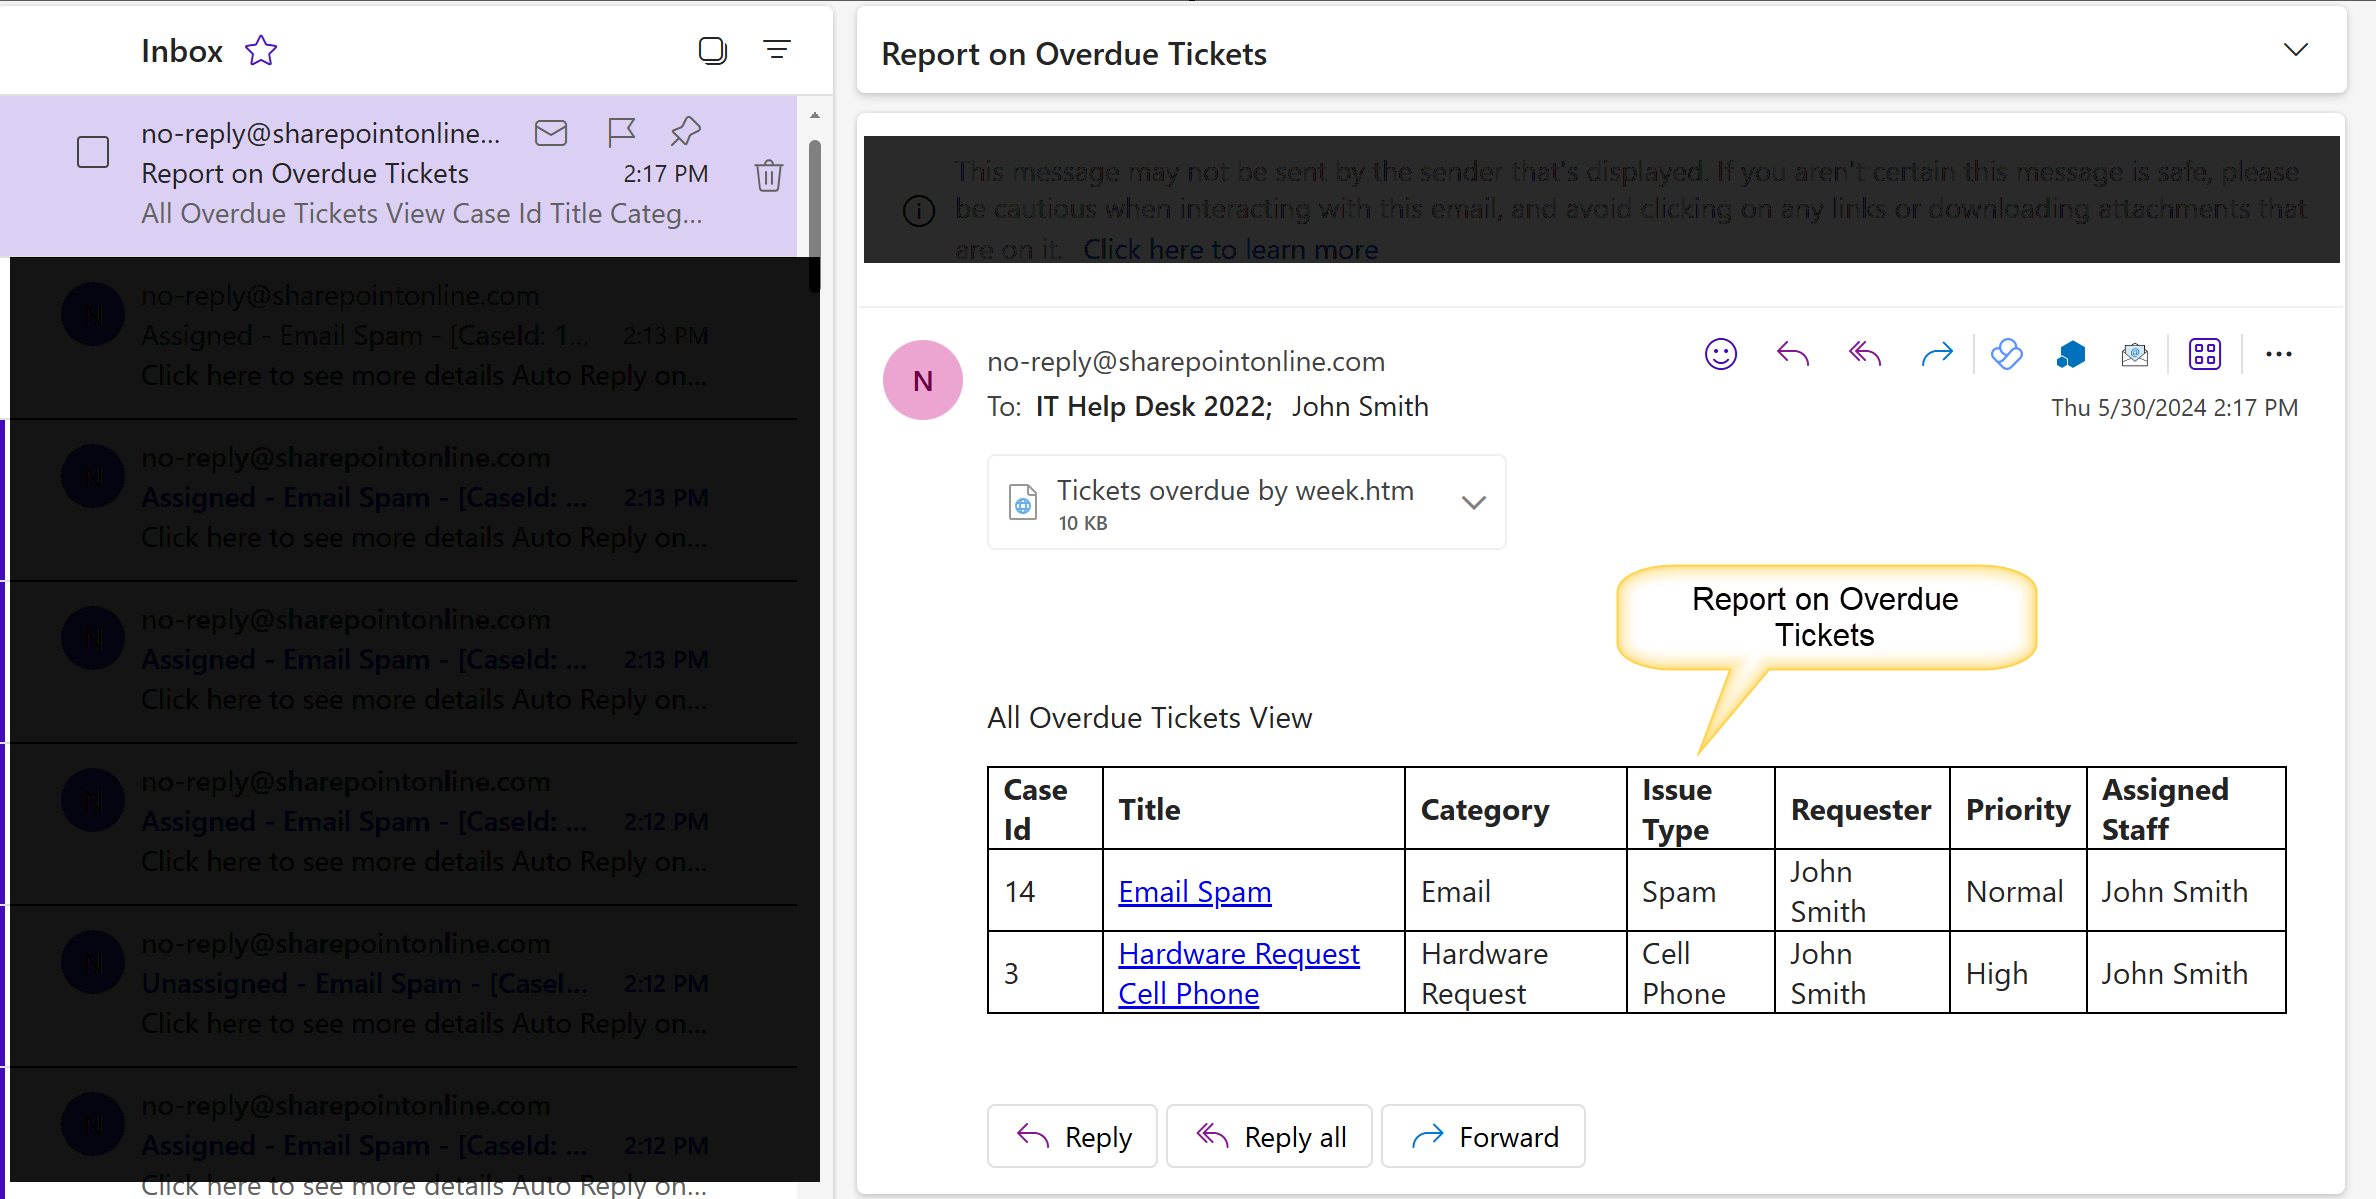
Sample Output
Case 2: Weekly Report of “Open Tickets by Category and Priority” along with all open Tickets view
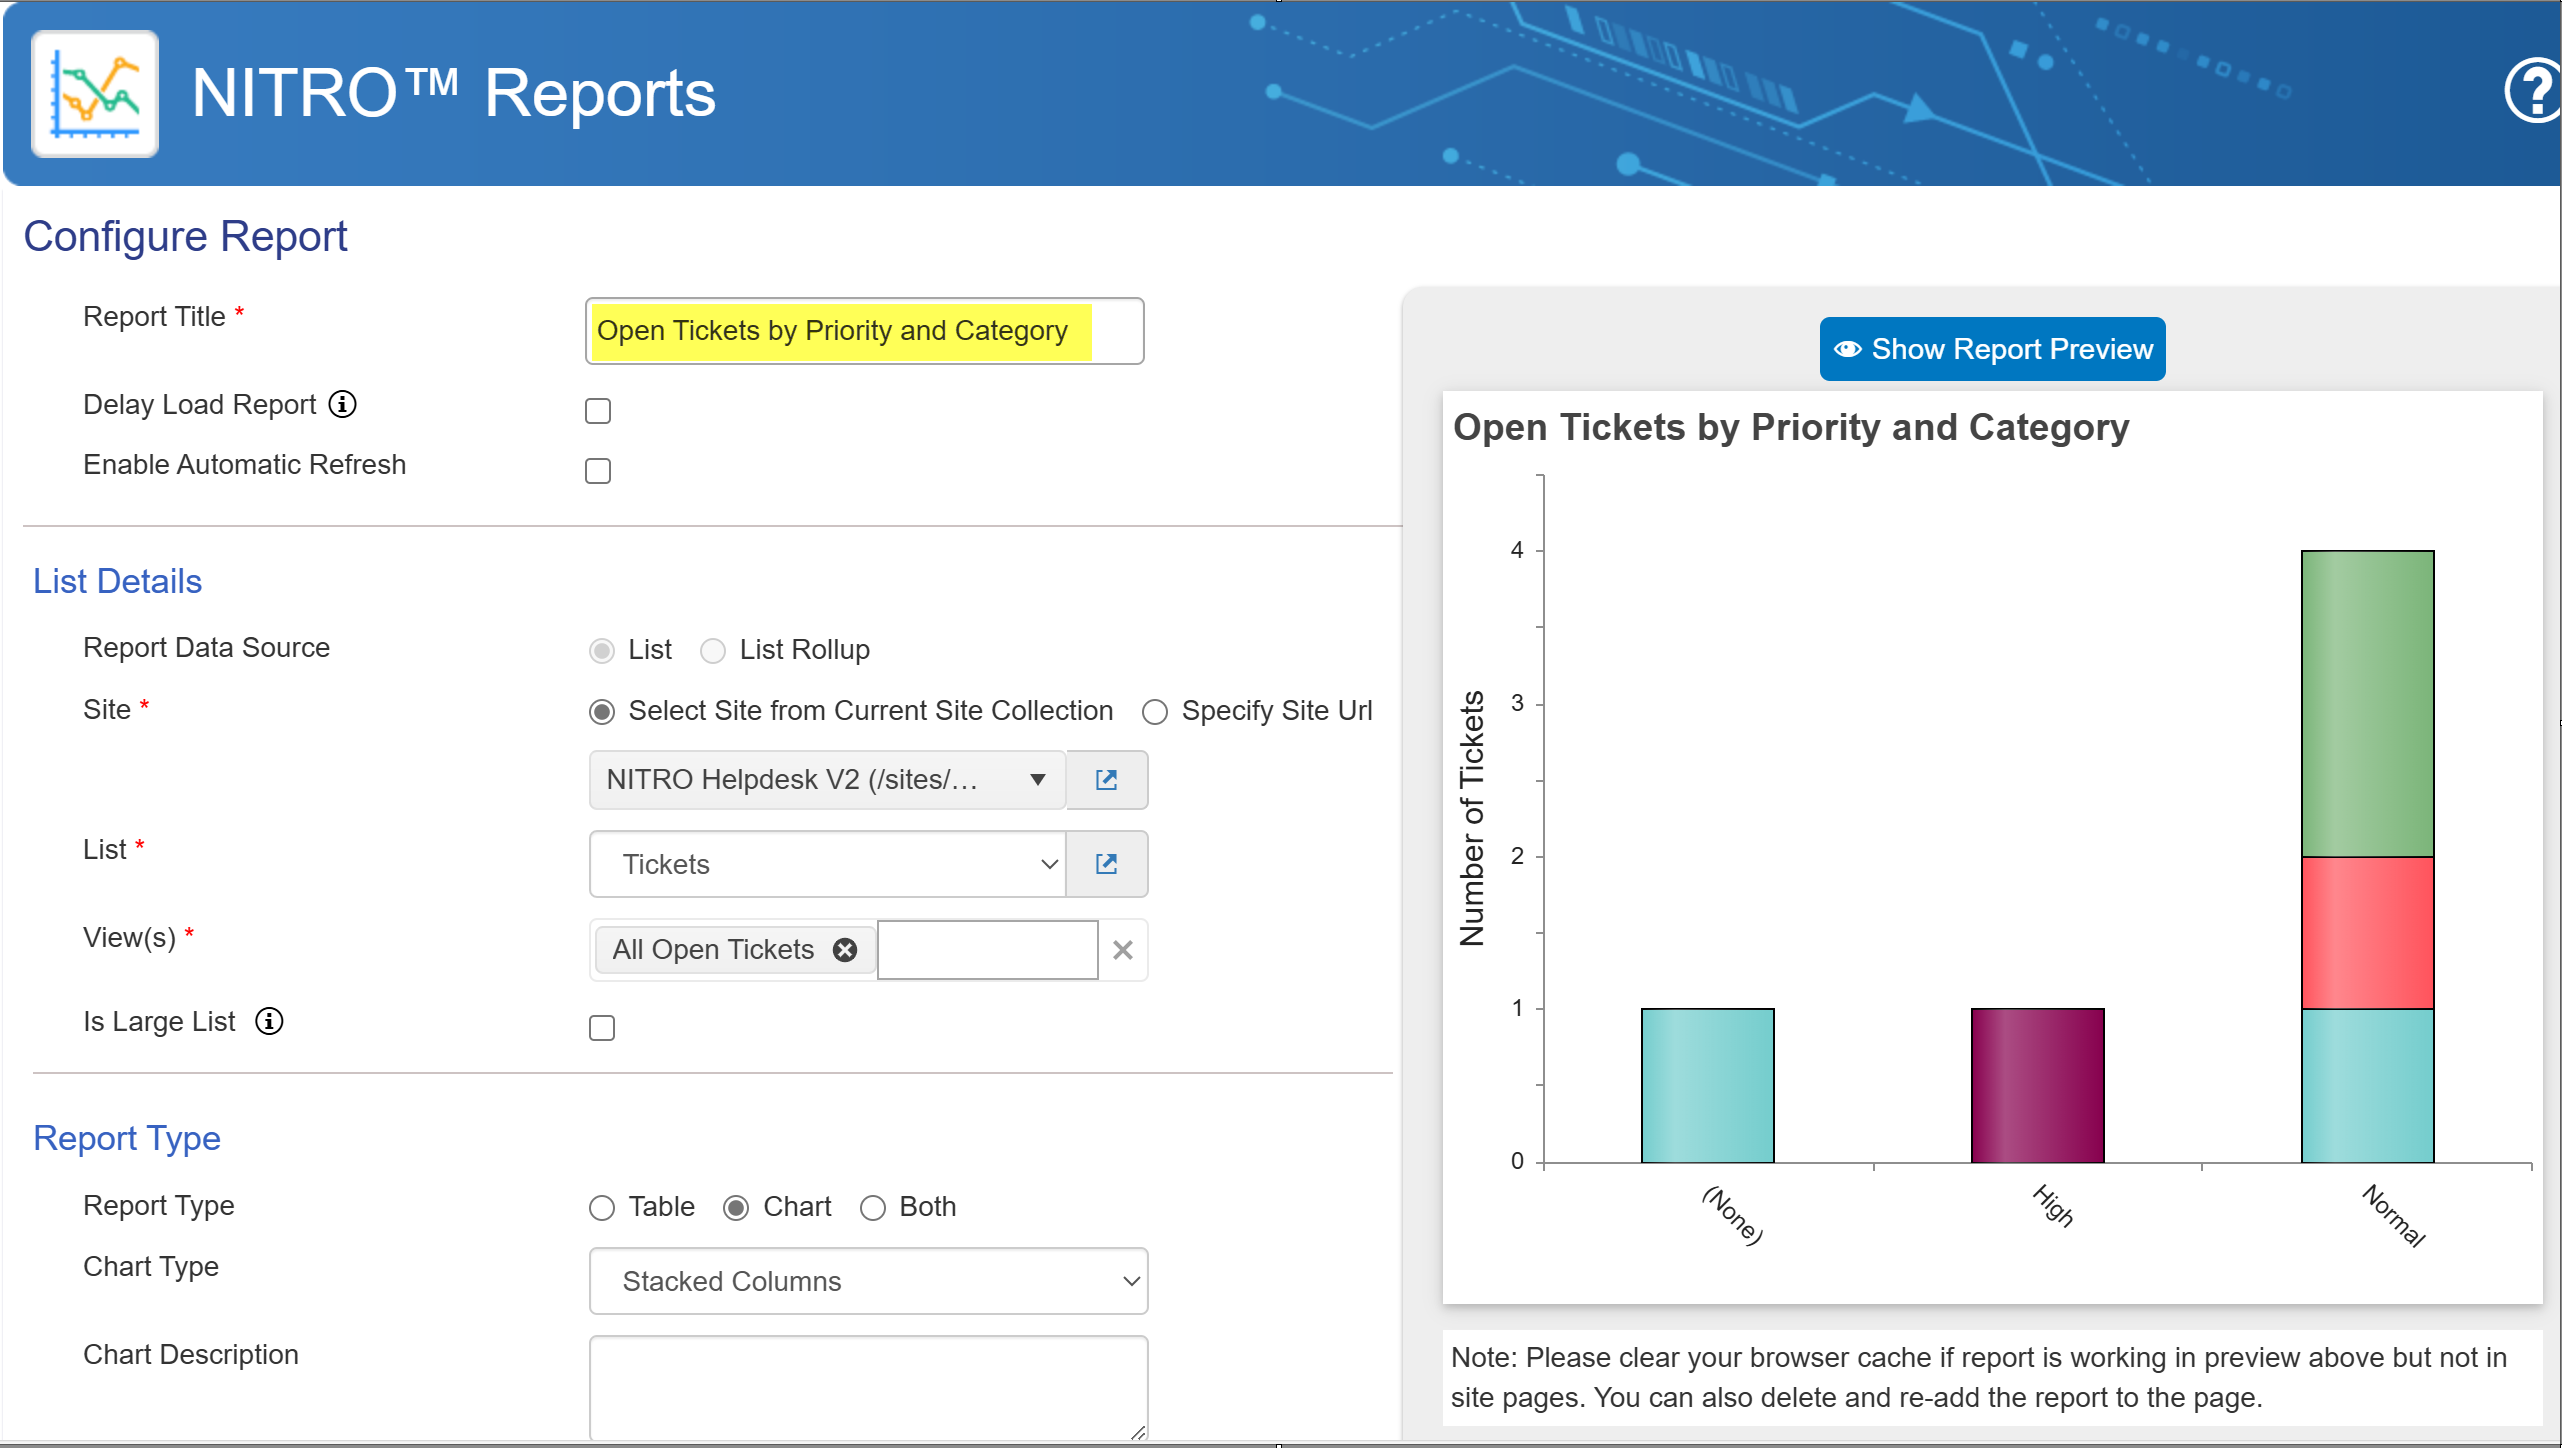
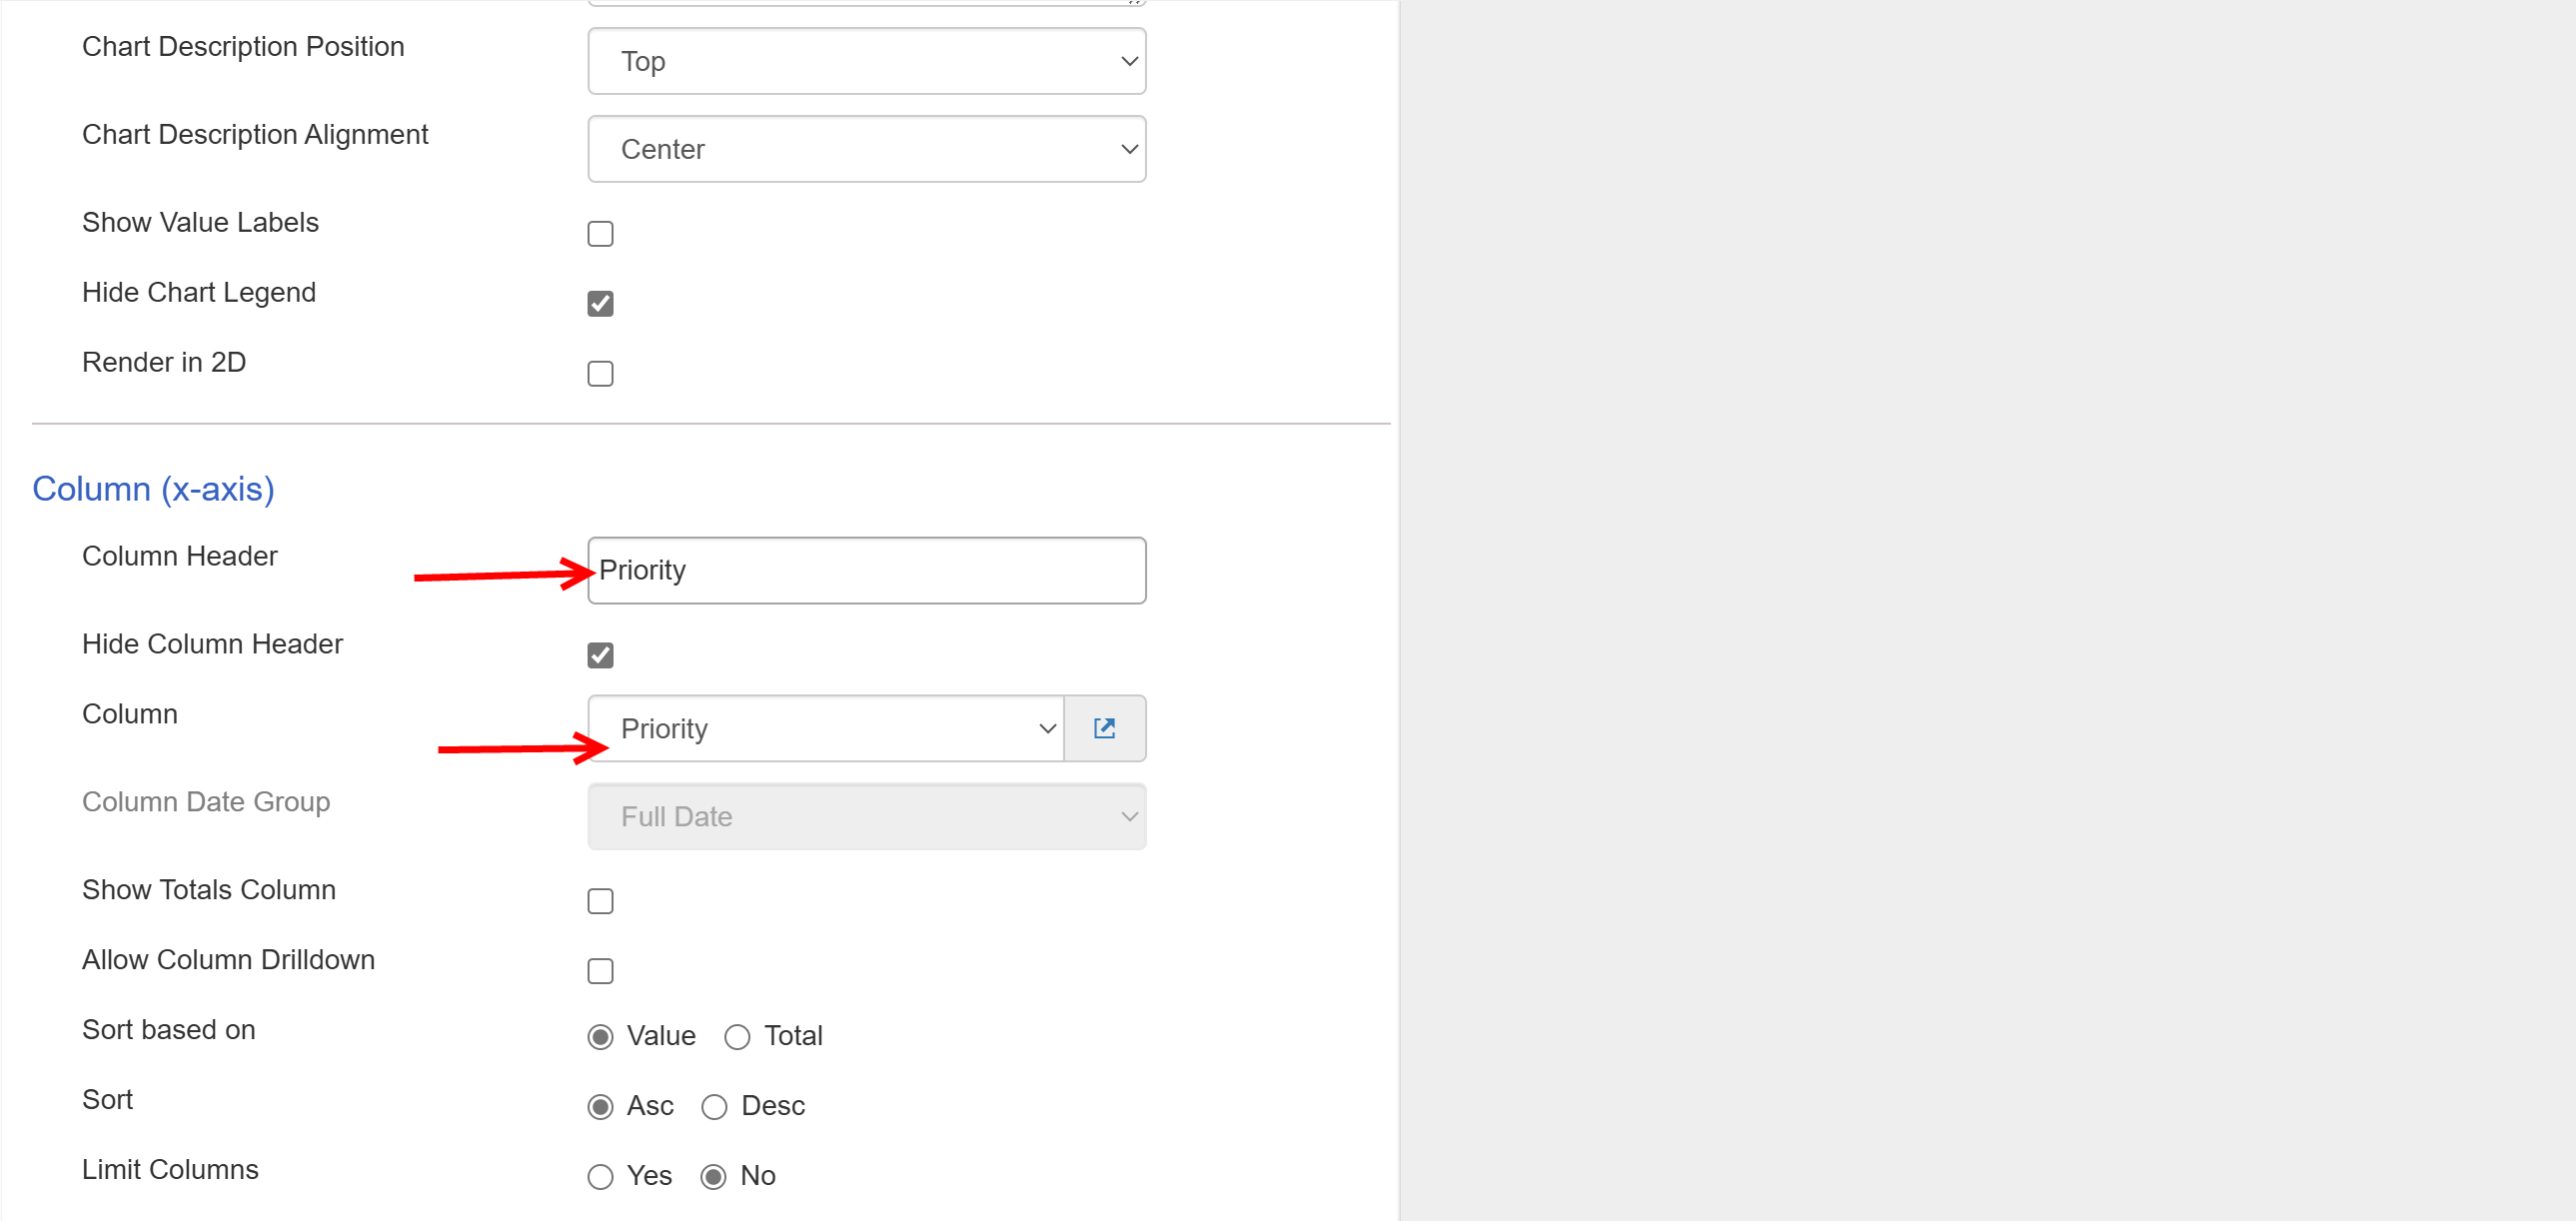
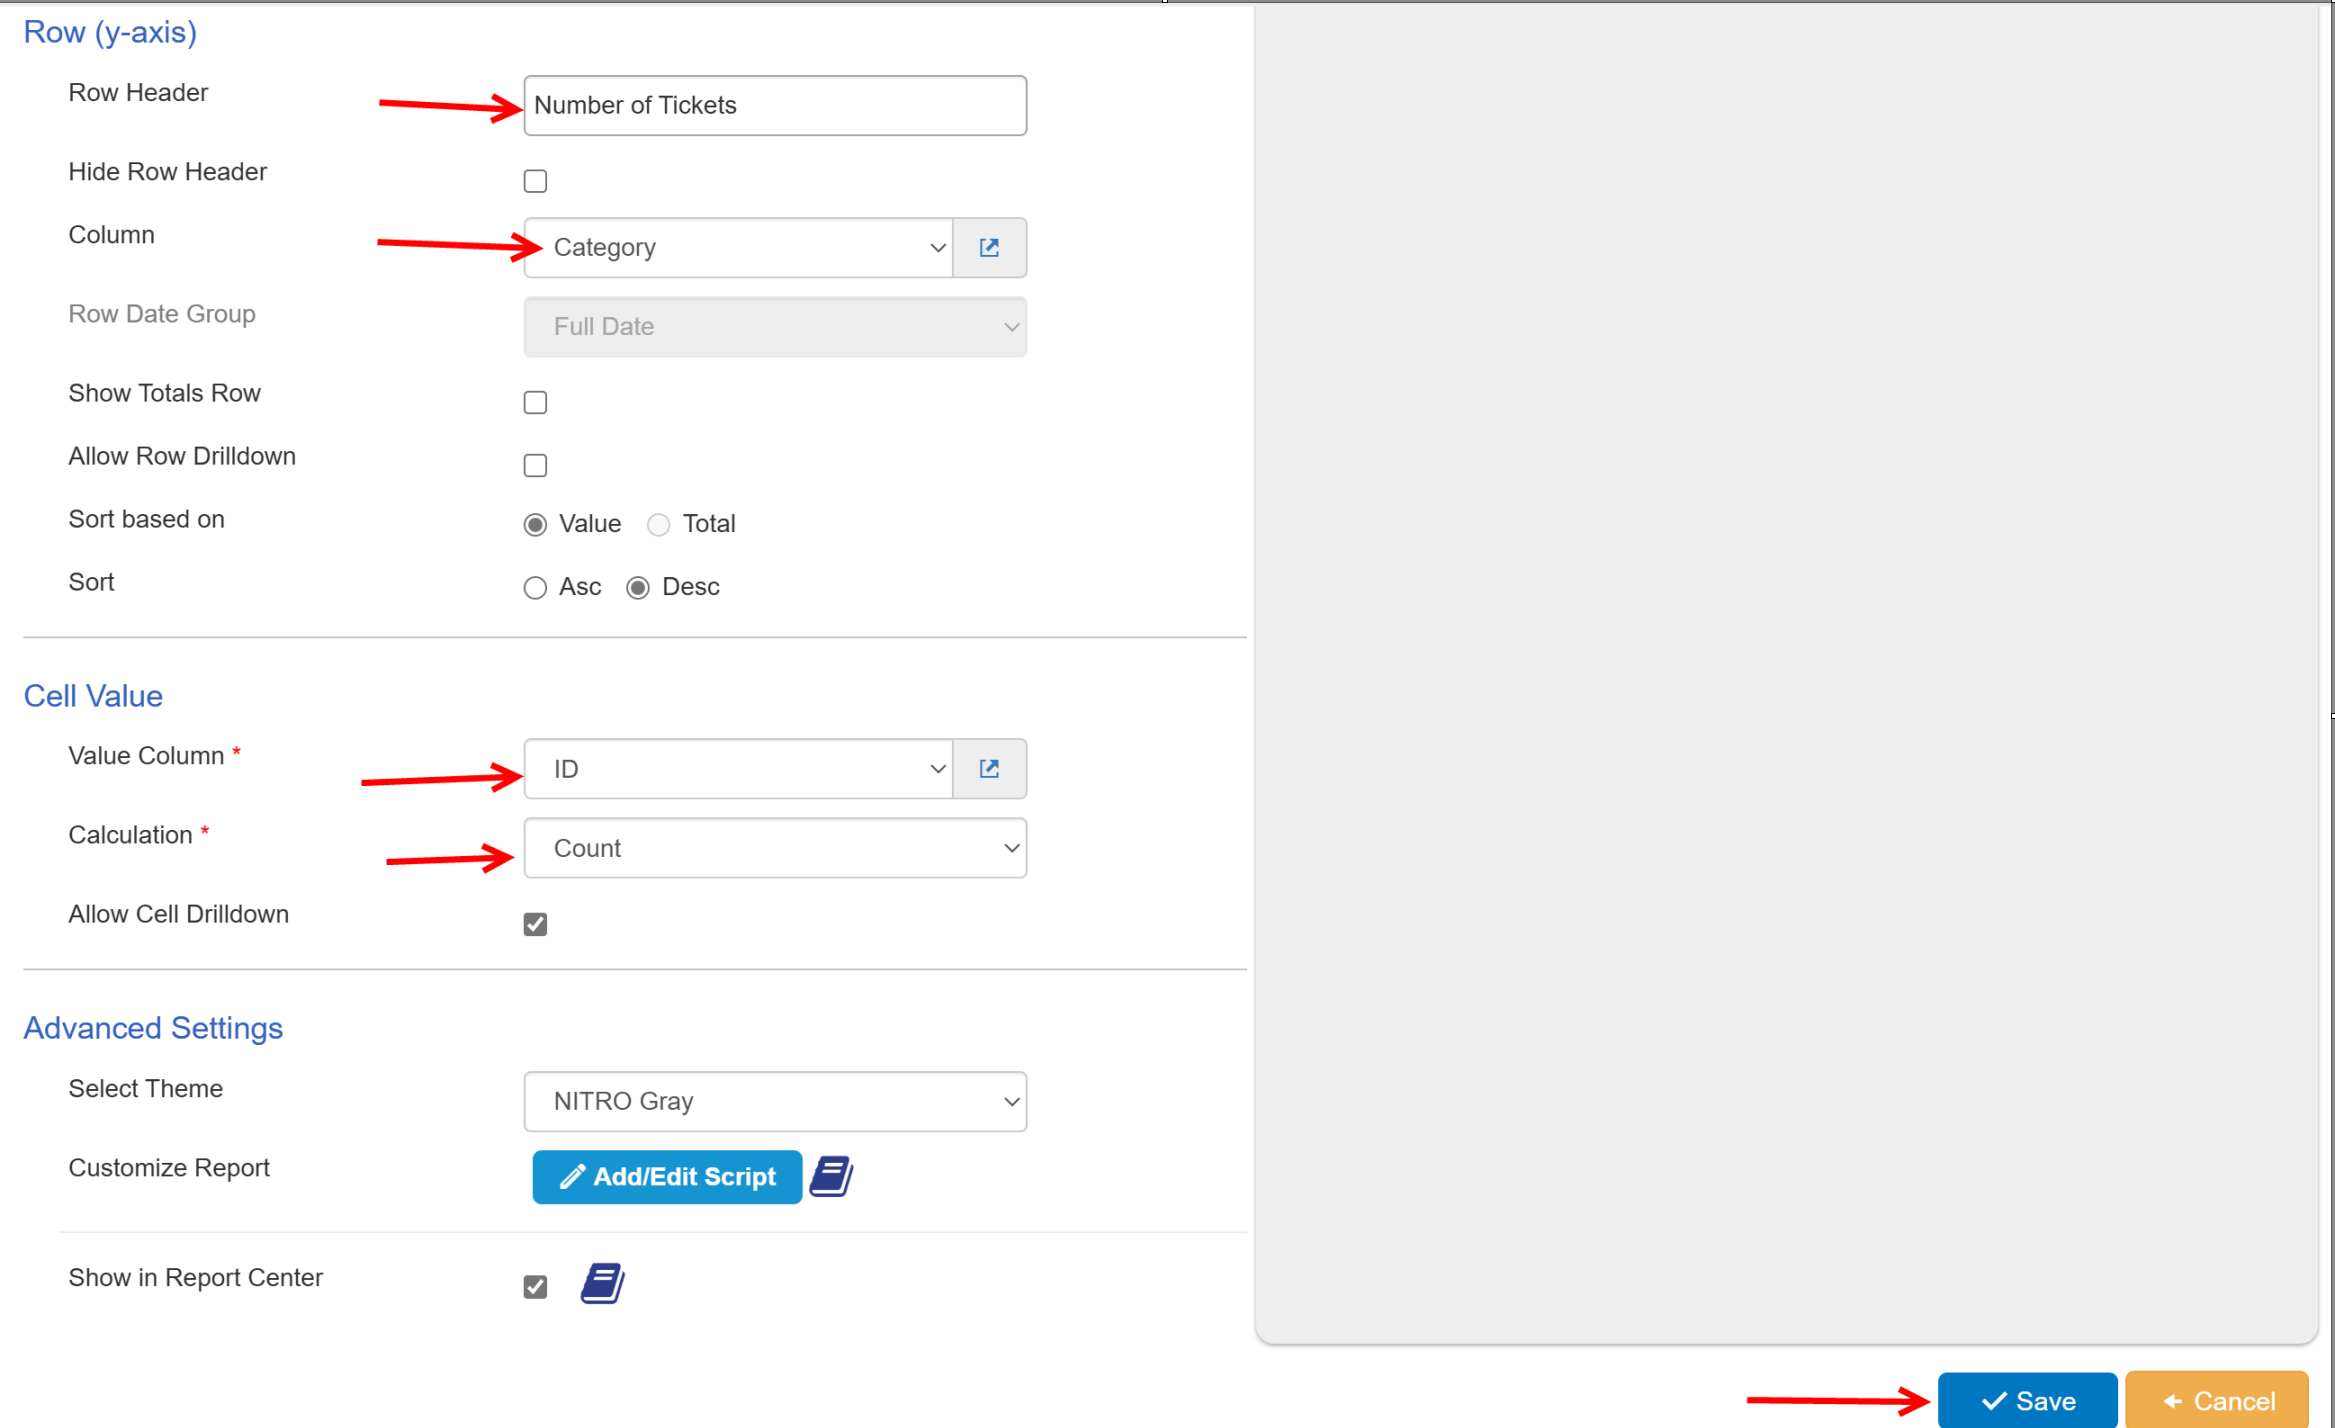
Report Configuration (Open Tickets by Category and priority)
Go to Report Center -> Manage Reports and create new report like shown below
SharePoint list view configuration
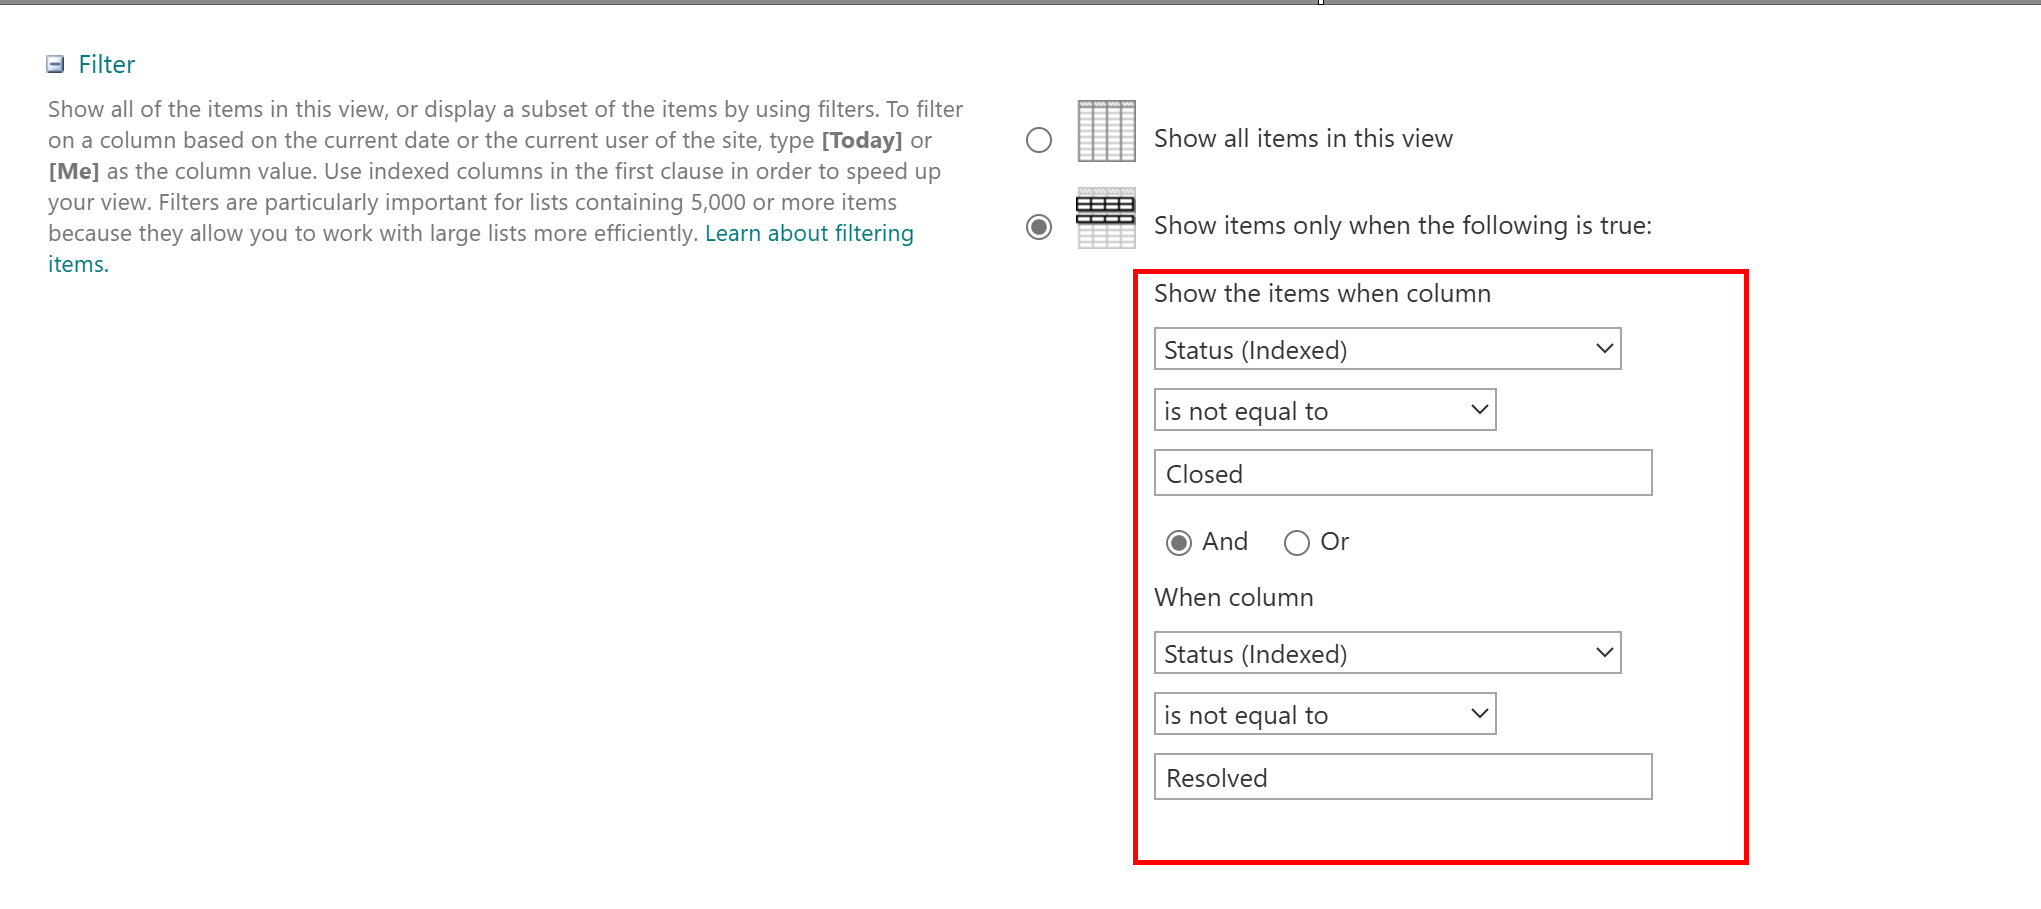
Create “All Open Tickets” view like shown below.
Go to Tickets list -> List Settings -> Create a new view with required view columns along with below filter conditions.
Workflow configuration
Open “Crow Canyon Nitro Studio” -> Crow Canyon Workflow Manager and create new workflow as shown below
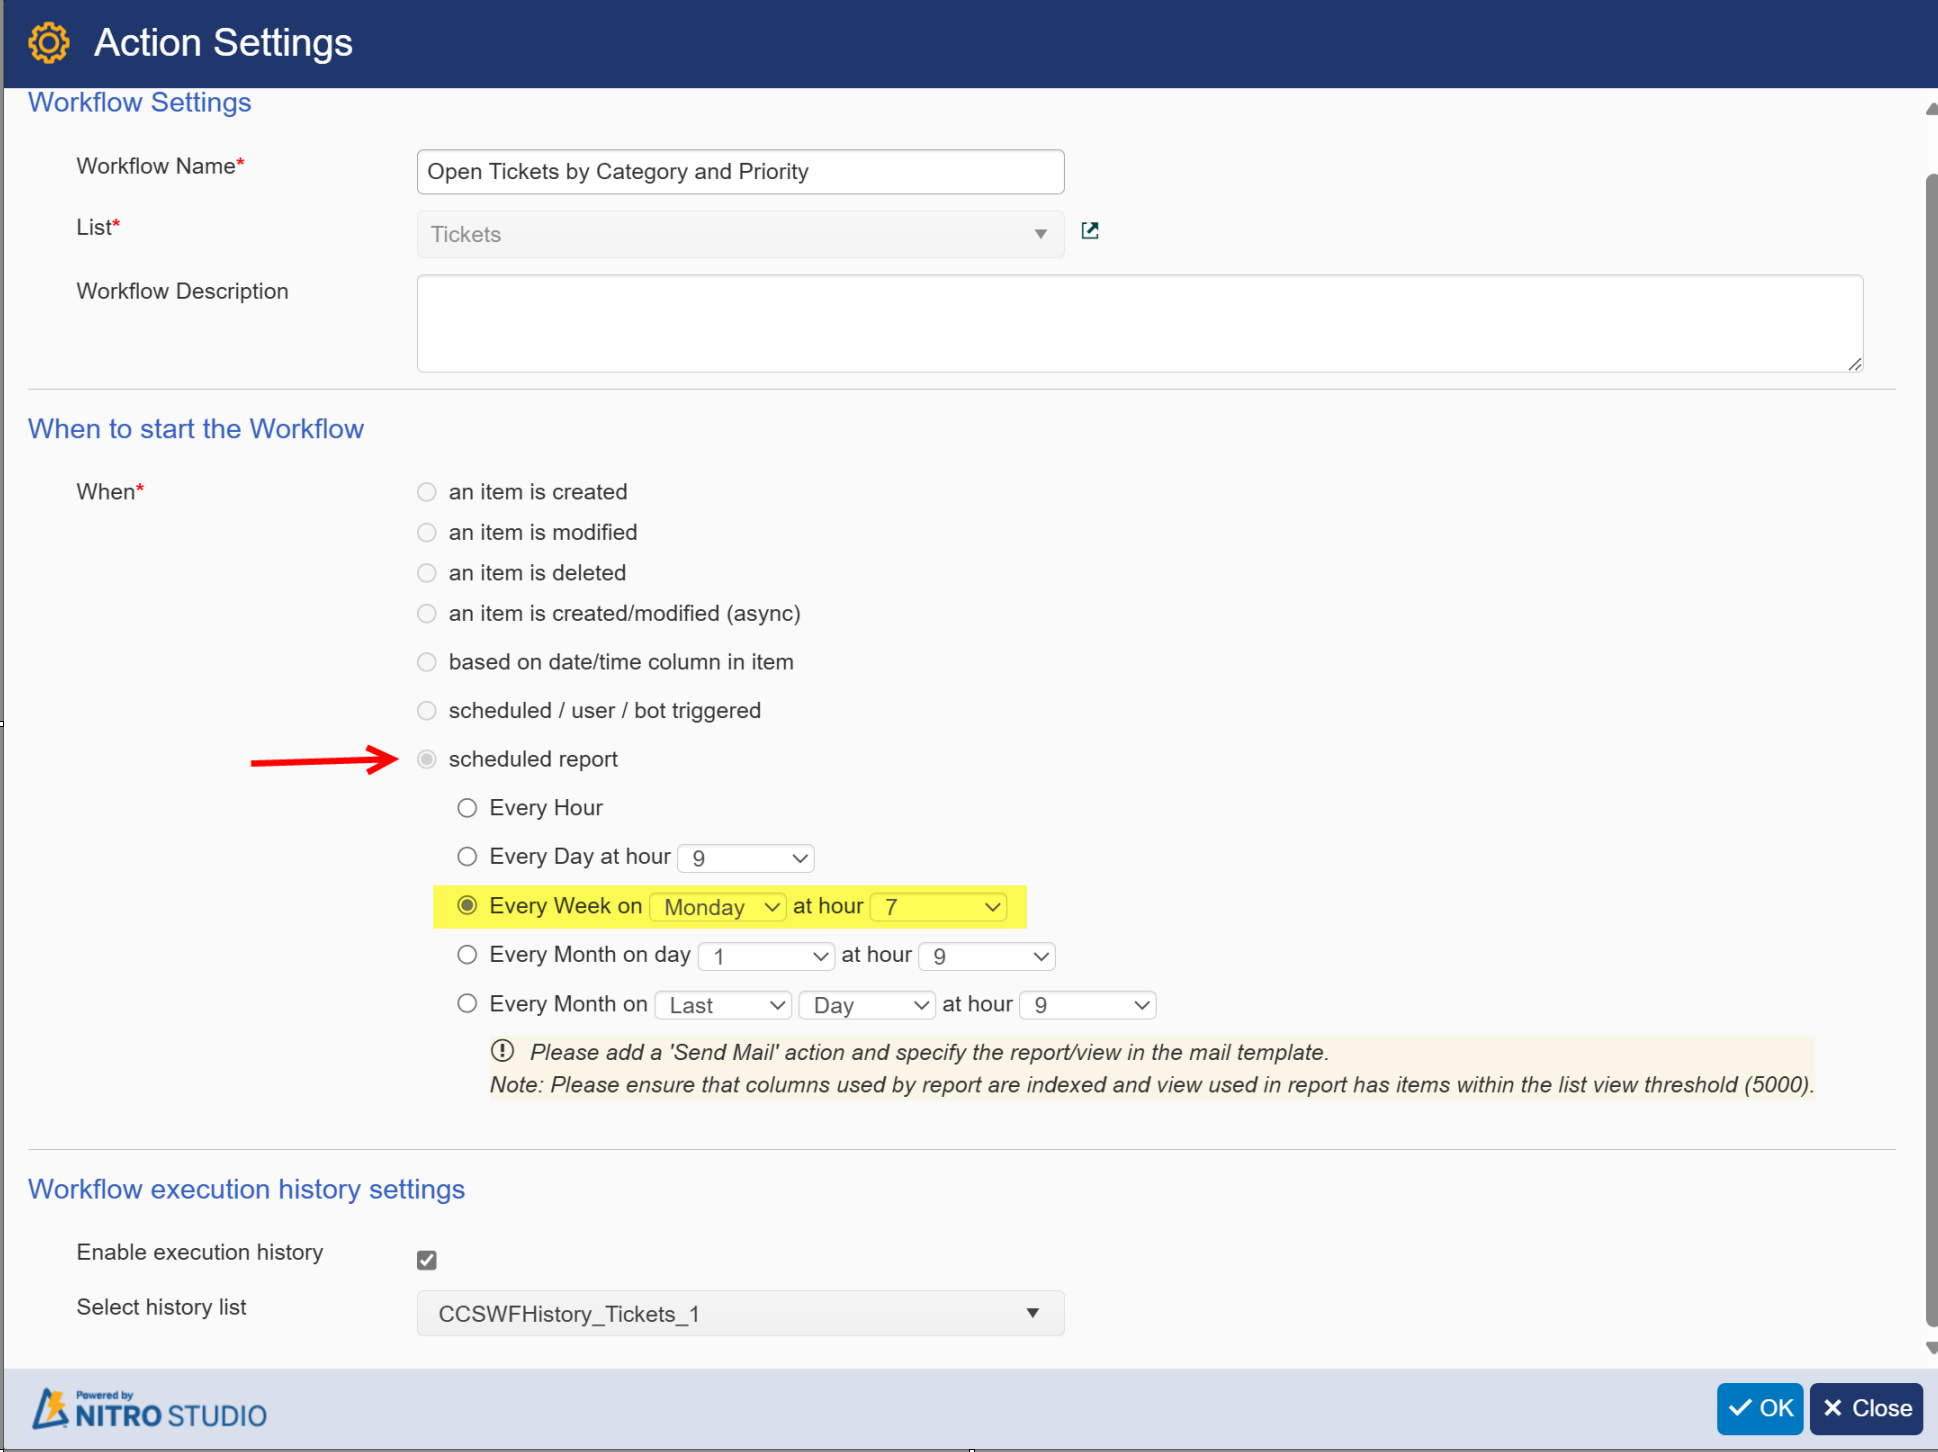
The below workflow will run for every week on Monday at 7 AM and will send mail to recipients with selected report as an attachment.
Workflow settings
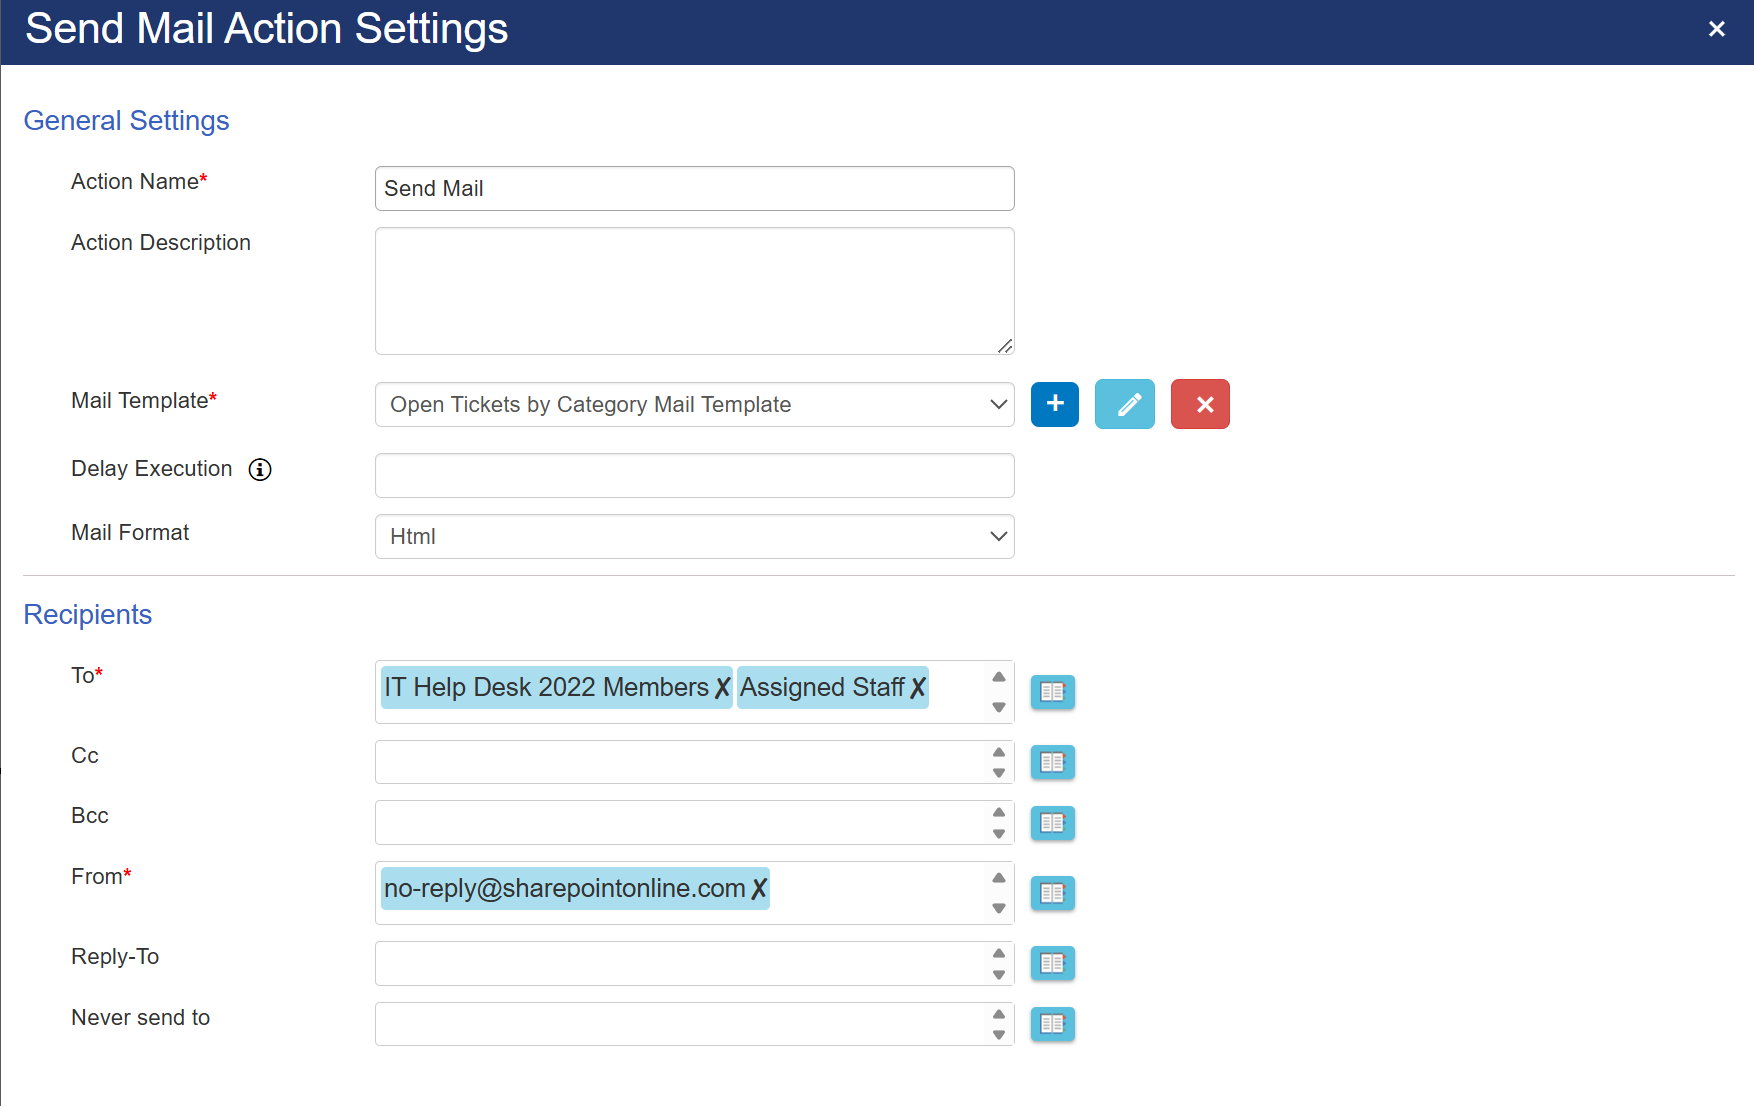
Send Mail Action
Mail Template configuration
All Open Tickets View data in Tickets List:

Sample output
Report:
