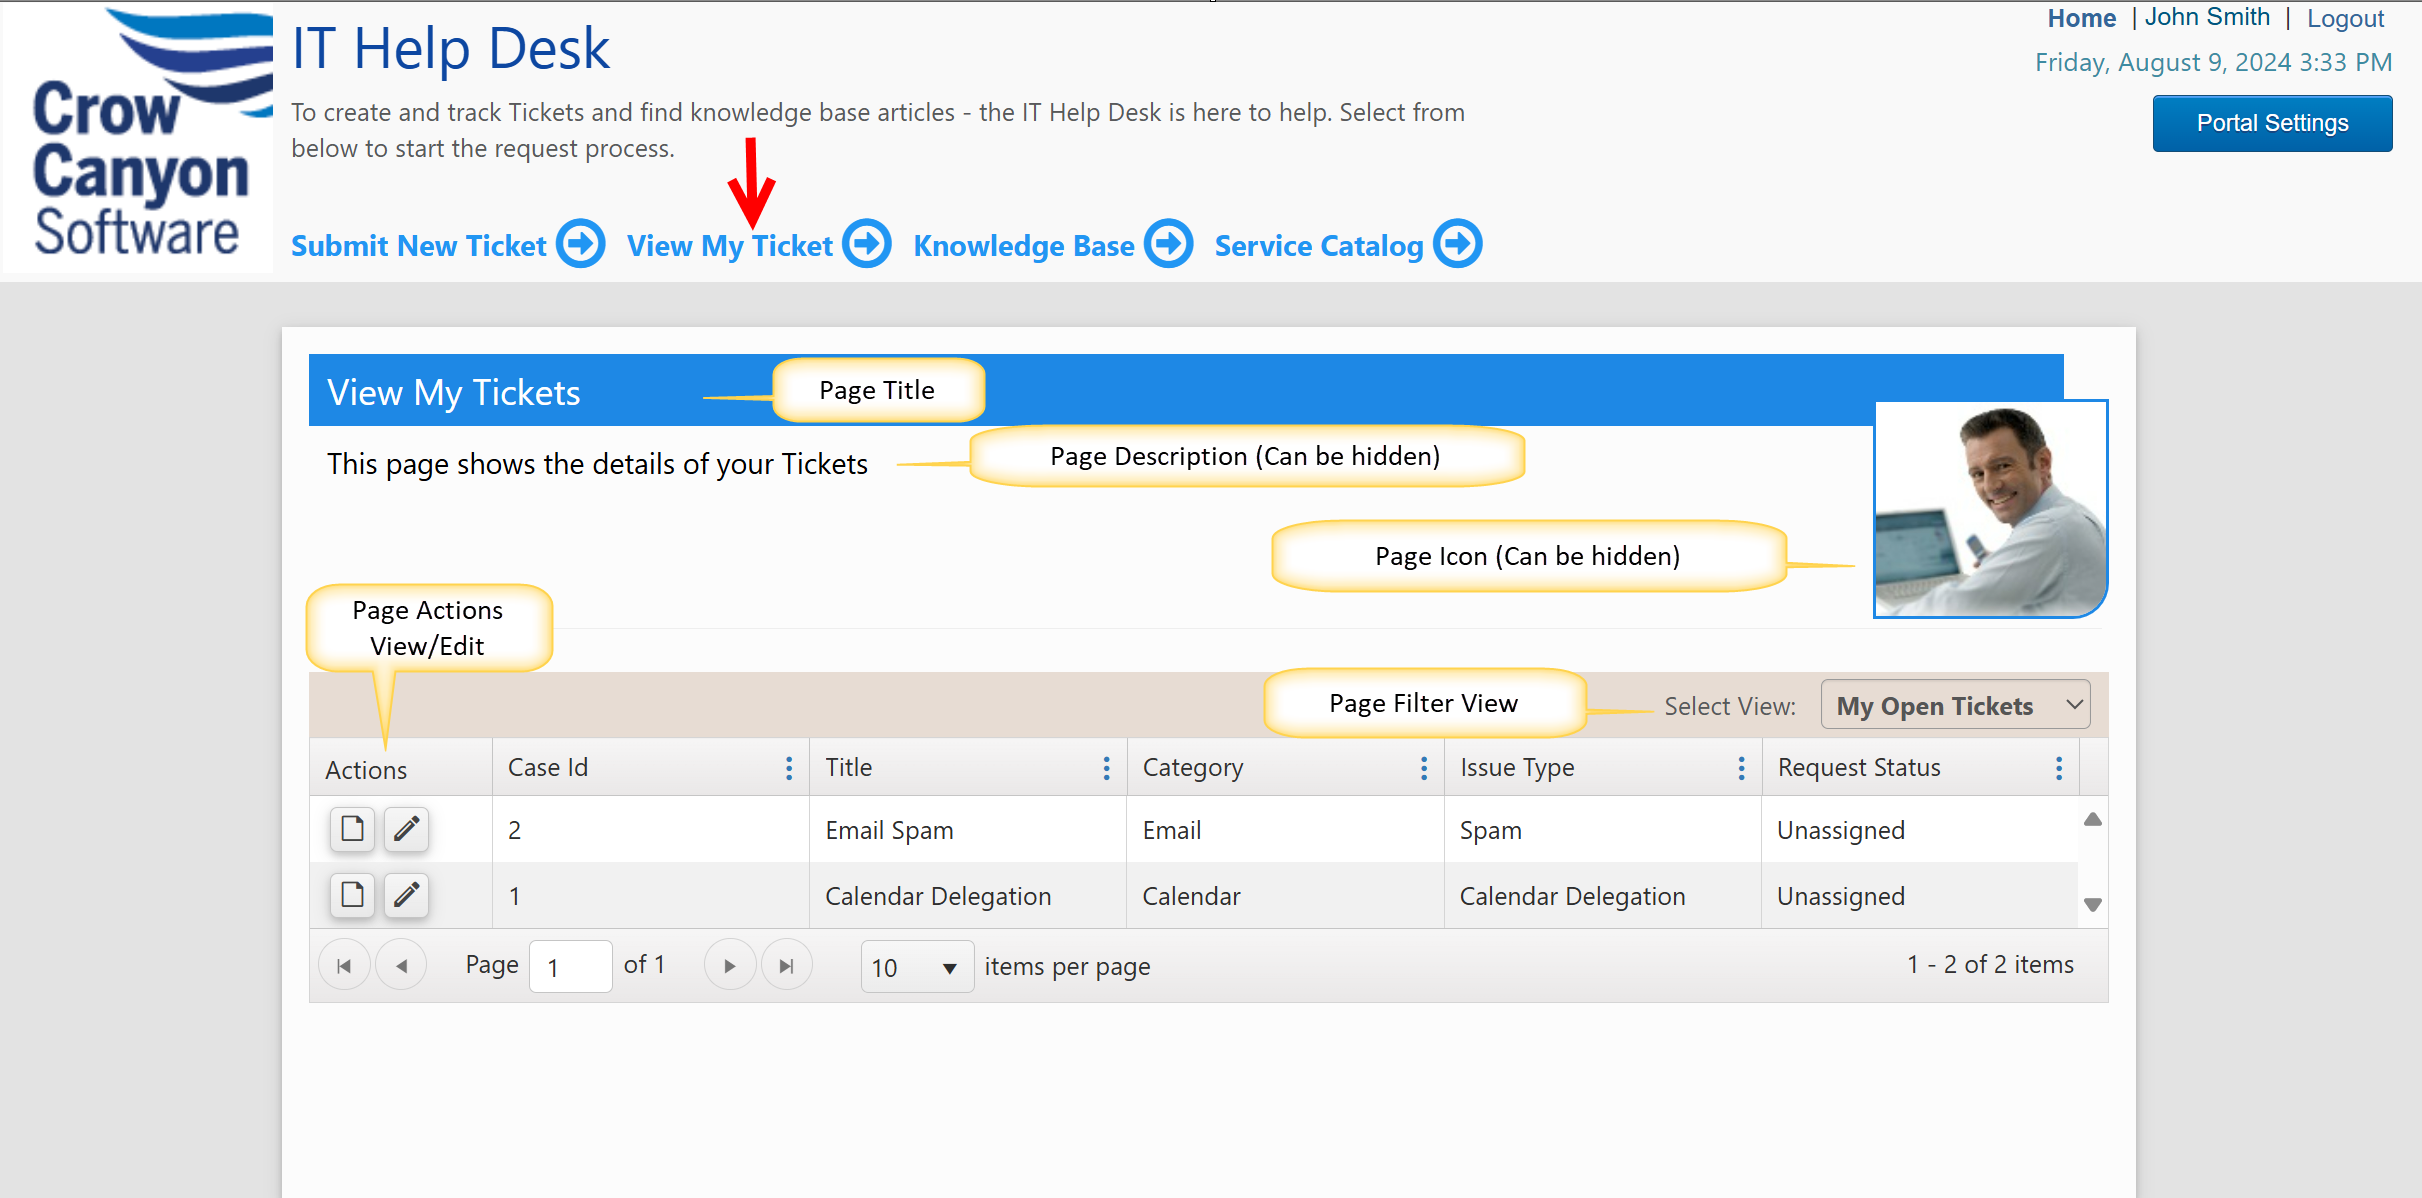
When the New Page button is pressed in Portal Pages, the screen to configure that type of Portal Page comes up. For reference, here is a screenshot of what the List View Page looks like in the Portal:
Example of List View Page in the Portal

CONFIGURATION IN PORTAL PAGE SETTINGS
Top Section
Each Portal Page is given a Page Name. "Web" refers to the SharePoint Site. "List" refers to which list this page will work with.

View Page UI Settings
A page can have an icon or image. This needs to be a JPEG file 135px X 125px. It can be selected by using the Choose File and Upload Image buttons. Click "Hide" checkbox to not show an image or icon.
A Page Title is required. A Page Description can also be added (which can be set to Hide so it does not show to the Portal end users).

View Page Settings
This determines how many items are shown per page and also the total limit of items shown. The List View Page will have pagination if the number of items exceeds the per page limit.

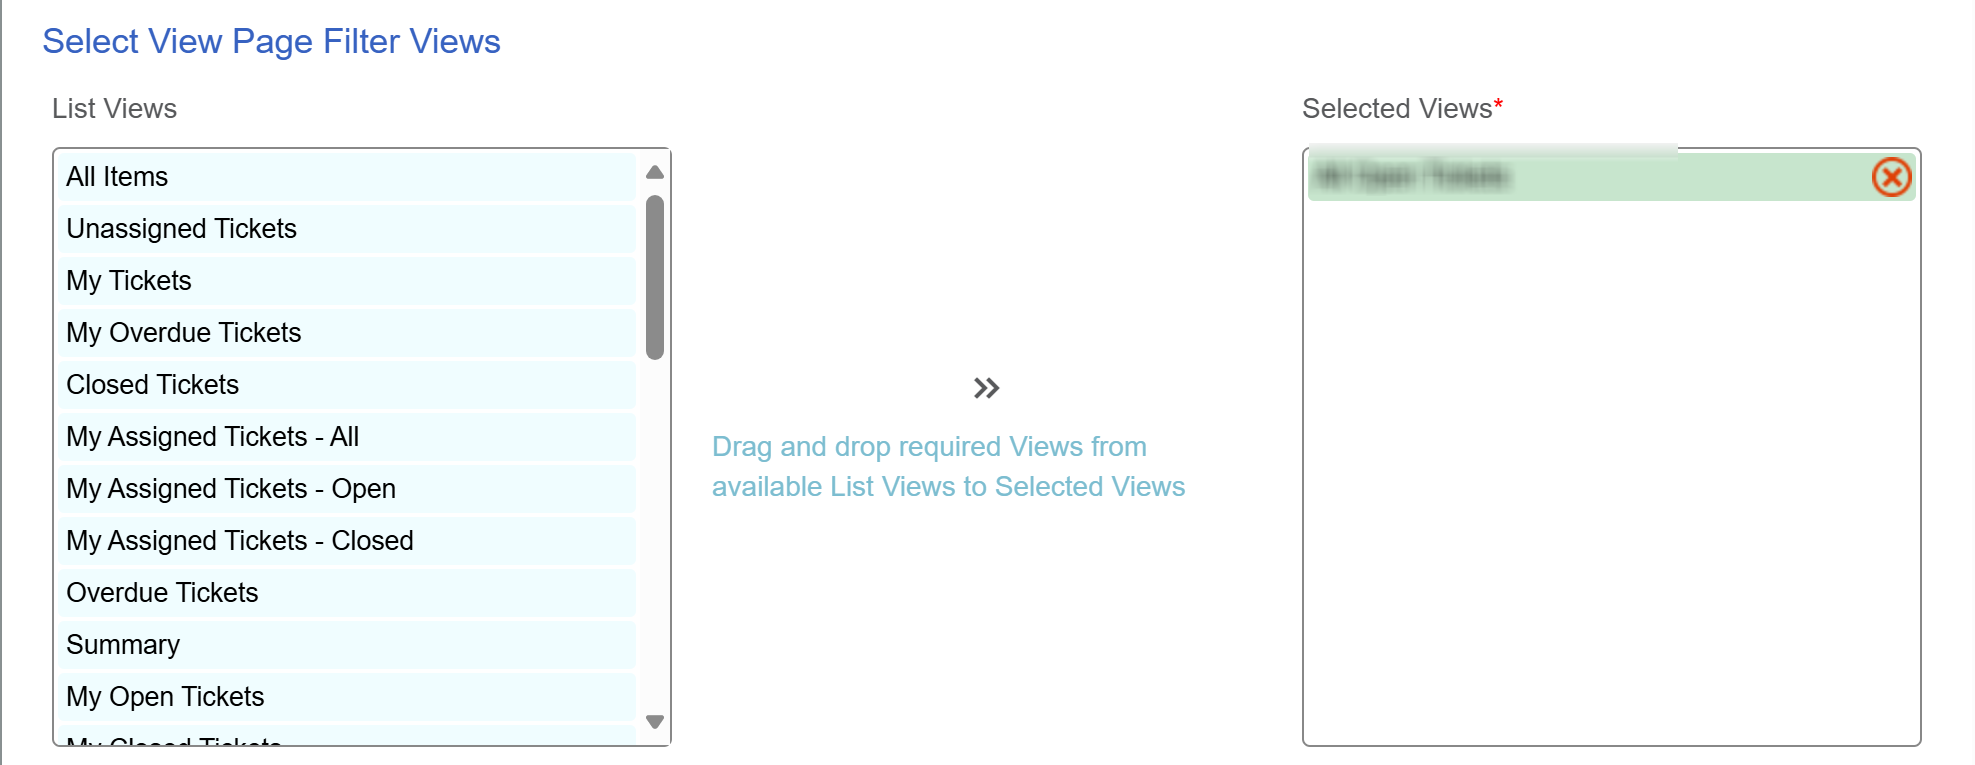
Select View Page Filter Views
This determines what views are listed in the "Select View" drop down on the page. The list on the left is a list of views that are on the List. Any of these views can be moved to the right column so that the view shows up as an option for the user in the Select View drop down.

Page Actions
"Actions" on the List View page allow the item to be opened in display or edit mode. The selections below set the default page for displaying or editing an item using the Actions on the List View Page. However, if the item is part of a Portal Forms group, the Display Form or Edit Form of that group will be used instead.

Show Large Buttons:
Normal buttons = 26px X 26px
Large buttons = 40px X 40px