NOTE: it is important to have a clear idea of how the approval workflow will run prior to configuring it. You should know the details of the approval process -- who approves it, how many levels, what triggers an approval, if having multiple approvers requires all or just one to approve, etc. While the approval workflow can be re-configured after it is set up, it is best to have as much knowledge of the process as possible prior to setting it up.

New Approval Setting
Click the "New Setting" button.

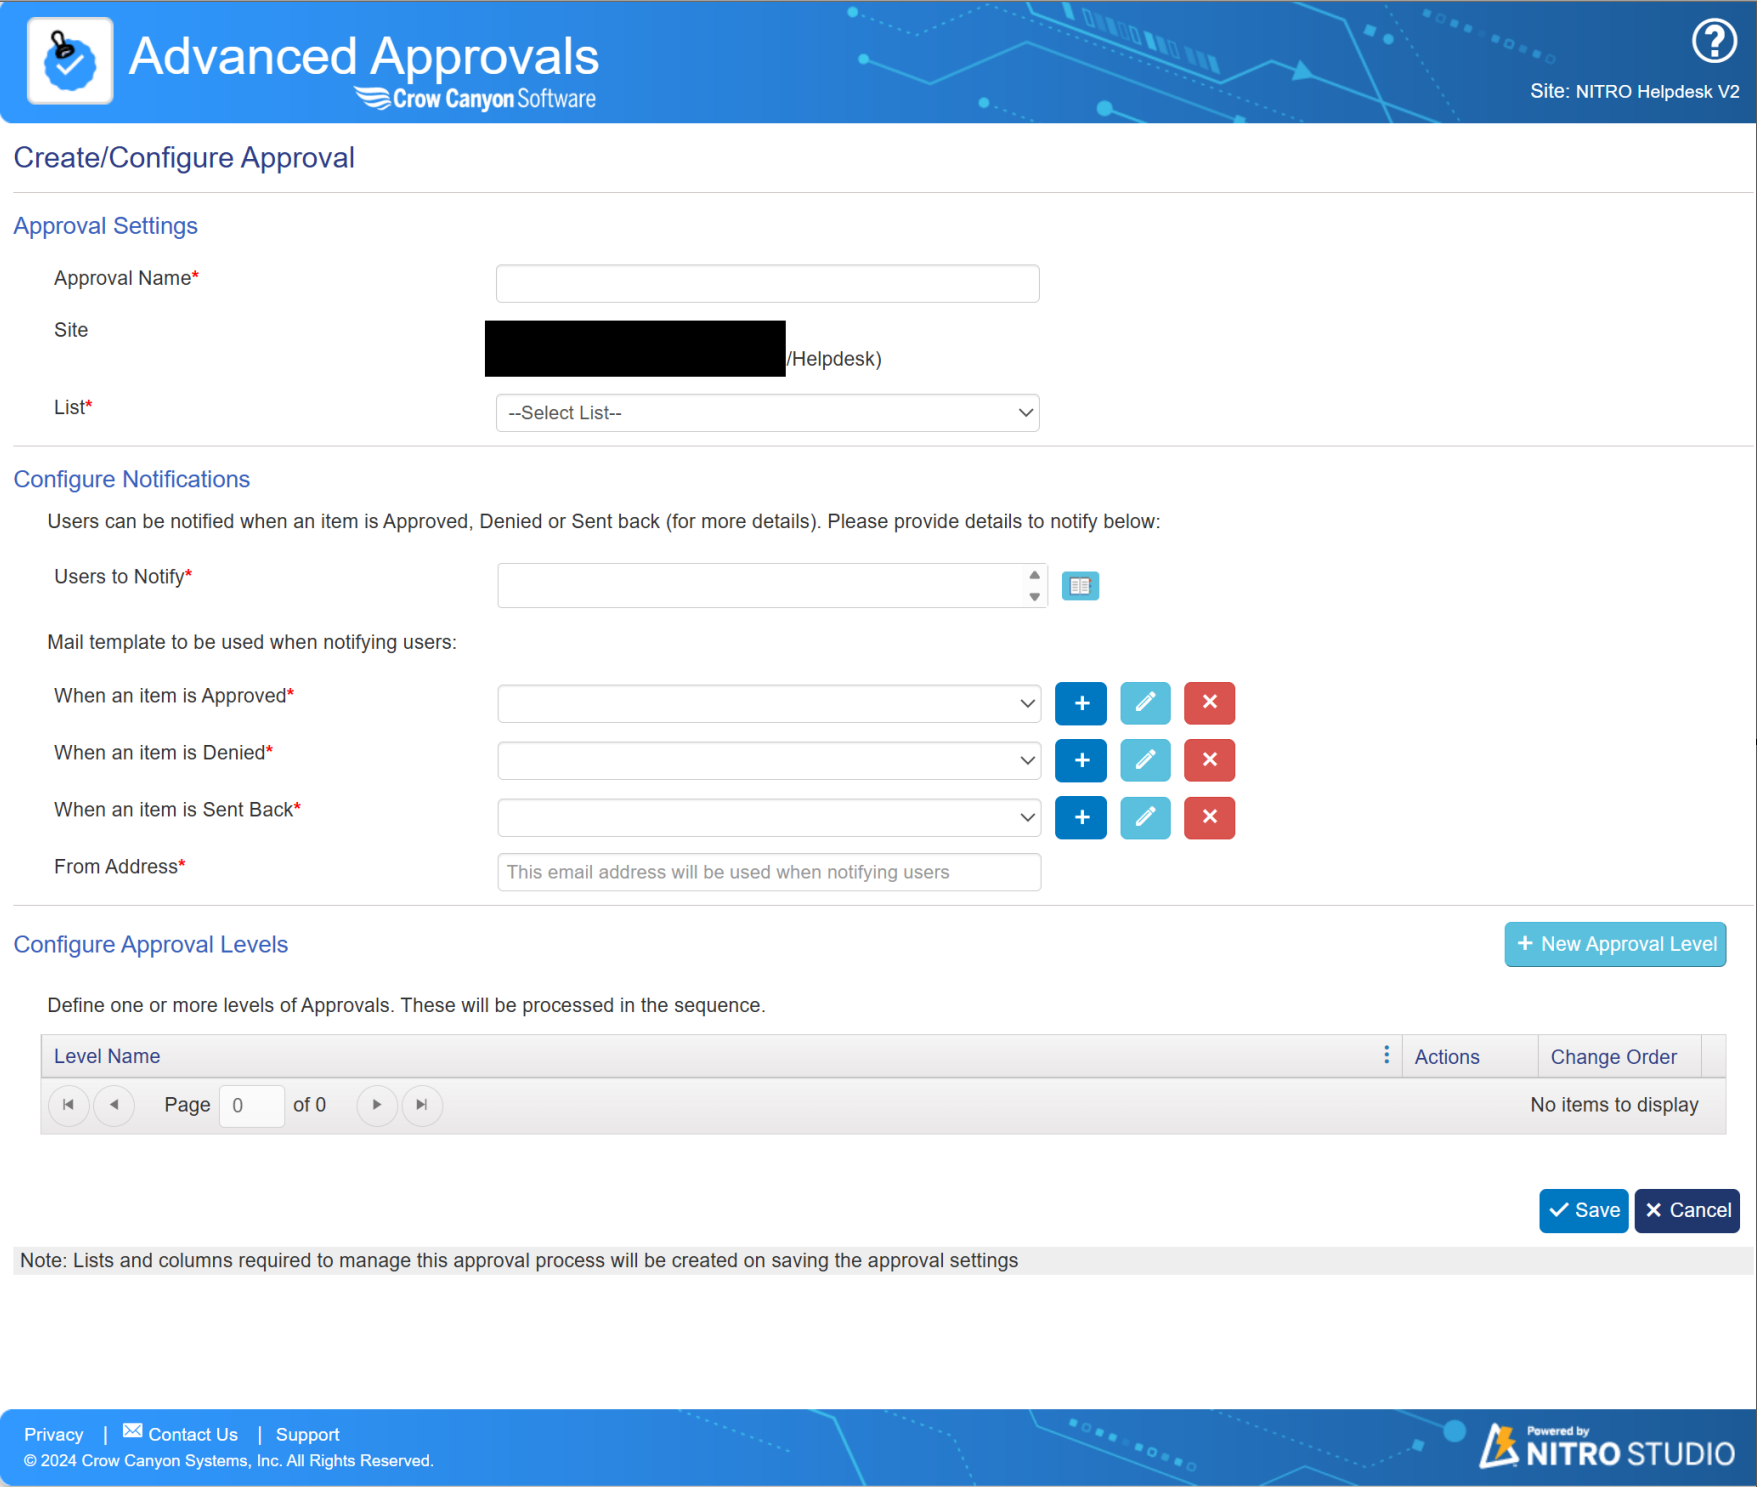
Approval Settings
Approval Name -- Enter a unique name for this approval setting.
Site and List --Select Site and List. The approval setting will run on items in this List. Note that each list can only have one approval defined.
Configure Notifications
This Section is used to configure settings to notify users when item is Approved, Denied or Sent Back.
Users to Notify - This field allows you to specify which users should receive notifications when certain actions are taken on an item. The notifications can be sent when:
•The item is Approved.
•The item is Denied.
•The item is Sent back for more information or clarification.
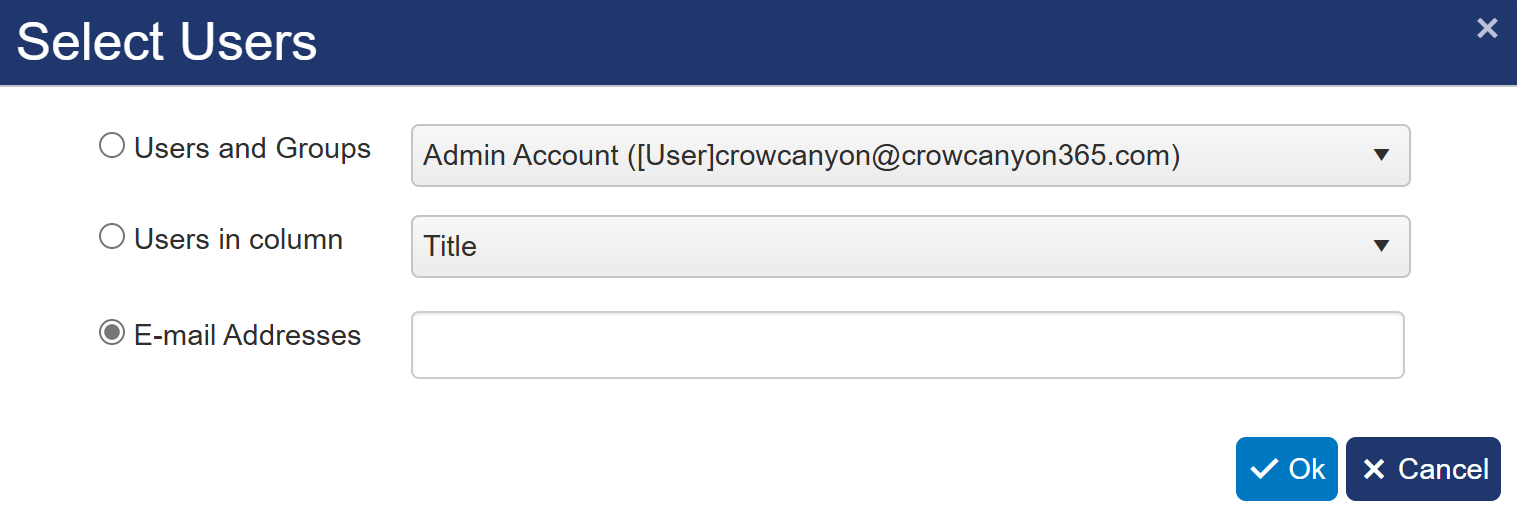
Click the icon at the end of the box to select a recipient. Multiple recipients can be selected by opening this box multiple times.

Users and Groups drop list is used to select users and groups from SharePoint site.
Users in column drop list is used to select users from a column on the current list.
Email Addresses text box is used to enter email addresses manually.
Note: You must select at least one user column or enter at least one email address.
Mail template to be used when notifying users:
"Approved" dropdown is used to select mail template to send when an item is Approved.
"Denied" dropdown is used to select mail template to send when an item is Denied.
"Sent Back" dropdown is used to select mail template to send when an item is Sent Back.

 Create a Mail Template -- see Configuring Mail Templates for details. Note that the templates created in the Advanced Approval app only apply to Approvals and are not used elsewhere in NITRO Studio.
 Edit a Mail Template -- a template must be selected in the drop list in order to edit it.
 Delete a Mail Template -- a template must be selected in the drop list in order to delete it.
From Address -- enter mail address from which notification emails will be sent.

Configure Approval Levels -- see the section of the manual on Approval Levels