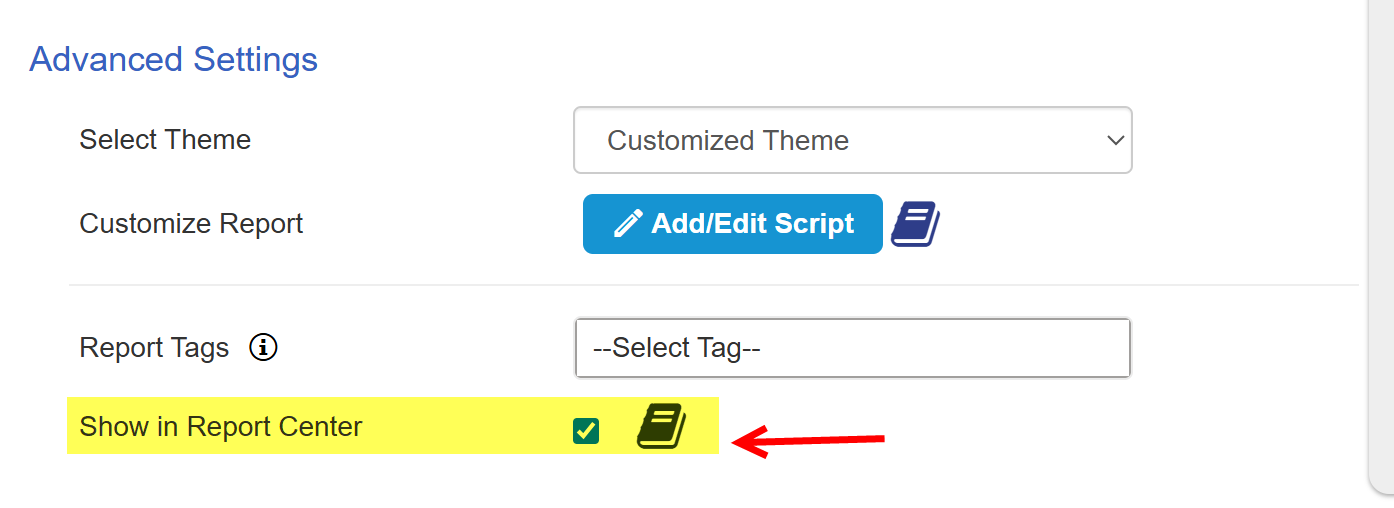
The Report Center lists all reports that have "Show in Report Center" checked in Report Configuration.
GO o Report Configuration -> Advanced Settings -> enable Show in Report Center
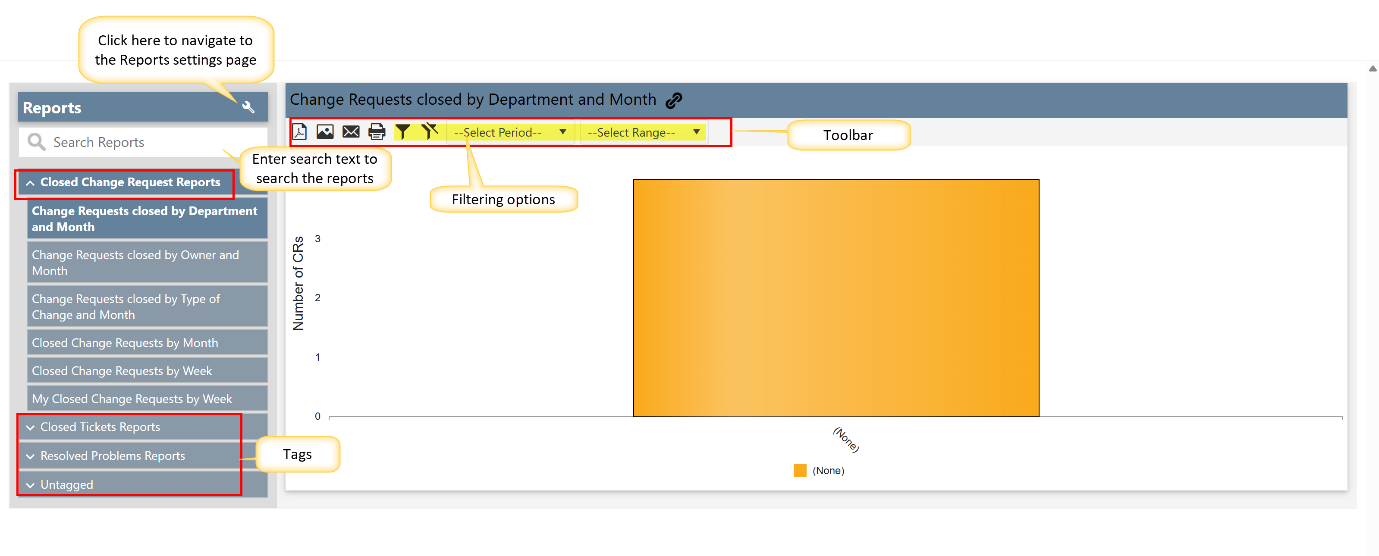
Report Center:
Report Center settings
Go to Site Contents -> Crow Canyon NITRO Apps -> NITRO Reports -> Report Center Tab
Report Center Features
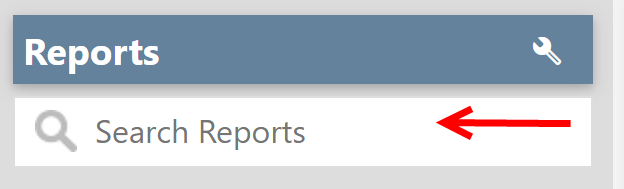
Enable Search: Turn on this option to display the Search Reports bar in left panel in the Report Center to search reports by title.
‘Search Reports’ in the Report Center
The Report Center includes a search functionality that allows users to quickly find reports by name or relevant keywords. This feature helps in locating specific reports without manually scrolling through a long list.
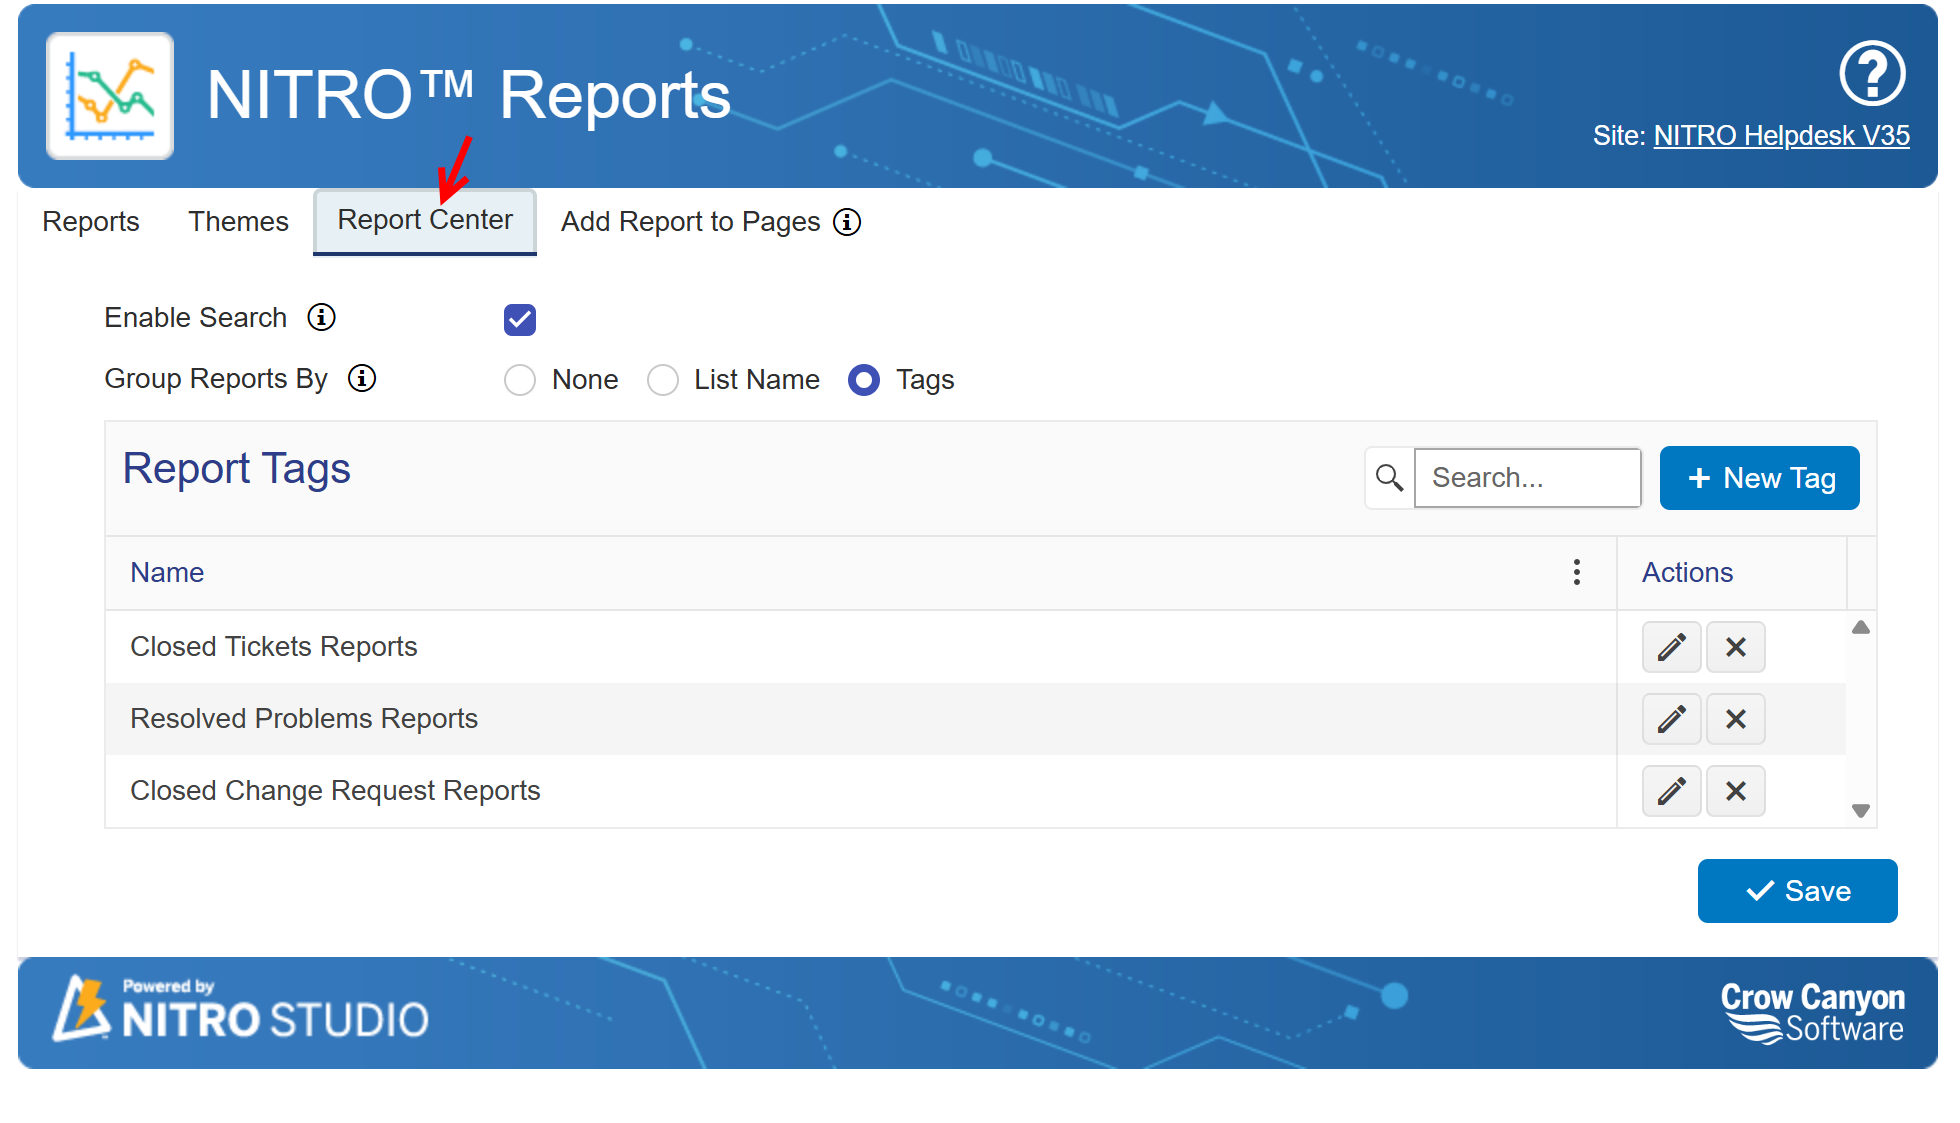
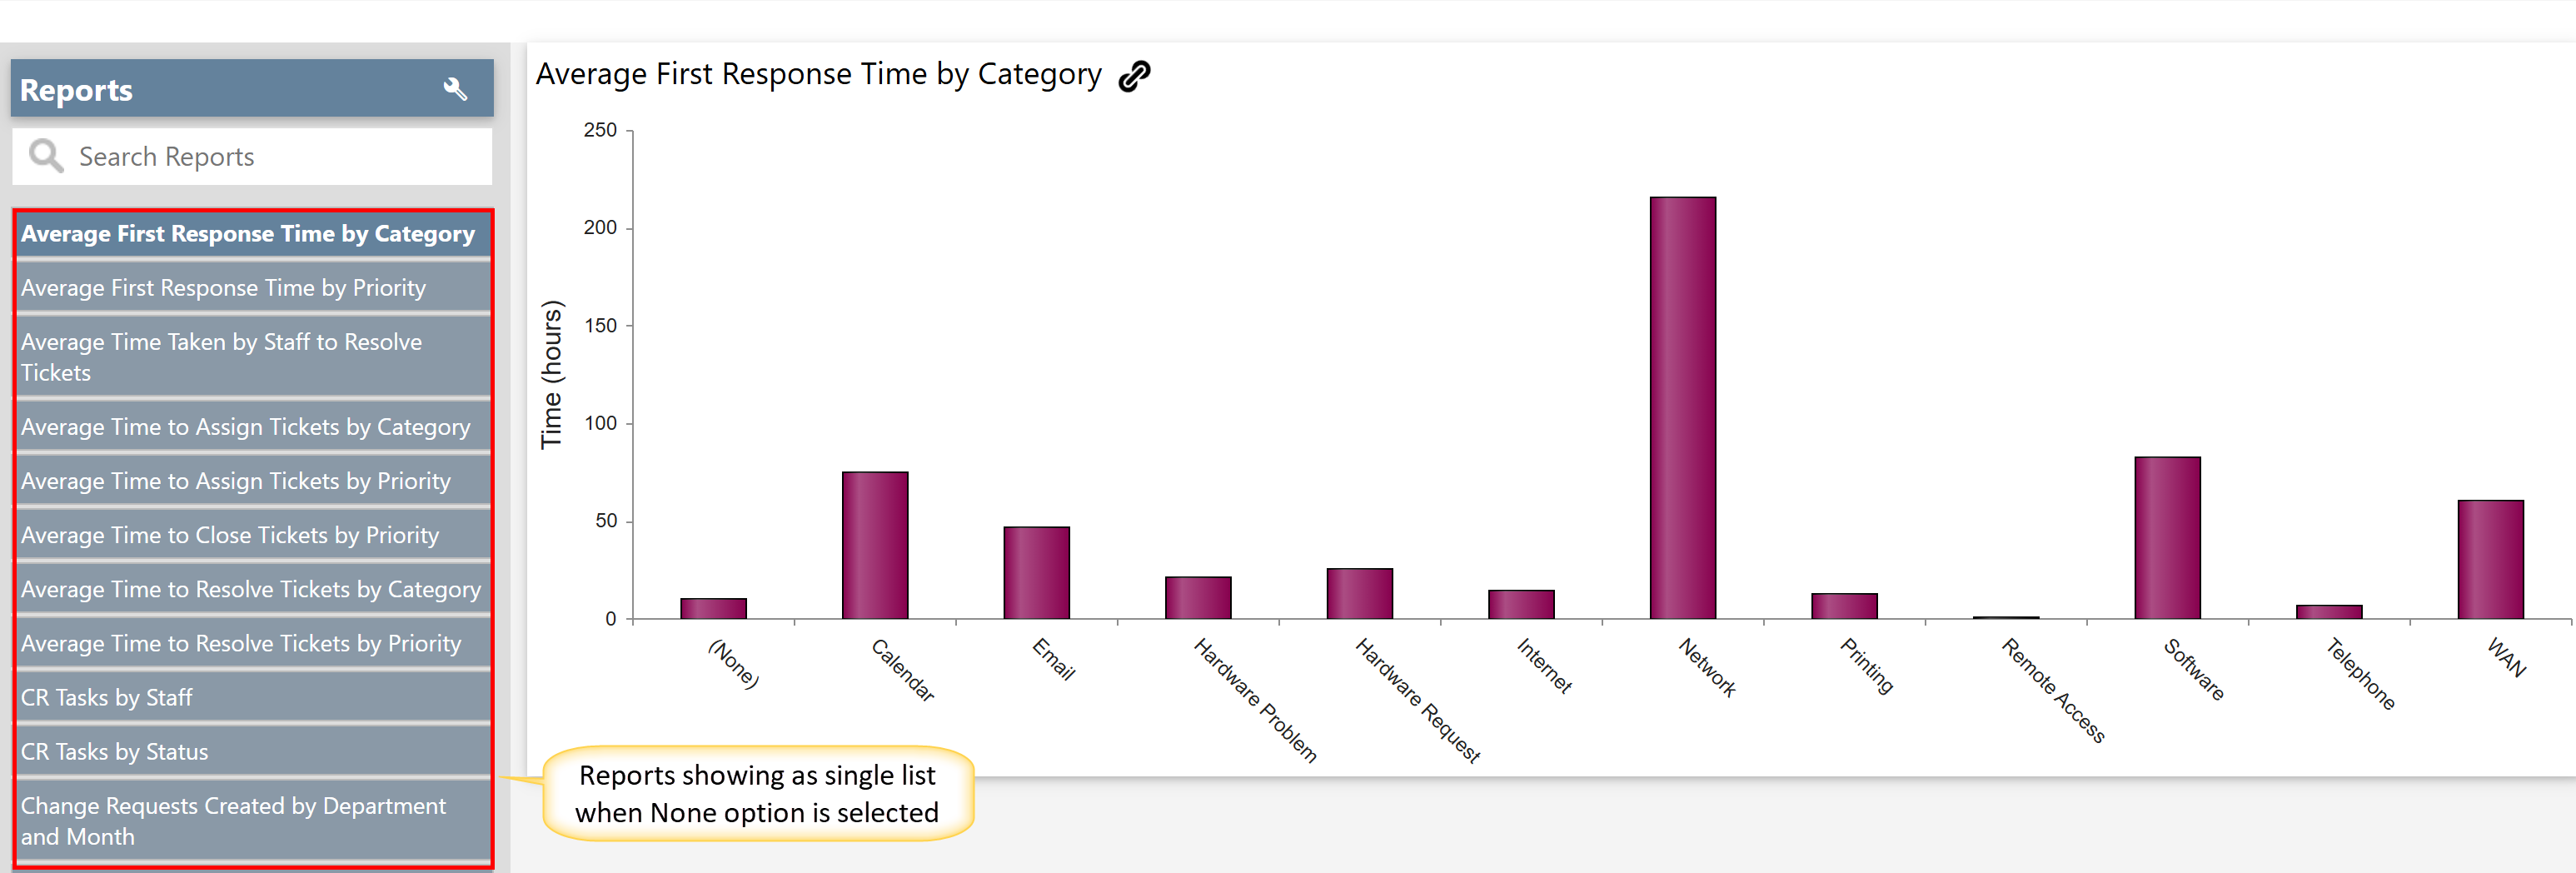
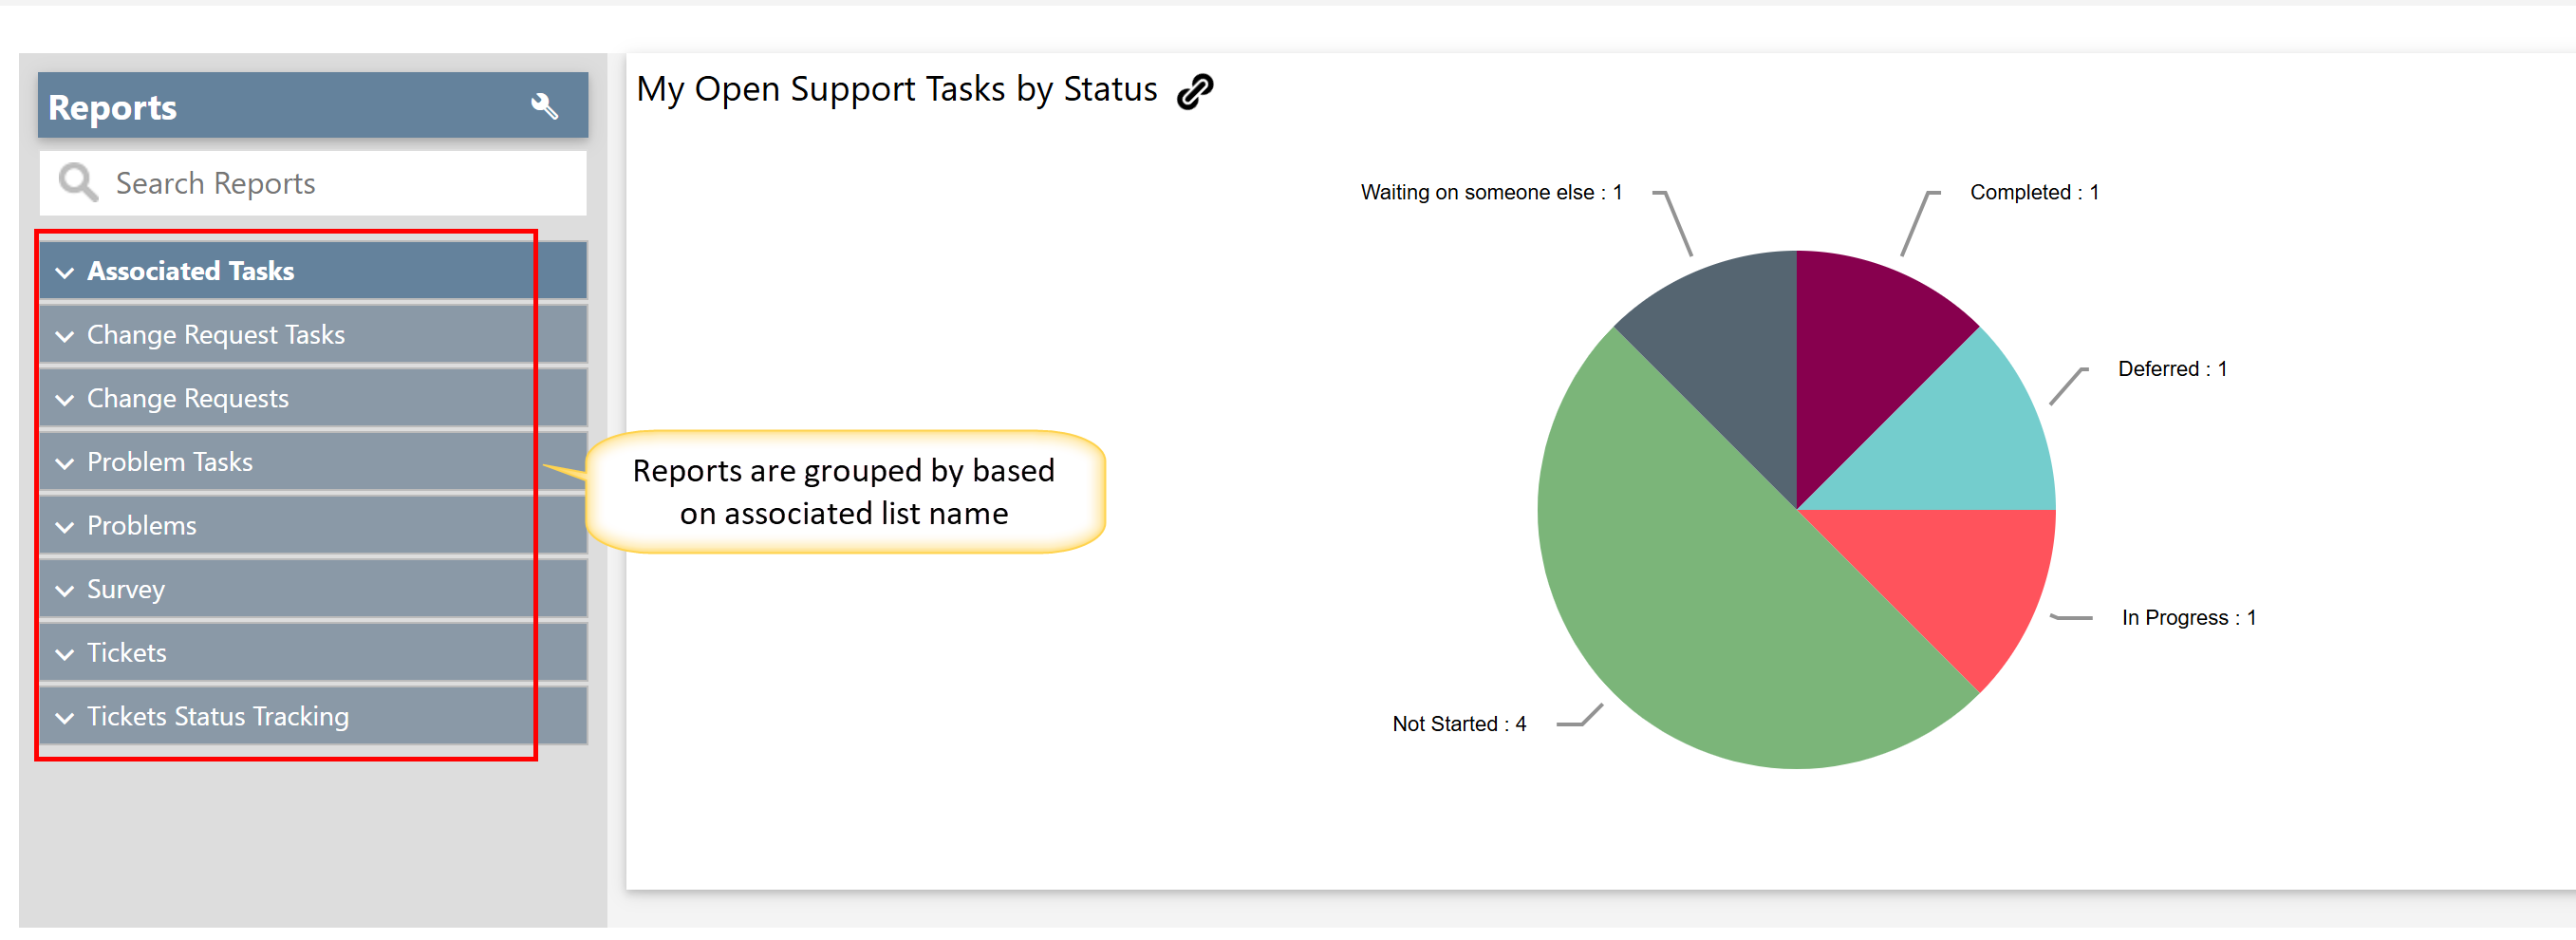
Group Reports By:
This option allows users to organize reports based on specific criteria for better accessibility and categorization. The available grouping options include:
•None: Displays all reports in a single list without any grouping.
•List Name: Groups reports based on the associated list, making it easier to locate reports related to specific data sources.
•Tags: Organizes reports using assigned tags, enabling users to categorize and filter reports efficiently based on predefined labels.
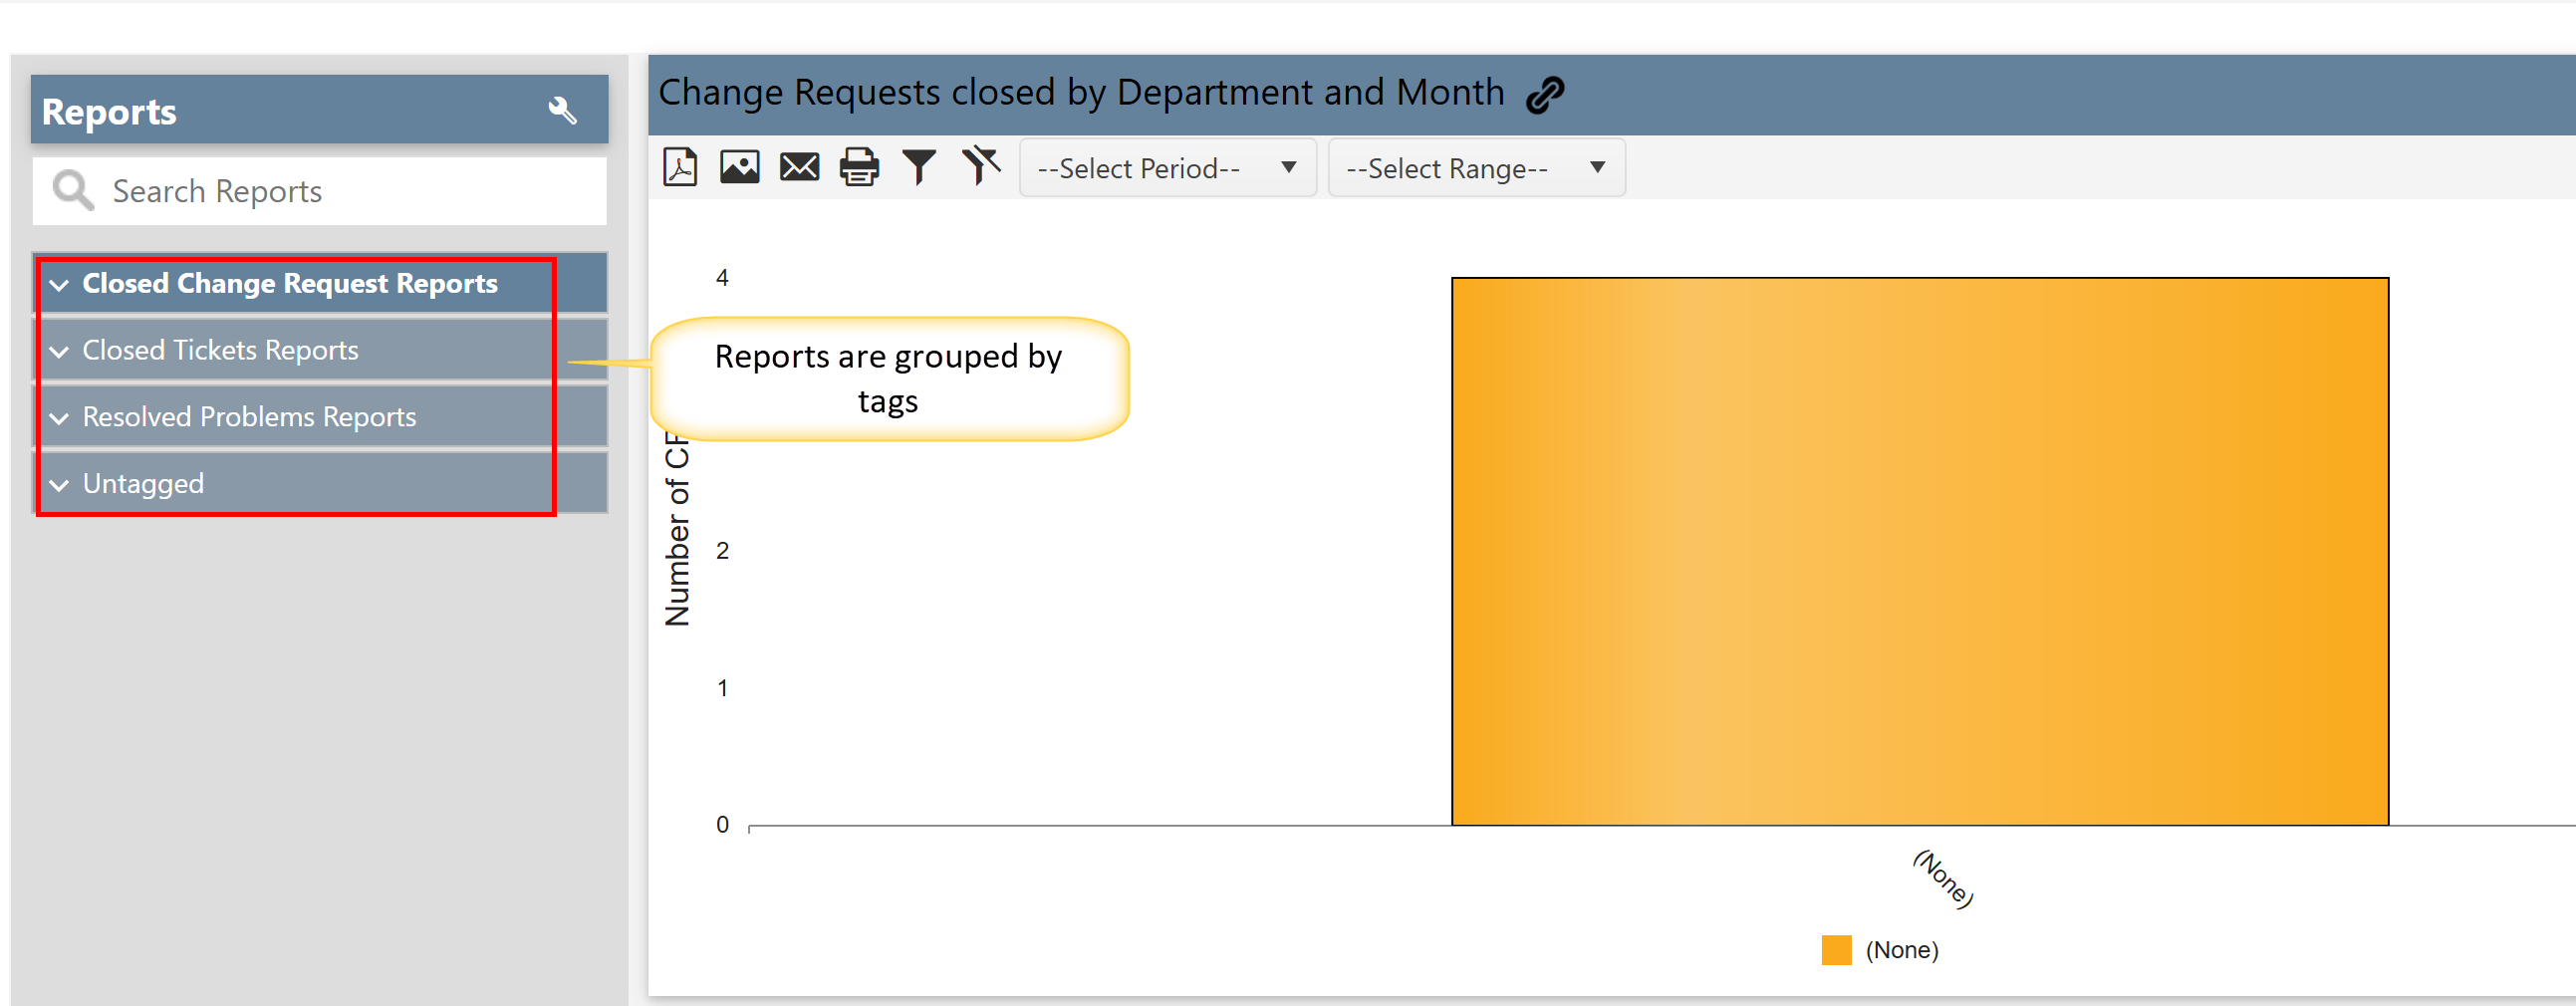
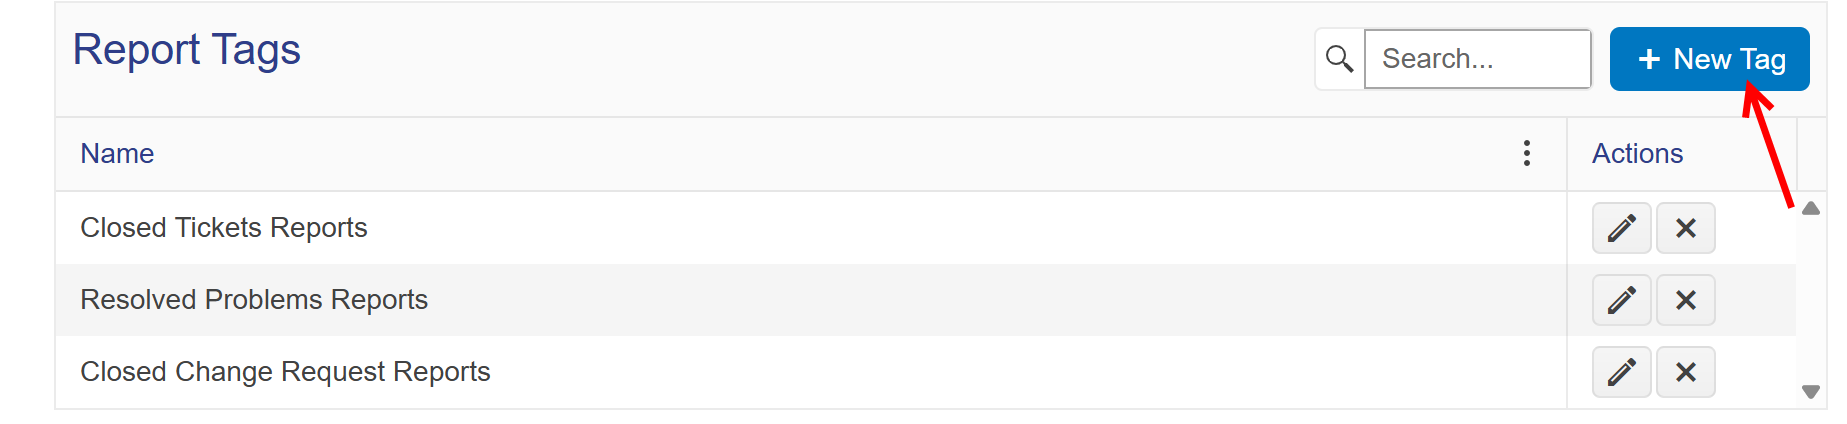
Report Tags:
Users can assign tags to reports, making it easier to categorize and group similar reports together. This feature enhances organization and improves accessibility, especially in environments with numerous reports.
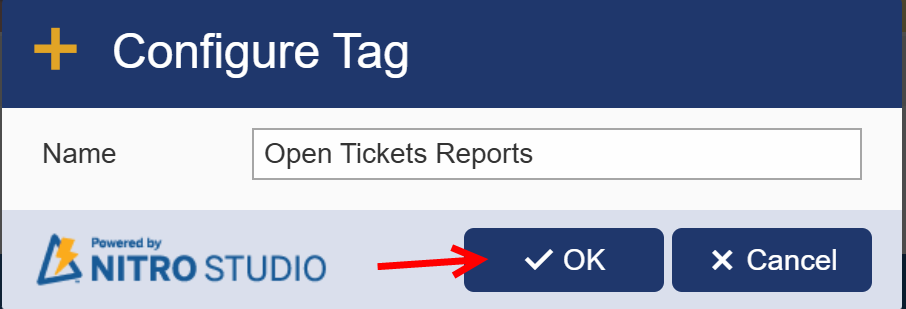
To create a new tag, click ‘New Tag’ button. A window will popup. Enter the tag name there
Settings Button in the Report Center
The Report Center includes a "Settings" button that directs users to the NITRO Report Settings page.
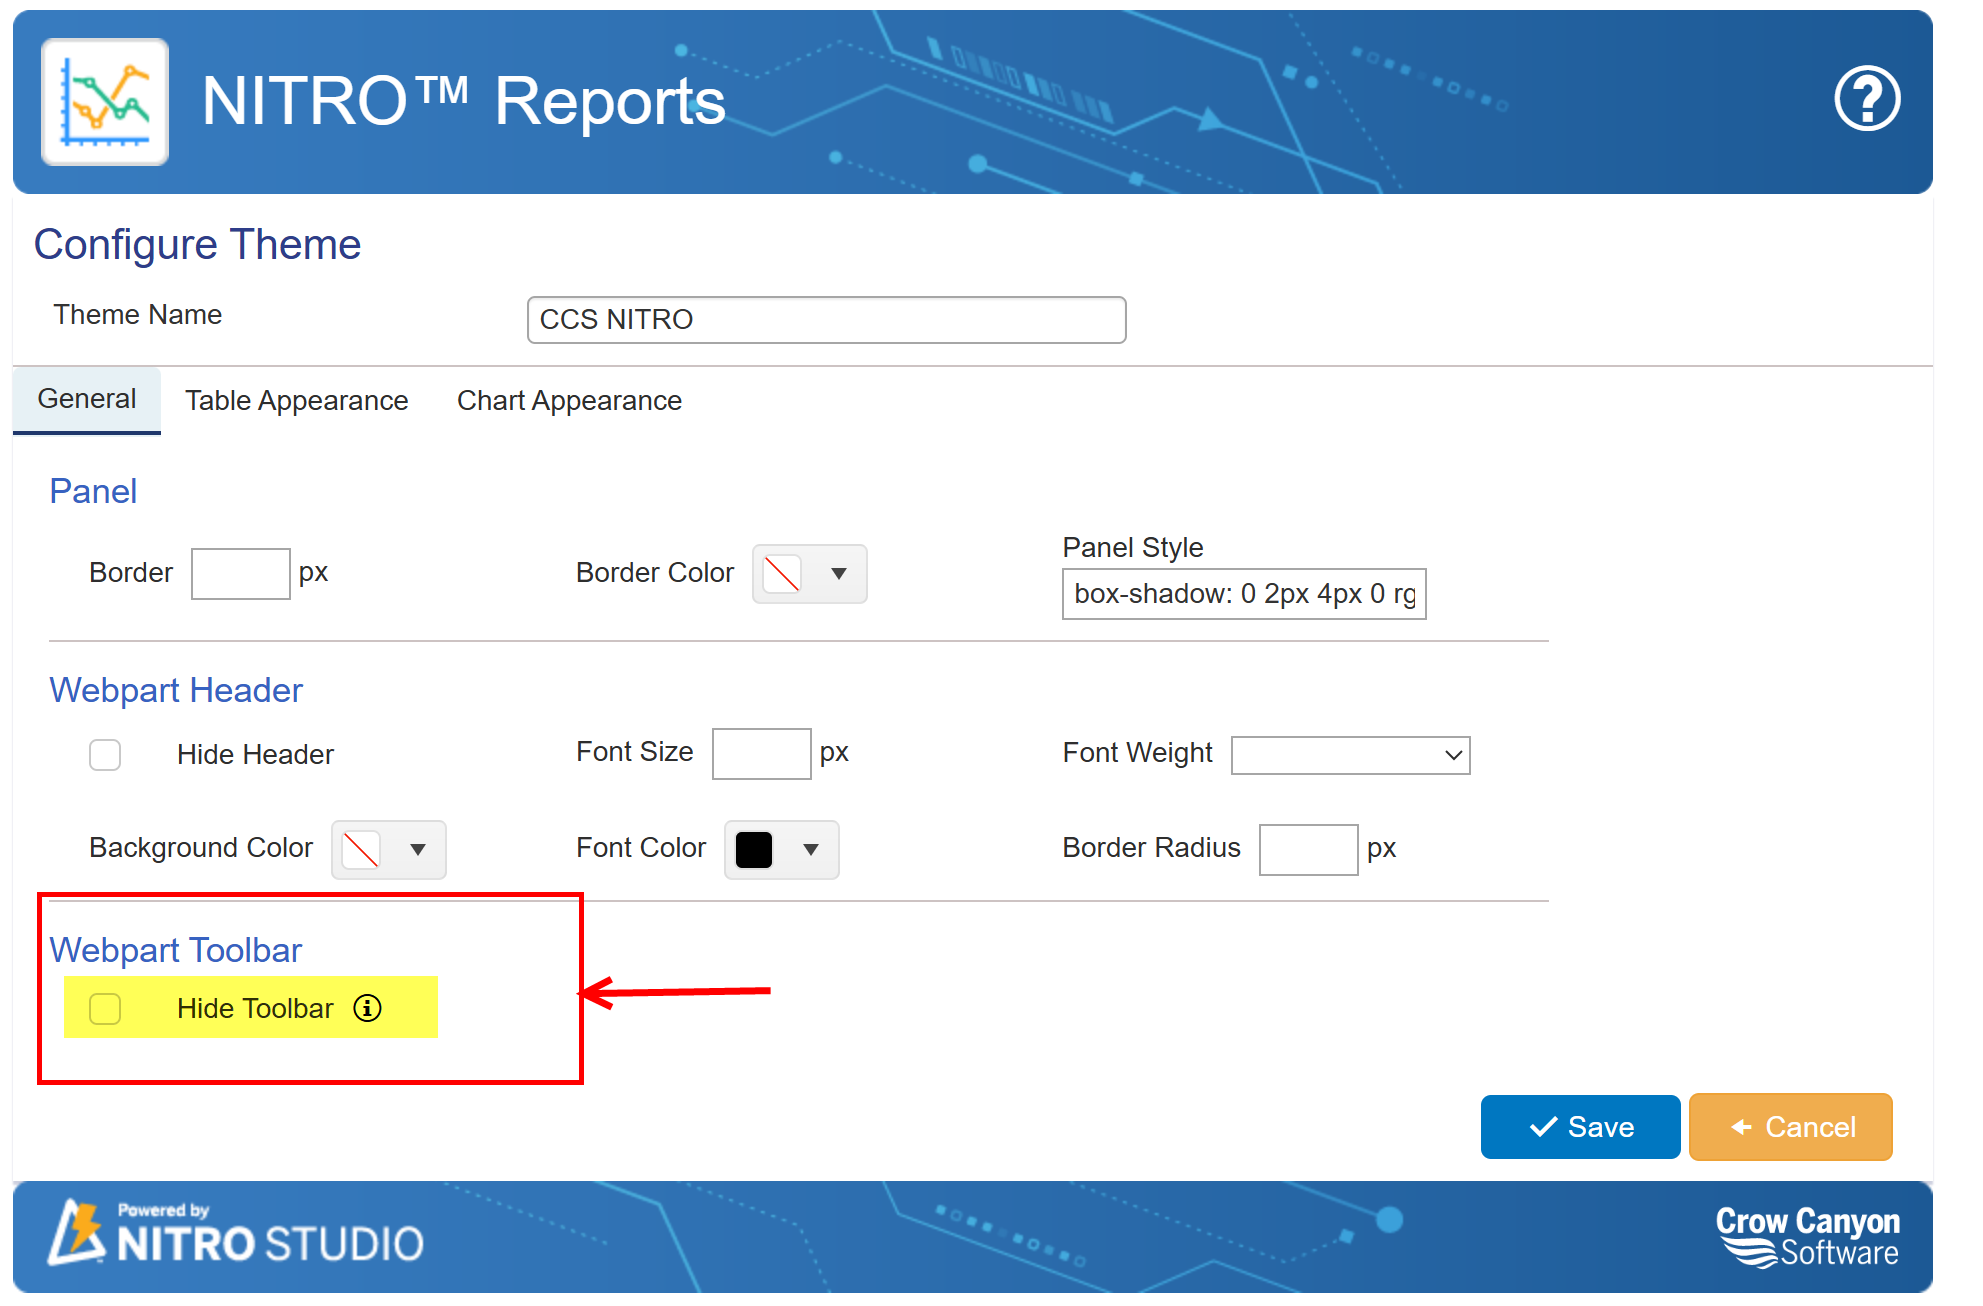
Toolbar: Users can show or hide the toolbar by adjusting the settings in the Themes section of the NITRO Reports Settings page.
Navigation: Go to NITRO Reports → Themes Section and enable or disable the ‘Hide Toolbar’ option.
The toolbar can also be shown or hidden through the Web Part settings.
Navigation:
Go to the Page where the Report Center is added -> Click on Edit Page -> Open the Web Part Settings for the NITRO Report Center -> Locate the Toolbar Visibility option -> Enable or disable the toolbar as needed
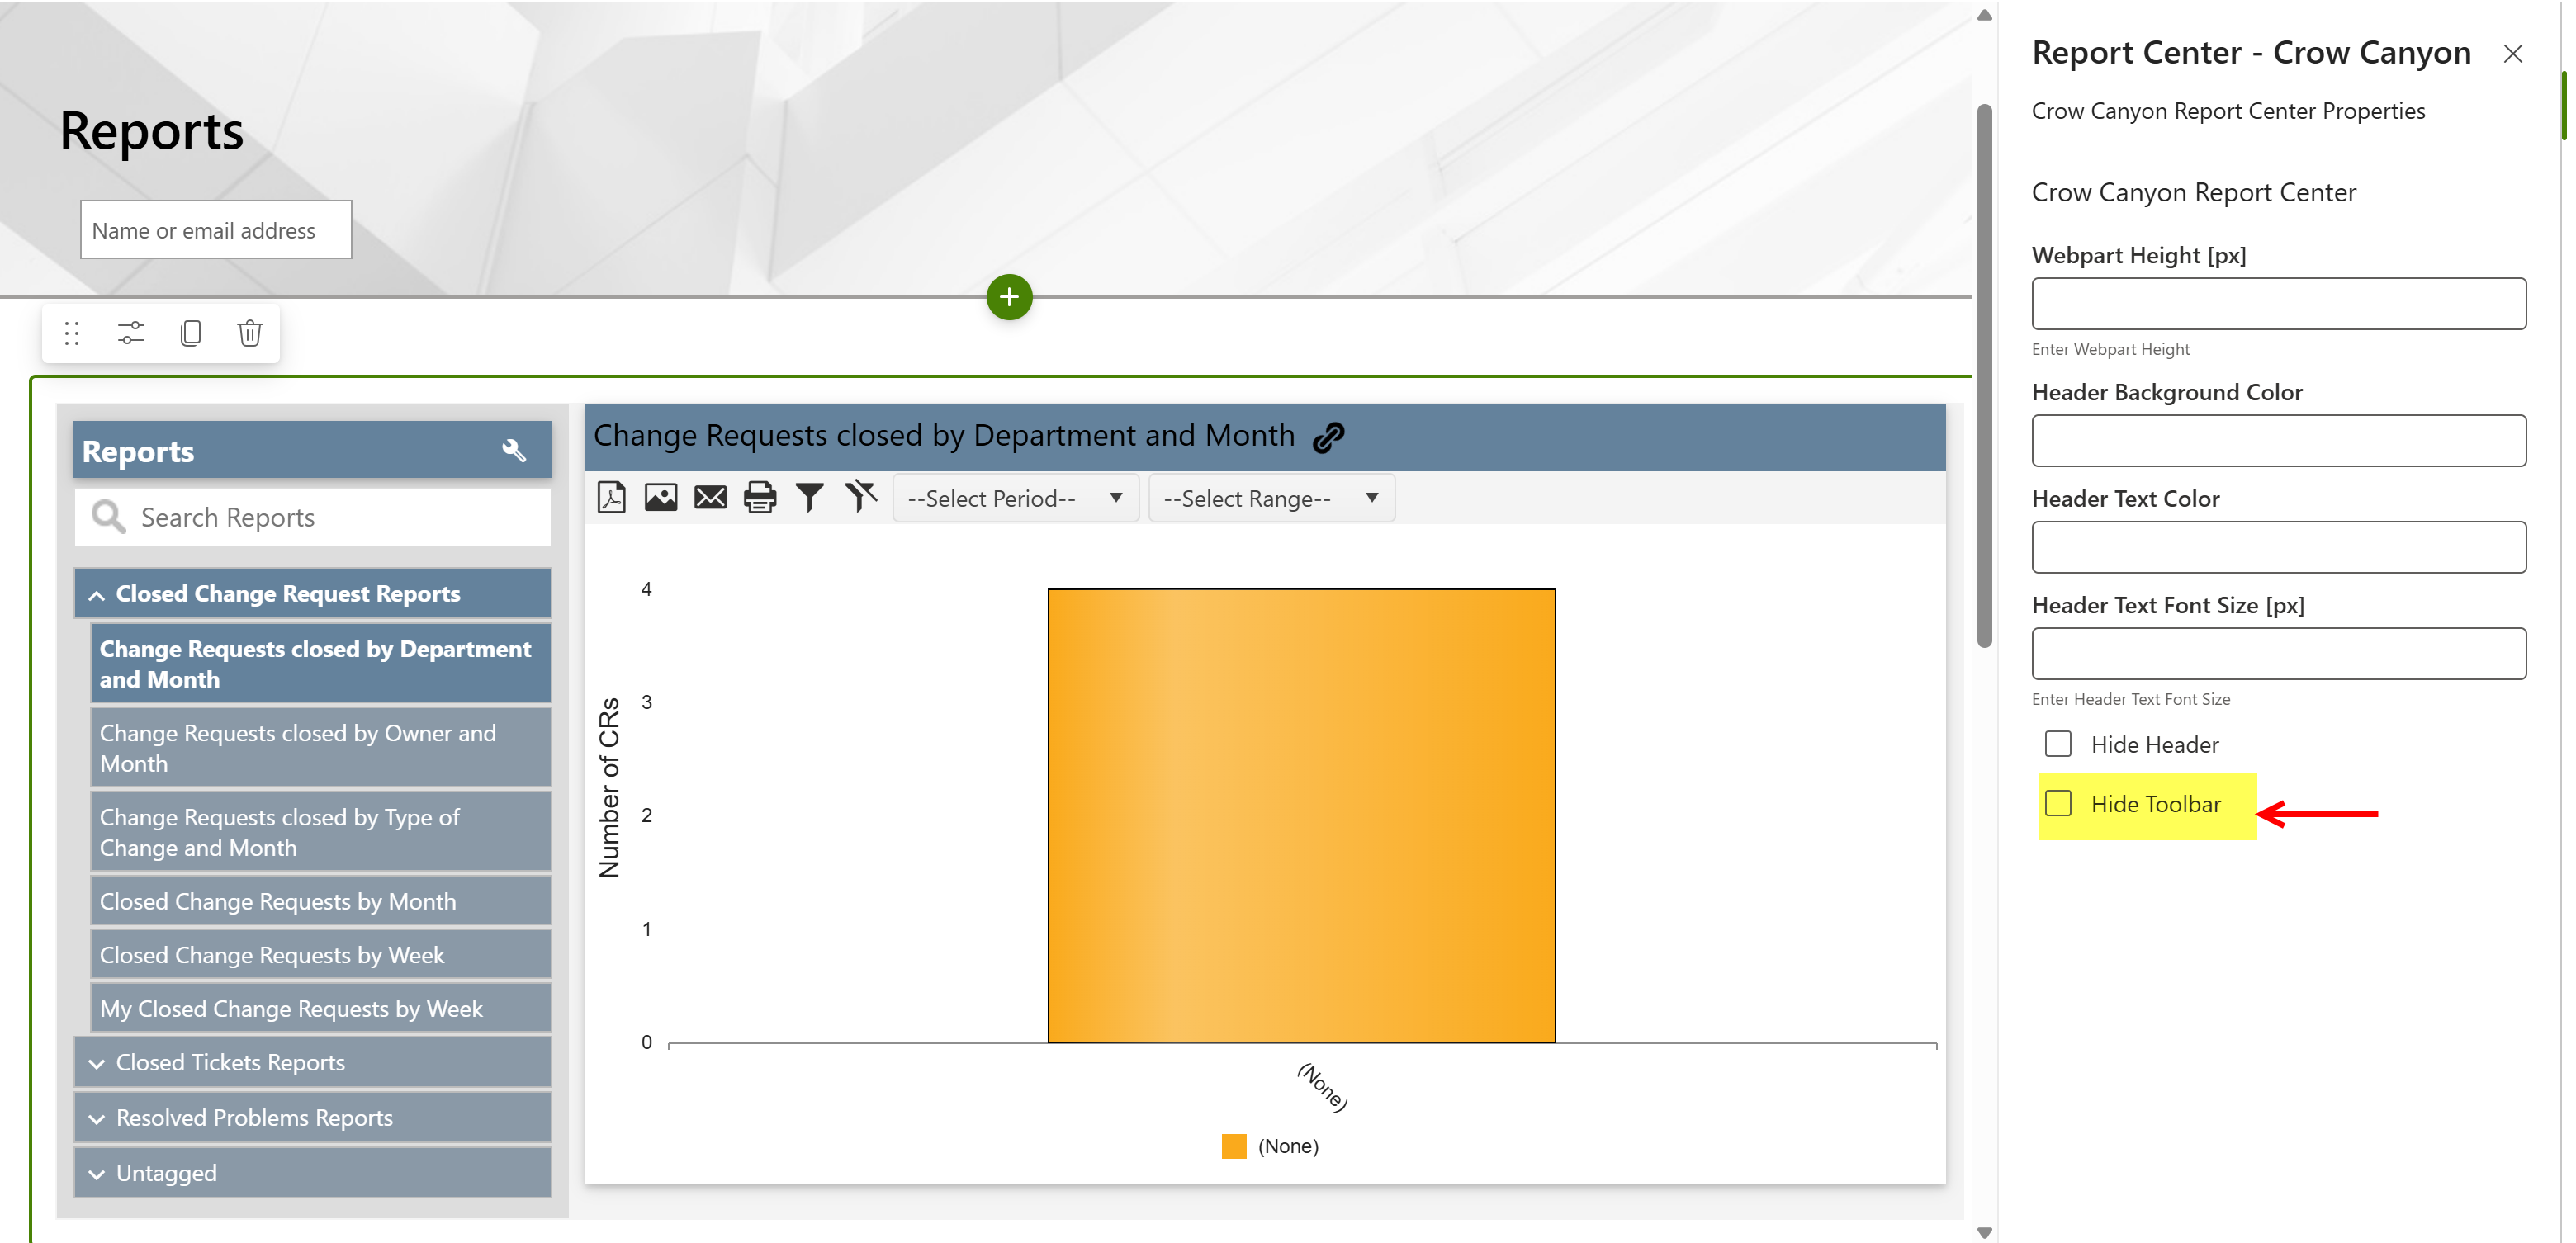

The Toolbar provides the following options for the report:
•PDF: Generates a PDF version of the report.
•Image: Creates an image (.png file) of the report.
•Email: Opens the "Send Email" box, allowing users to set the recipient, subject, and body. The report can be attached as either an image or a PDF.
•Print: Prints the report.
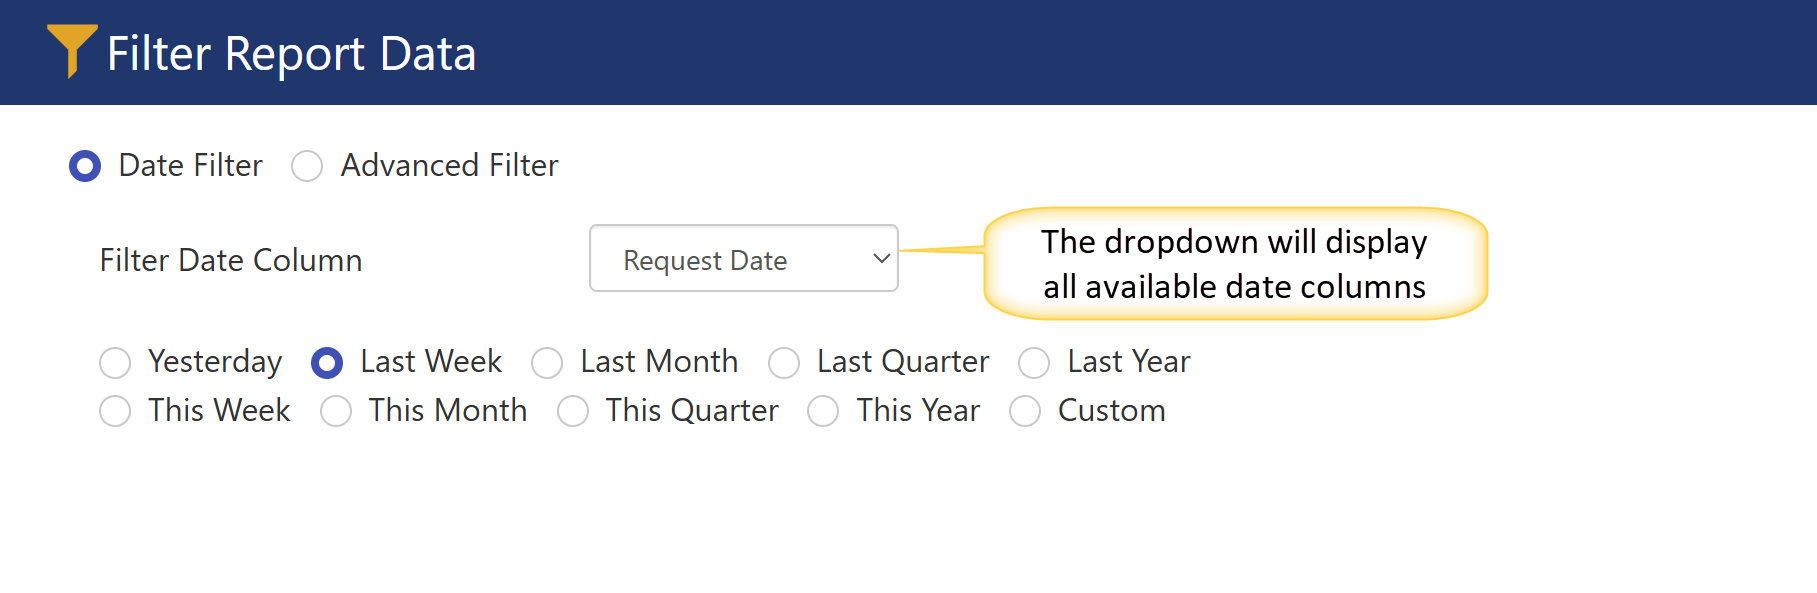
•Filter Report: Filters the report based on specified conditions.
Date Filter: This filter allows you to refine the report based on the selected date column. You can further narrow down the results using options such as "Yesterday," "Last Week," "Last Month," and more.
For example, in the image below, the report is filtered based on the "Request Date" and the "Last Week" option.

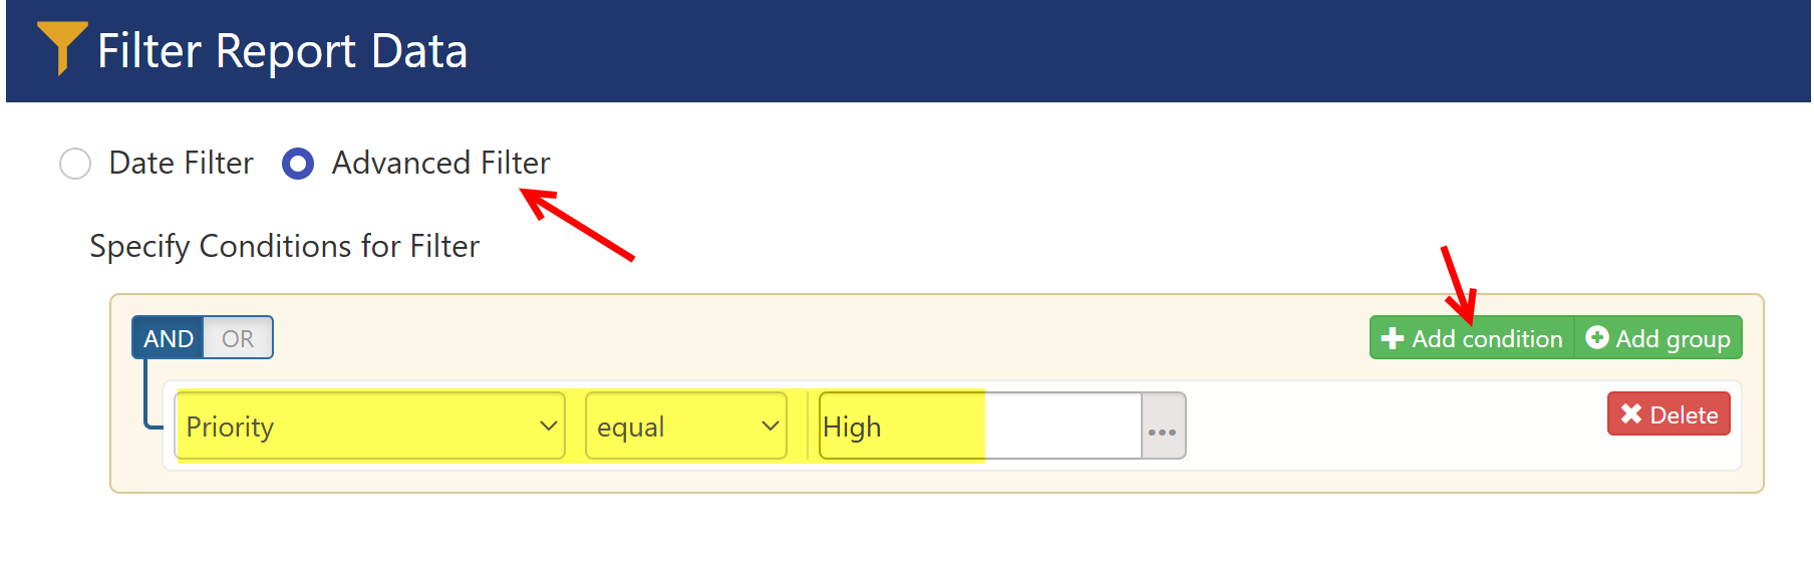
Advanced Filter: This option allows users to define specific conditions to filter the report.
For example, in the image below, the report is filtered based on the "High Priority" value.

•Clear Filter Report: it will clear the filters that are applied on the report
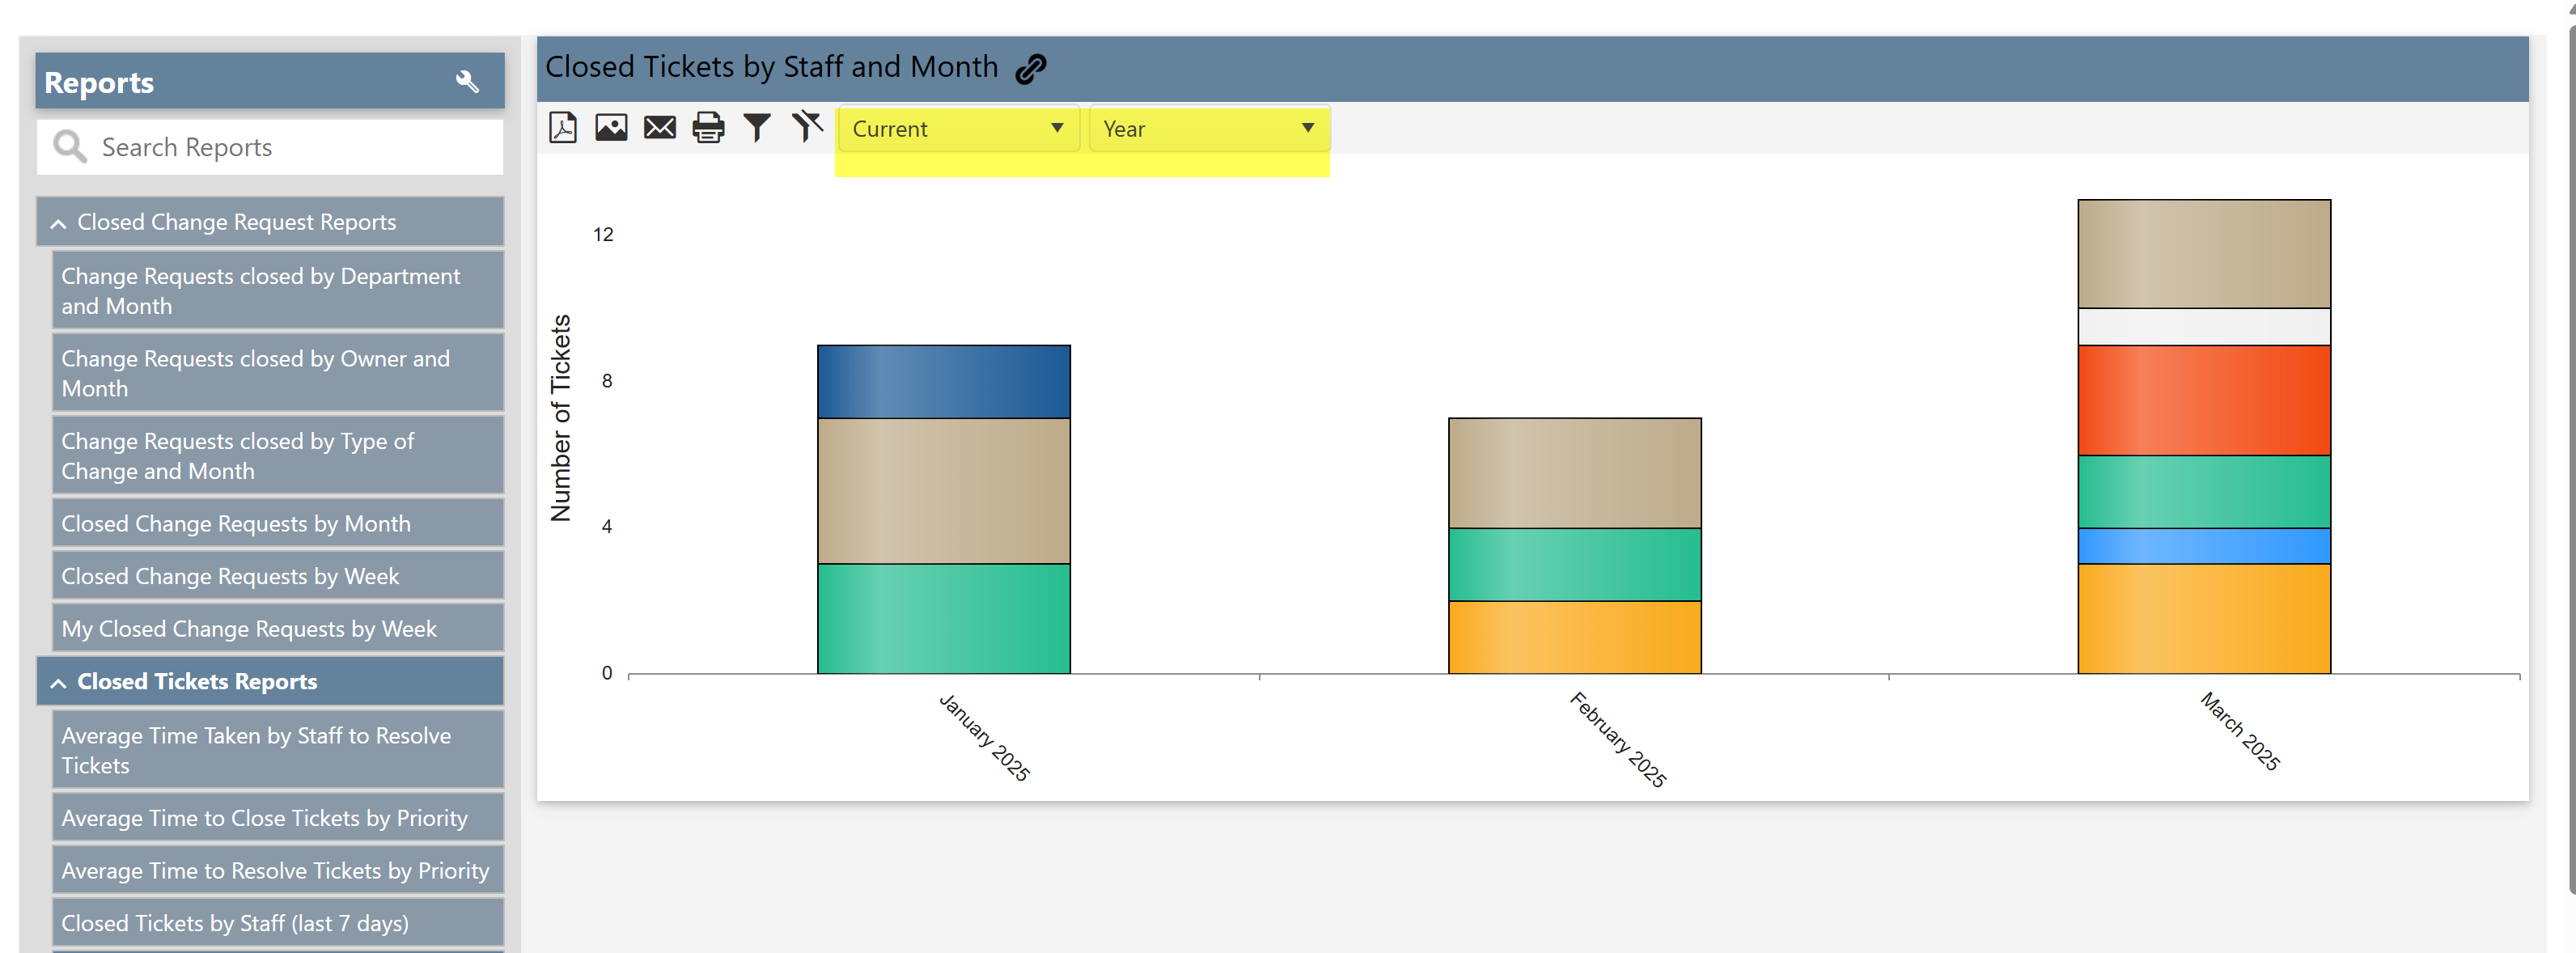
•Select Period box: The Select Period filter allows users to define the time frame for the report data. It has two available values:
Current: Filters the report to show data for the current period (e.g., today's date, this week, this month, etc.), depending on how the report is set up.
Previous: Filters the report to show data from the previous period (e.g., yesterday, last week, last month, etc.), depending on the report's configuration.
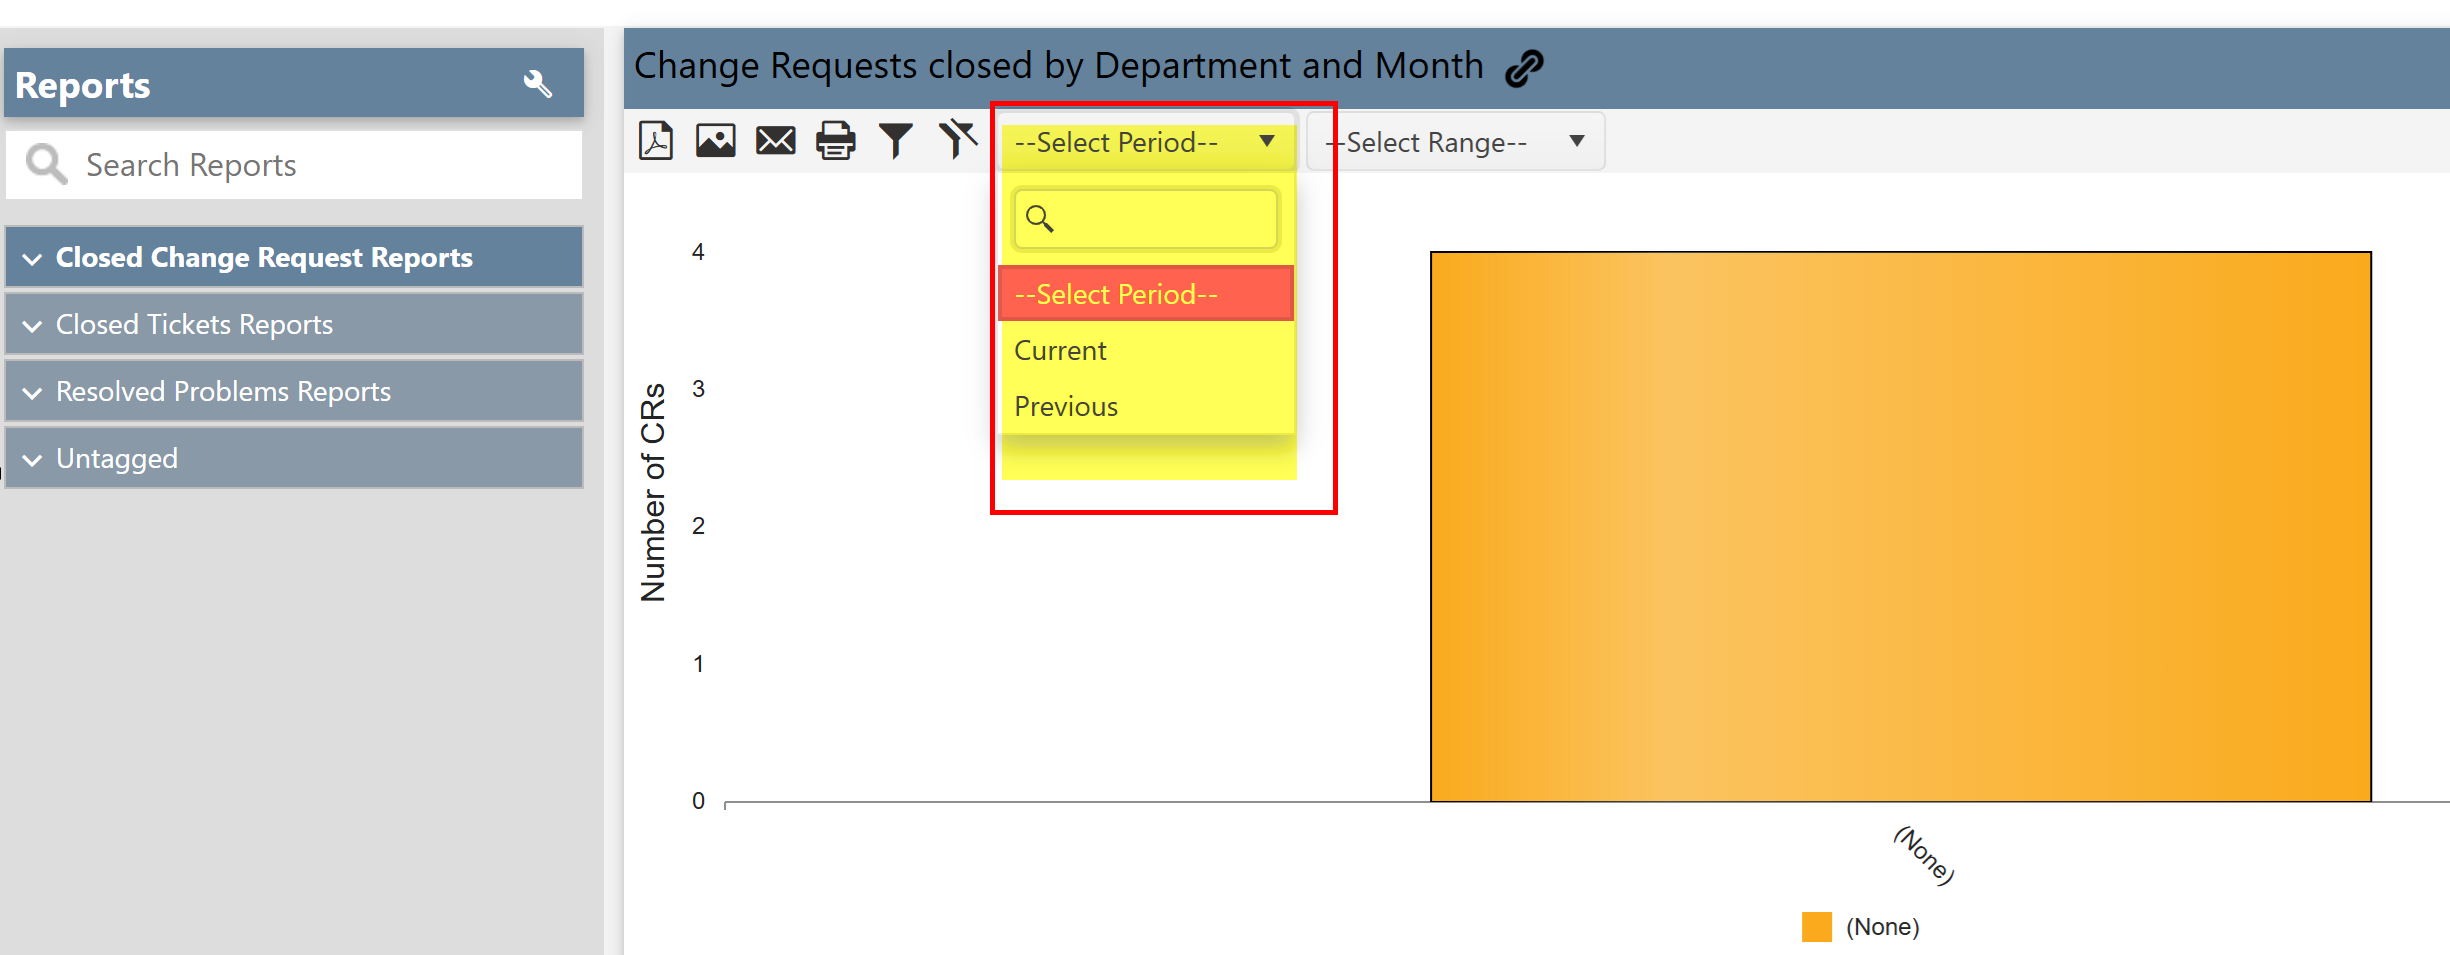
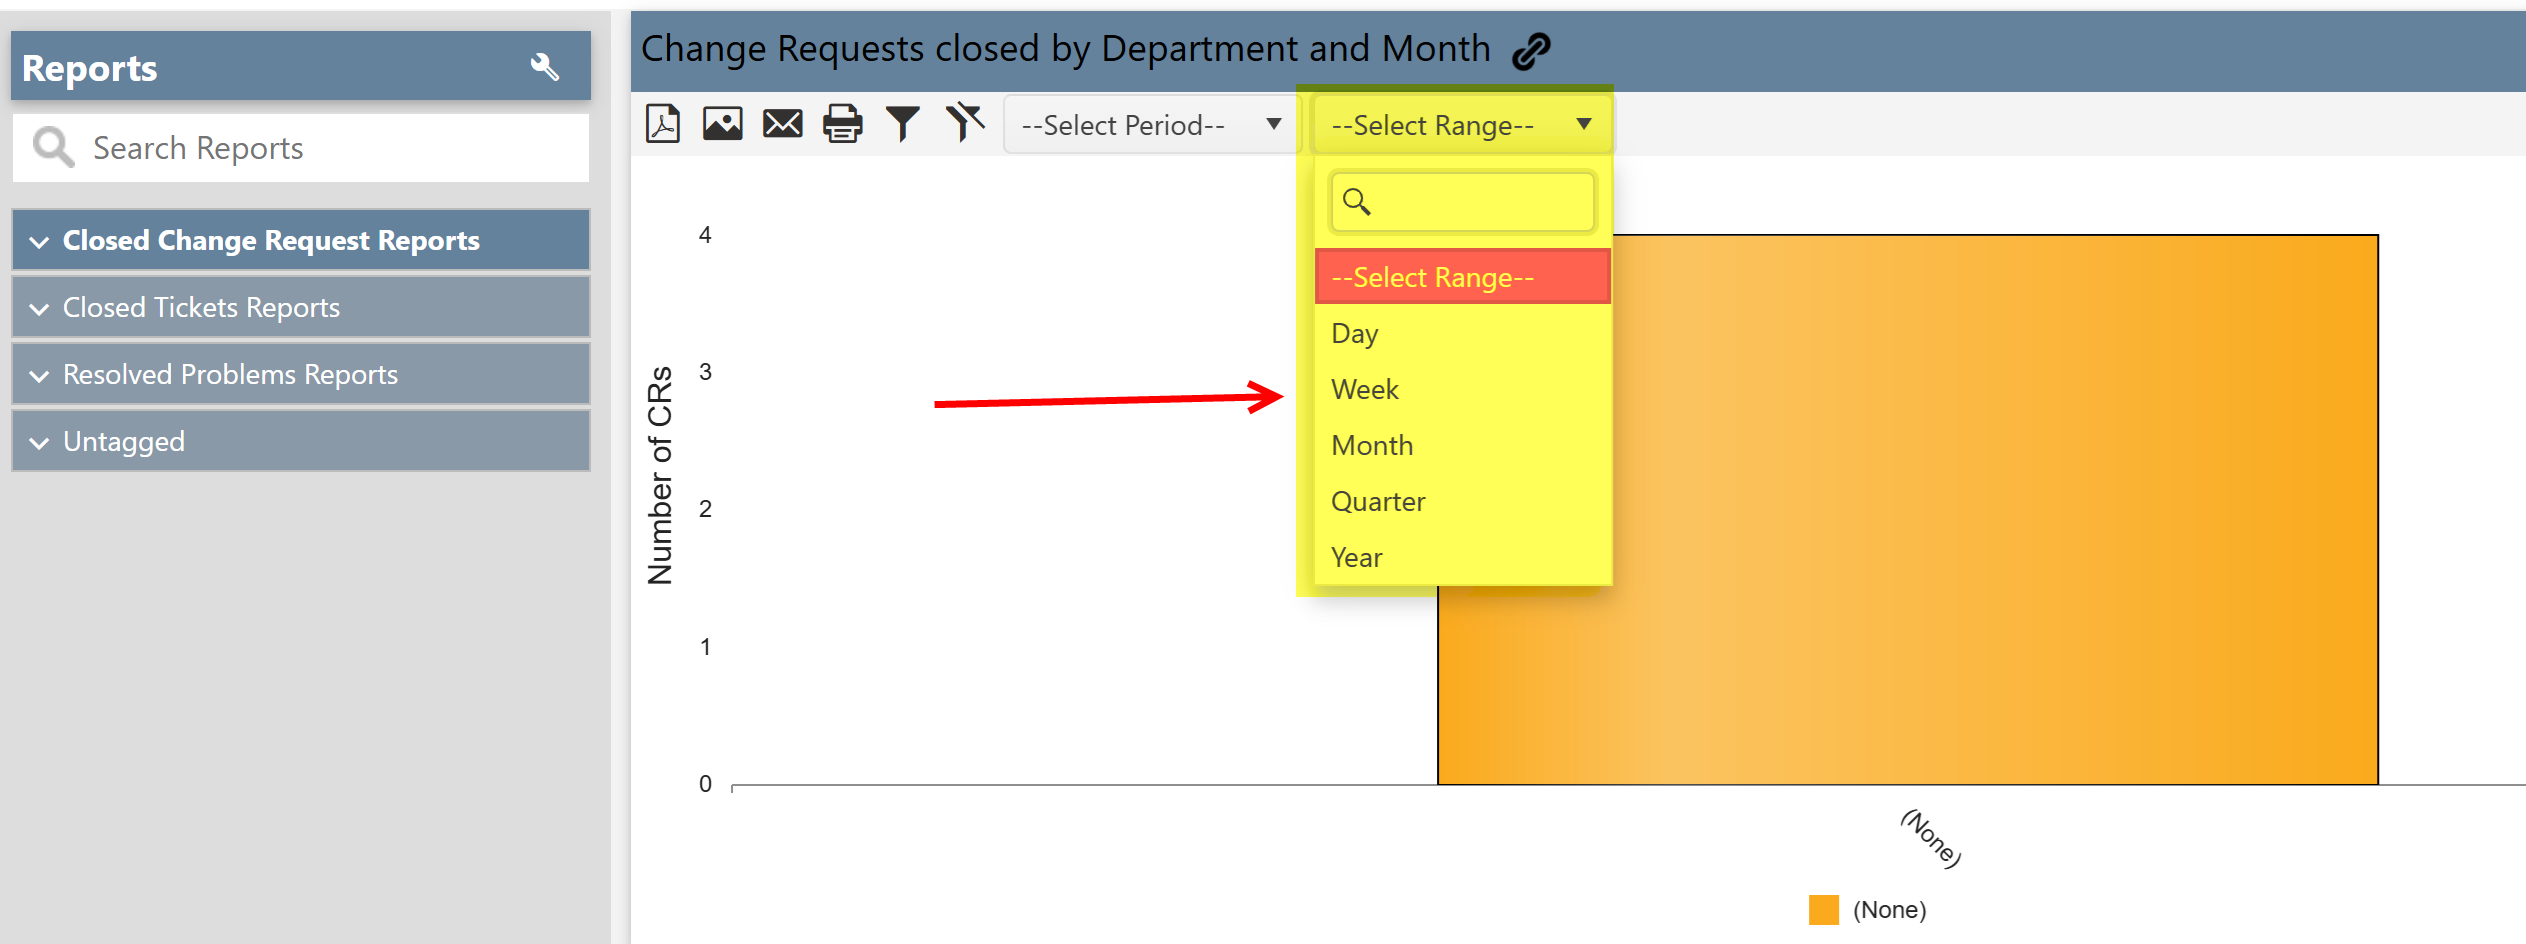
•Select Range box: The Select Range filter allows users to define the time unit for the report data. It provides the following options:
Day: Filters the report based on a specific day.
Week: Filters the report for a specific week.
Month: Filters the report for a specific month.
Quarter: Filters the report for a specific quarter (e.g., Q1, Q2, Q3, Q4).
Year: Filters the report for a specific year.
By using this filter, users can control the scope of the data presented in the report, helping to focus on particular time periods for analysis.
Example: In the image below, the report is filtered to show data for the current year.