Auto-fill is a great way to save time for your end users by automatically filling in fields with information tied to specific users or groups of users.
Auto-fill can base its auto-population on the logged-in user or on a user name in a specific column on the form. It can be set to get information from the SharePoint User Information list, User Profile, or from a custom information list.
To create an Auto-fill in NITRO Forms Designer, go to Form Settings on the left-side pane, expand that, and choose Auto-fill User Information.

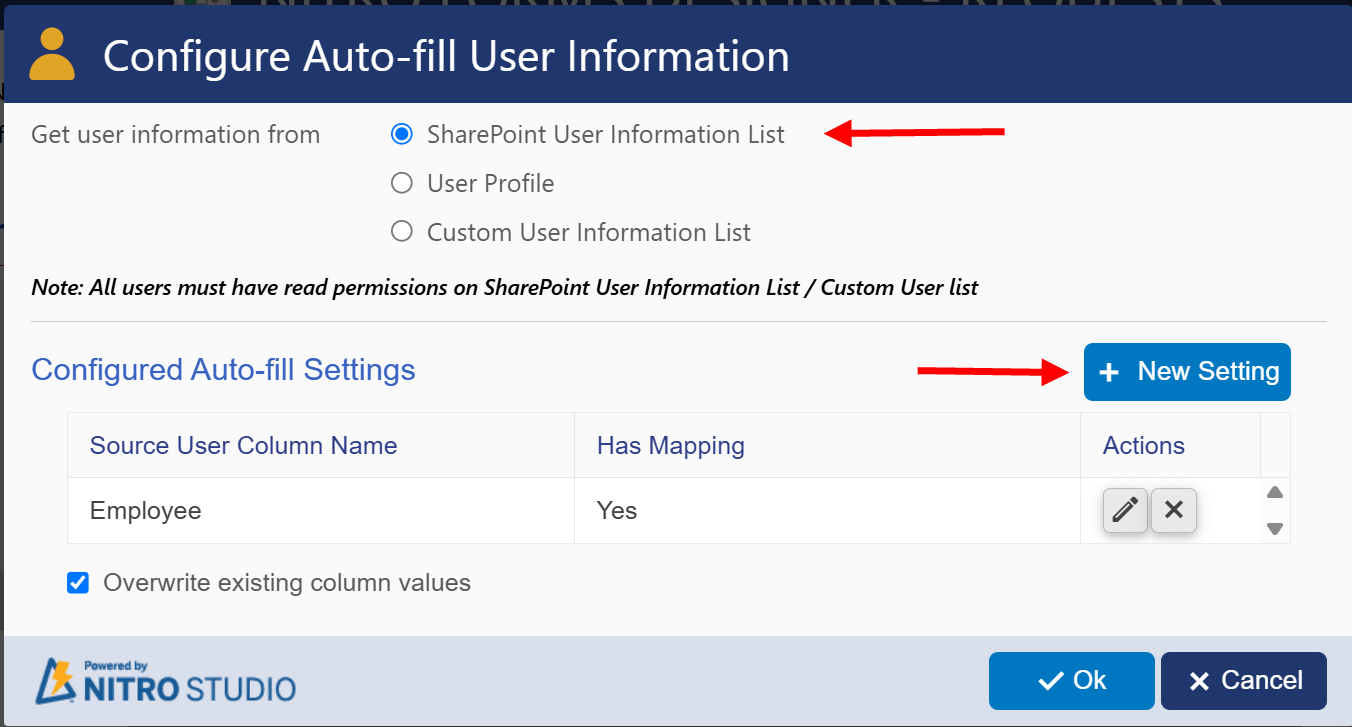
Clicking on Auto-fill Settings will bring up the “Configure Auto-fill User Information" box. At the top of that box is "Get User Information from”. In the video tutorial paired with this manual, found here, we use the “SharePoint User Information List”
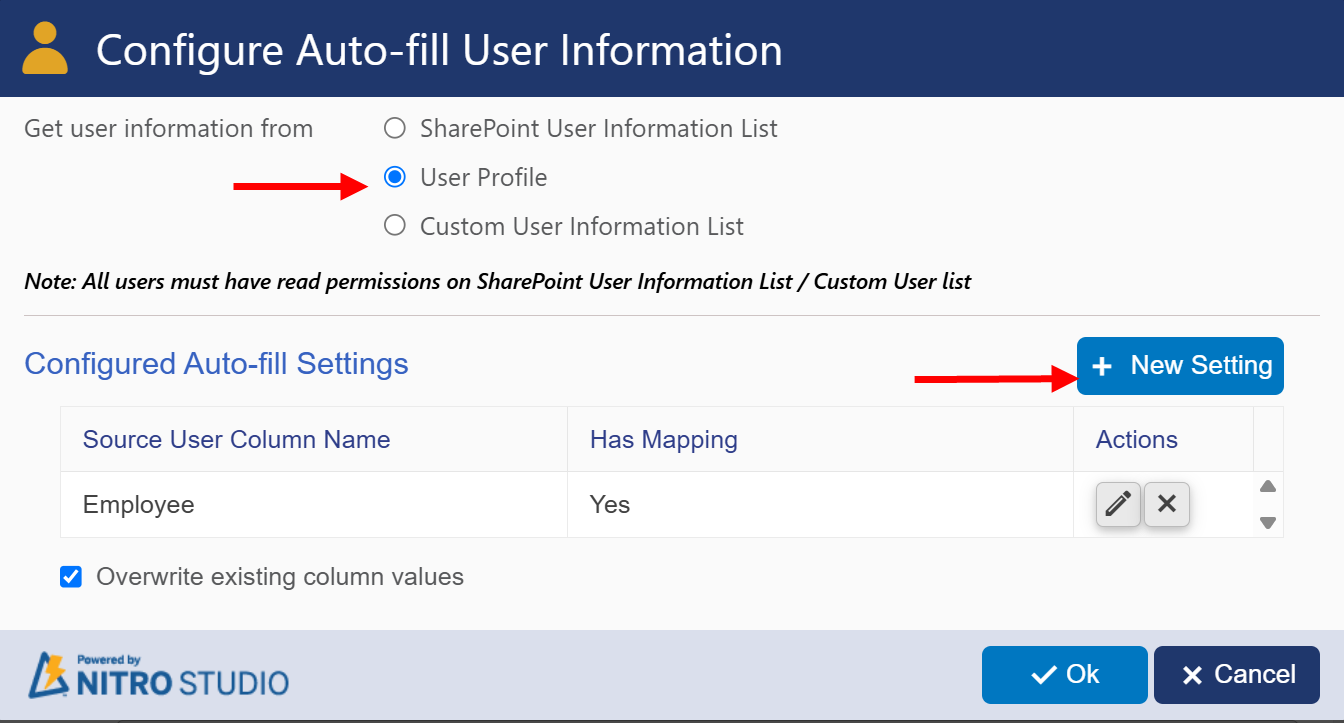
The box has a table, "Configured Auto-fill Settings" that shows you all the Auto-fills you have previously set up.

Get user information from: this field provides three options to get user information
1. SharePoint User Information List: This option retrieves user details from the default SharePoint User Information List. This list contains basic user metadata, such as name, email address, and other profile-related details that SharePoint automatically stores when a user is added to the site. This is ideal when user information is already being captured in the default SharePoint User Information List, and there is no need for custom user data.
2. User Profile: This option pulls user information directly from the SharePoint User Profile Service, which stores more comprehensive user details and can be synced with Active Directory. It provides advanced attributes like phone numbers, manager relationships, and extended job information. This is suitable when there is a need for richer user metadata that might not be available in the standard SharePoint User Information List.
3. Custom User Information List: This option allows users to define and use a custom SharePoint list that contains user information. This is useful when additional or unique user attributes are needed, which are not part of the default SharePoint lists or User Profile Service. This is Useful in scenarios where organizations maintain separate custom lists to track user-specific information, such as project-specific user roles, certifications, or custom statuses.
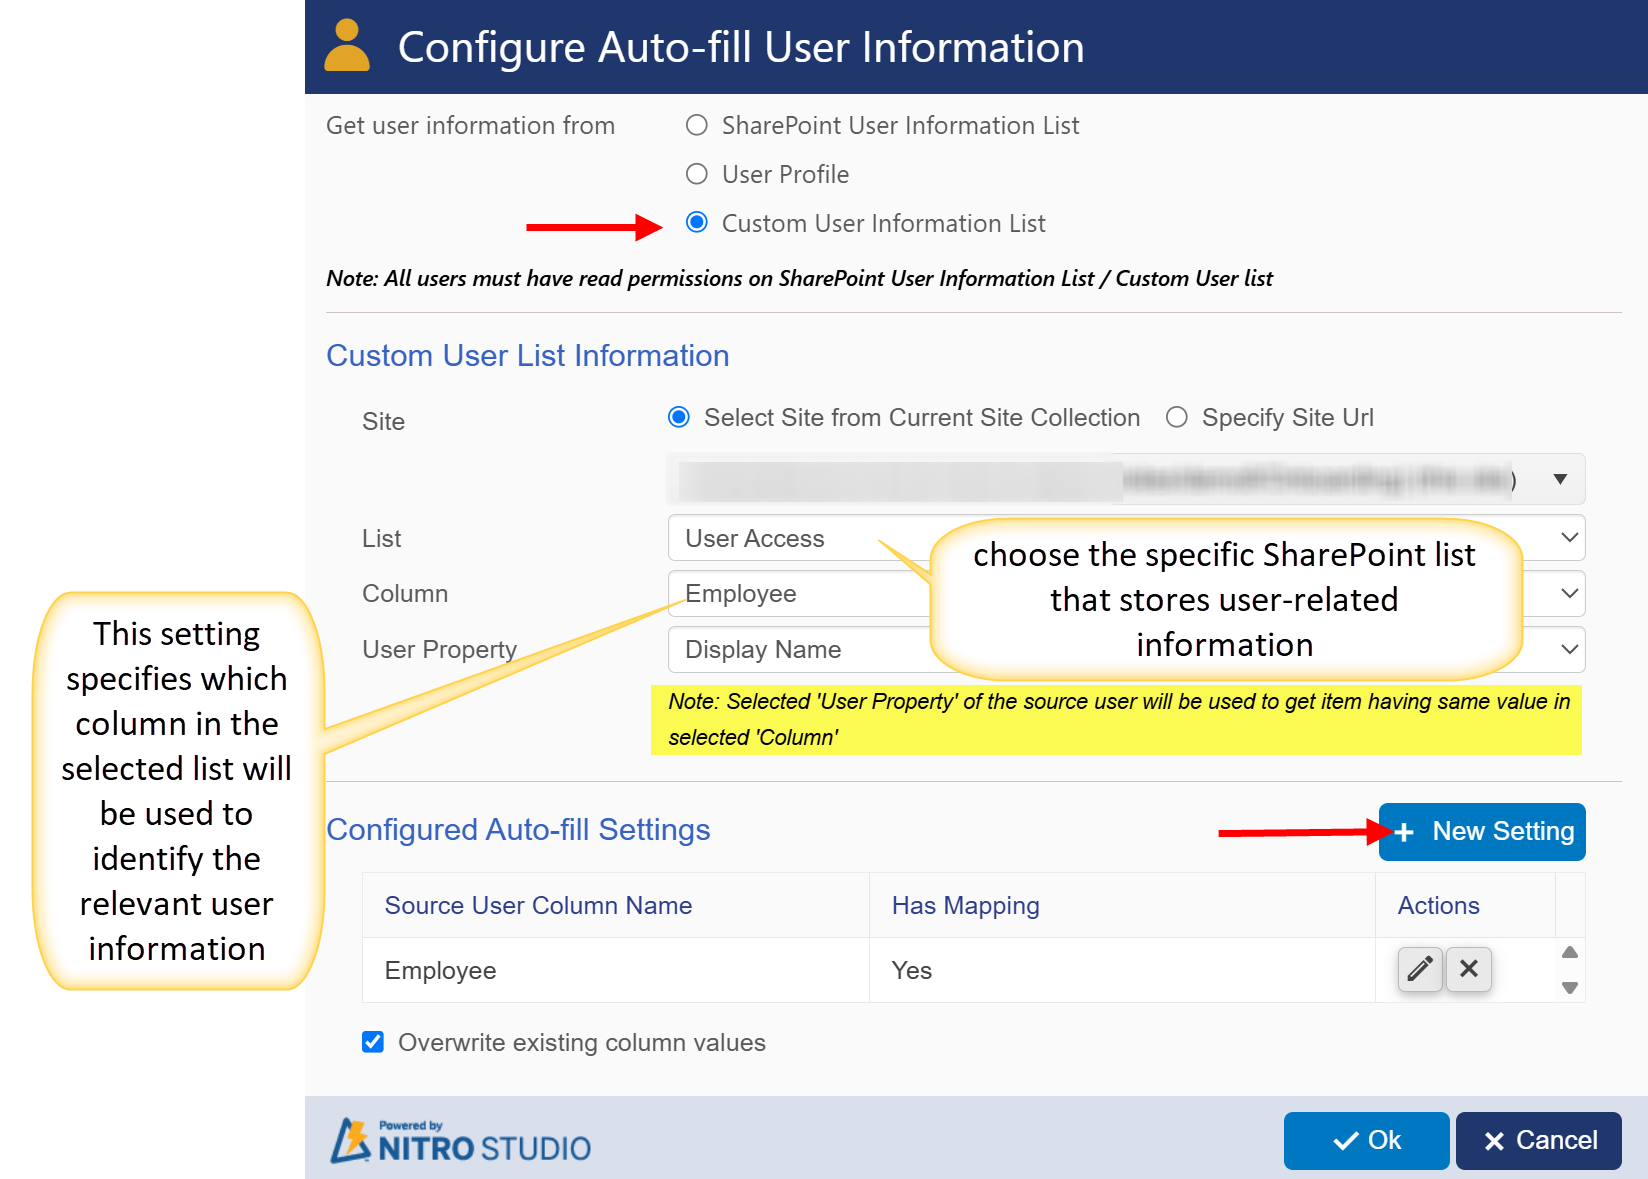
Column User List Information section
List (Dropdown)
•Select List from Dropdown:
Here, you choose the specific SharePoint list that stores user-related information.
oExample: "User Access" or "Employee" lists that store relevant user data like user roles, permissions, or other details.
Column (Dropdown)
•Select the Column Name from the List:
This setting specifies which column in the selected list will be used to identify the relevant user information.
oExample: If the list has a column named Employee, it might store usernames, user IDs, or other values to match the user.
| User Property (Dropdown) |
| This dropdown maps the selected column value to a specific User Property. |
o Example: If "Display Name" is chosen, the system will match the value in the selected column (like "Employee") with the user's display name to auto-fill the corresponding information.
Configure Auto-fill Settings Section:
To configure a new Auto-fill Setting, click the New Setting button.
In the next screen, choose one of the following:
"Based on logged in User” -- there is no need to select a column since the auto-fill will use the logged in user's name or you can select the "People or Group" column which is having logged in user.
 |
“Based on a User column” -- you need to select the "People or Group" column that will be used for the auto-fill.

In either case, the next step is to map columns on the form to User Properties.
1.Select New Mapping
2.Map a column to the desired property. In the example below, we are mapping the column “Requester Email” to the user property, “Email”. The list of User Properties will depend on what you chose in "Get User Information From" in the earlier step.

3.Once you have set up the mapping, hit “Ok”.
4.You can add more column-to-property mappings in the same way.
5.Once done with the mappings, click “Ok” in the Auto-Fill Settings to return to the main screen.
6.As with all edits and changes made in NITRO Forms Designer, remember to publish the form.
Refer below articles for more details on Auto-Fill User Information:
Configure Additional Requester Metadata Information In Tickets